


How to Add an Author Bio to WordPress Posts
No one will argue that great writing takes a great deal of time, effort, and skill. So when a new reader lands on your blog, you want them to know who wrote the content, right? How else would they make the connection between the words on the screen and the author who wrote them?
An author bio is the perfect solution for this. It can add some personality to an article and also boost your blog’s credibility. No matter where the bio is featured (whether it’s before, after, or during a post), having an author bio is a great asset for any blog.
How is an Author Bio Created?
Some themes automatically come with author bio functionality. If your theme of choice does not, there’s no need to worry; you can always add it yourself!
There are two ways to add an author bio to your site. You can use an existing plugin, or if you’re more of do-it-yourselfer, you can easily create a plugin from scratch. We’ll cover both methods (including a tutorial on creating your own plugin) but first, let’s start with some existing plugins.
Plugins you Can Use to Create an Author Bio
For those of you who would rather use an existing plugin, there are a lot of great options. Here are a couple to check out:
When choosing a plugin, it’s important to note that some have more advanced functionality than others. Just because you’ve chosen to use an existing plugin doesn’t mean you are limited on styling. Often you can modify the CSS and make it match your brand. Just be sure to do your research, if that’s something that you’re looking for.
WordPress Users and Roles
Whether you’re using an existing plugin or planning on creating your own, you’ll want to take advantage of WordPress users and roles.
Here’s a quick refresher on the five types of rolls:
- Subscriber: The lowest level of access, as they can only view their own profile and read posts on the WordPress site.
- Contributor: They can write posts but cannot publish. For guest writers, this is the ideal access level.
- Author: This is an access level above a contributor with full control over the writing and publishing of their posts.
- Editor: They are able to write their own posts and manage each of their own posts, as well as all posts on the site from all authors. This is a typical access level for a content manager.
- Administrator: These users have full control over the site, so they can change the theme, add and delete plugins, write posts, read posts, delete posts, add and remove authors, etc. Anything that needs to be done, they have the access level to do it.
Now that the different user roles are covered, it’s important to note that the author bio features the author of the post, no matter what their level of access is. If you’re adding an author bio to your personal site, you’re likely an administrator, so you don’t have to worry about it. If you’re building a multi-author blog, just makes sure your writers aren’t set as subscribers, so they have access to write posts.
Adding the Bio
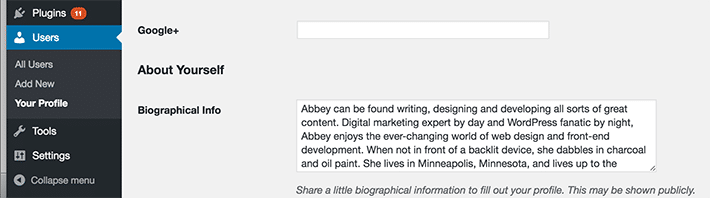
After a user is set up, to fill out their bio they simply need to edit their user settings (or you, as an administrator, can do this for them). Simply go to Users > Your Profile. They will see the fields they can fill out, such as bio, website, etc. The more information they add, the more users will see in their author bio on the website.
Creating your Own Author Bio Plugin
One thing to mention before building your own plugin – all of this should be done on a test site. If you need help setting up a development environment, be sure to follow the step-by-step directions on how to get started with MAMP.
Now, let’s get started!
1. Create a new folder in the plugins directory. For exxample: /wp-content/plugins/mysite-plugin/
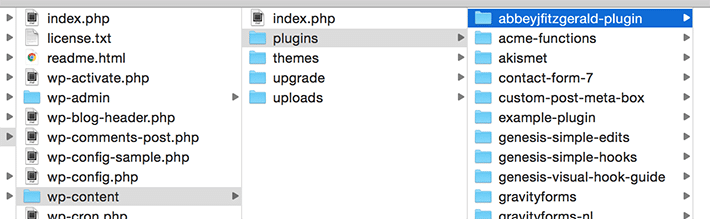
2. Open the text editor of your choice, create a blank file, and save it as mysite-plugin.php.
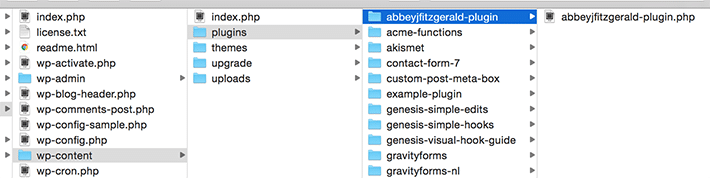
3. Put the following code in the mysite-plugin.php file (including comments and PHP tags):
<?php

/*

Plugin Name: Author Bio for mysite.com

Description: Site-specific functions for mysite.com

*/

/* Add Functions Here */

/* Keep Functions Above This */

?>
4. Fill in the information for the plugin name and description.

Next, we’ll add some information to the plugin file. When we are finished, the bio box will appear below posts.
Here’s the information we’re going to display:
- Author’s name
- Author’s image
- Author’s bio
- Author’s posts link
- Author’s website
Add snippets to the plugin
1. Create the function
function mysite_author_bio( $content ) {

global $post;

}
To access a global variable you “globalize” the variable. This is why we have $post included. When you declare a global variable, it is accessible to every part of this function. By using the”word “global,” you’re declaring that you want to access the $post global variable. This variable holds the various details about the current post data. This is important because we are showing the post author’s information and it needs to feature the the correct author name, bio, website, etc.
2. Under the global post variable, you can start adding your own content. Make sure you are within the closing bracket. It’s also important to specify that this should be displayed only on a single post with an author, so that logic has been included.
function mysite_author_bio( $content ) {

global $post;

if ( is_single() && isset( $post->post_author ) ) {

}

}
3. Display the author’s name and information.
function mysite_author_bio( $content ) {
global $post;
if ( is_single() && isset( $post->post_author ) ) {
}
if ( empty( $display_name ) )
$display_name = get_the_author_meta( 'nickname', $post->post_author );
$user_description = get_the_author_meta( 'user_description', $post->post_author );
$user_website = get_the_author_meta('url', $post->post_author);
$user_posts = get_author_posts_url( get_the_author_meta( 'ID' , $post->post_author));
if ( ! empty( $display_name ) )
$author_details .= '<p class="author_links"><a href="'. $user_posts .'">View all posts by ' . $display_name . '</a>';
if ( ! empty( $user_website ) ) {
$author_details .= ' | <a href="' . $user_website .'" target="_blank" rel="nofollow">Website</a></p>';
}
else {
$author_details .= '</p>';
}
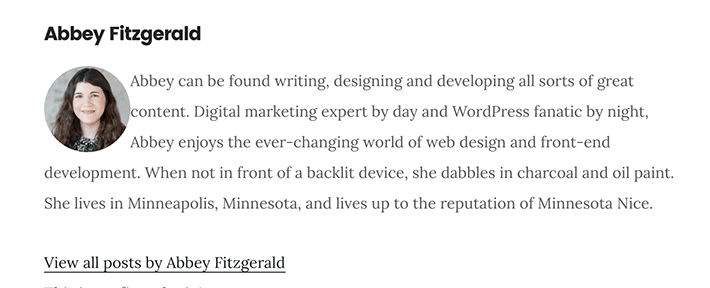
}Thanks to this code, on a single post with an author, their name will be displayed. If by chance they did not specify a name, there is the option to display their nickname. Remember when you entered bio information before? This is where that content will show. A link to the author’s posts will also be included. If the author has a separate website, and entered that into their profile, that will be shown as a link.
4. Pass information into the content of the bio so it shows on the page.
function mysite_author_bio( $content ) {

global $post;

if ( is_single() && isset( $post->post_author ) ) {

	$display_name = get_the_author_meta( 'display_name', $post->post_author );

	if ( empty( $display_name ) )
	$display_name = get_the_author_meta( 'nickname', $post->post_author );

	$user_description = get_the_author_meta( 'user_description', $post->post_author );

	$user_website = get_the_author_meta('url', $post->post_author);

	$user_posts = get_author_posts_url( get_the_author_meta( 'ID' , $post->post_author));

	if ( ! empty( $display_name ) )

	$author_details = '<p class="author_name">' . $display_name . '</p>';

	if ( ! empty( $user_description ) )

	$author_details .= '<p class="author_details">' . get_avatar( get_the_author_meta('user_email') , 90 ) . nl2br( $user_description ). '</p>';

	$author_details .= '<p class="author_links"><a href="'. $user_posts .'">View all posts by ' . $display_name . '</a>';

	if ( ! empty( $user_website ) ) {

		$author_details .= ' | <a href="' . $user_website .'" target="_blank" rel="nofollow">Website</a></p>';

		} else {
		$author_details .= '</p>';
		}

		$content = $content . '<footer class="author_bio" >' . $author_details . '</footer>';
	}
	return $content;
}

add_action( 'the_content', 'mysite_author_bio' );

remove_filter('pre_user_description', 'wp_filter_kses');
This is the logic to show the avatar image along with the bio content (assuming the author has included a photo in their profile). It will also show the website URL along with a link. This information is passed into the post content and then called with the function so it will appear under the post content.
5. If you haven’t done this yet, be sure to activate the plugin.

While we’ve created our own plugin here, it’s important to note that with a little modification, the code snippets from this tutorial could also go in the functions.php file. We’ve chosen to take the plugin route so that it can be reused if you switch themes.
Styling the Author Bio
With just these simple code snippets, things look pretty good, but it could use some custom styling. Adjusting the CSS will help you make things look perfect and polished.
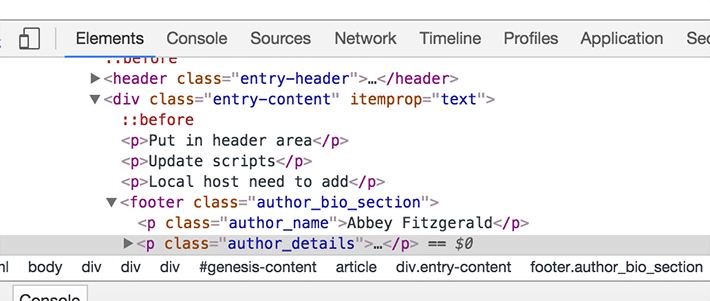
First, let’s take a look at the new styles. The Chrome inspector is a great way to see what’s going on. Right click and choose Inspect to open the Chrome Inspector.
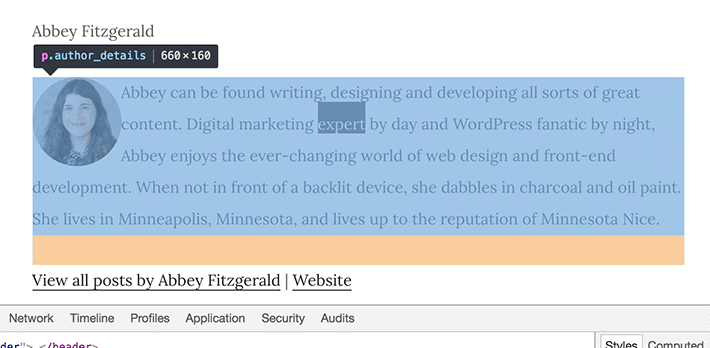
Here are some styles that could be added to your stylesheet. You can use these as a starting point and then adjust the styling for your design.
.author_bio {
font-family: 'Montserrat', sans-serif;
padding: 15px;
border: 1px solid #ccc;
}

.author_bio .author_name {
font-size: 2.5rem;
font-weight: bold;
text-align: center;
border-bottom: 1px solid #CCC;
}

.author-details {
border: 1px solid #D8D8D8;
}

.author_details img {
border: 6px solid #e85555;
border-radius: 50%;
float: none;
margin: 20px auto;
display: block;
clear: both;
}

.author_bio .author_links {
text-align: center;
}

.author_bio .author_links a {
text-decoration: none;
color: #e85555;
}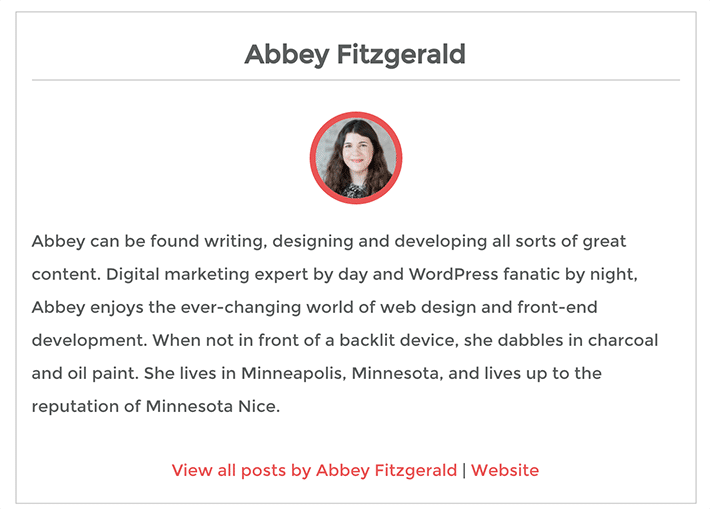
Whether you chose an existing plugin or created your own, there is a lot of flexibility with this way of featuring content authors. All it takes are a few code changes or a plugin to get a simple author bio added to your site’s posts. In just a few simple steps and by adding some custom CSS, you can make the author bio coordinate with the look and feel of your site.