


How to Make a Cinemagraph in Photoshop
Cinemagraphs have been one of my favorite design trends for a few years now. They’re a stunning mix between photo and video, resulting in an elegant piece of art for your site that adds just a hint of mystery.
There’s also a key practical reason cinemagraphs are great: their small file size. It’s much easier to add little moments of movement to your site, as opposed to an entire video file! But beyond the logistics, there’s one final reason cinemagraphs are so magical: they’re actually a lot easier to create than you’d think!
Ready to get started? Pull up your chair, open up Photoshop, and follow these seven easy steps to create your own cinemagraph!
1. Choose Your Video File
To make a cinemagraph, you’ll start with a basic video file. Ideally you would shoot the video yourself so it can be specific to your company and perfectly match your brand, but if you’re just experimenting, downloading a stock video will work just fine!
For this tutorial, I’m using a video we shot in-house of a Jenga tour against a plain blue background. (You’ll get the same file if you sign up for the Design Trends course!)

When choosing the perfect video for your cinemagraph, there are a few things you’ll want to keep in mind:
- The camera needs to stay still the entire time. If you’re shooting the video yourself, dig out the old tripod to keep things as stable as possible. If you’re browsing stock options, look for as little movement as possible!
- The movement you want to keep should be easy to isolate. If objects are crossing in front of each other or moving all over the screen, it’ll be harder to isolate the movement you actually want while keeping the background still.
- The video should loop. To keep the cinemagraph timeless, it’ll need to loop. While Photoshop can definitely help smooth things out, it’s easiest to use a video that can easily loop, or has a reversible beginning and end.
Once you’ve got your video file, you’re ready to load it into Photoshop.
2. Import the Video File
With Photoshop pulled up, head to File > Open. Select your file, and then you’ll see the video appear as a Layer. If it doesn’t show up automatically, make sure you can also see the Timeline by going to Window > Timeline.
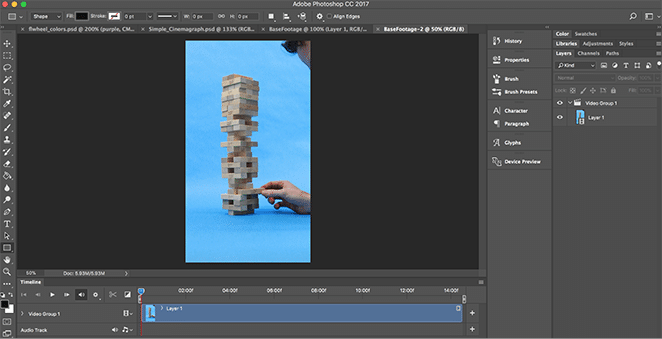
You’ll notice that the video file automatically gets put into a group, “Video Group 1.” You can leave it there, but if only having one layer in a group bothers you, feel free to pull the video layer out and delete the group! It’s not necessary.
3. Clean up the Timeline
Play your video file a few times – do you need the whole thing? If there’s extra footage either before or after the section you’d like your cinemagraph to focus on, go ahead and trim the file so it’s out of your way. You can do this by clicking the edge of the file in the Timeline and dragging it to the desired timestamp.
If your video file is long and you’re having trouble viewing the whole thing or getting to the exact spot you want, you can use the scale at the bottom of the Timeline window to zoom in and out.
Note: The part of your file that you trim will still be saved, so don’t worry about losing data here! You can always click and drag the edge back out, if you decide you need a certain part later.
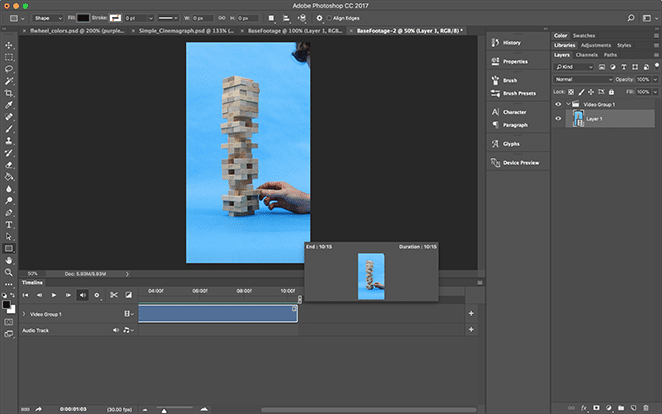
My original video file ended with the Jenga tower falling over, which wouldn’t be easy to loop. So I cut that part out and trimmed some from the beginning as well, just to simplify the time I was working with!
Once you’re done cleaning up the Timeline, it’s time to hide the movement you don’t want.
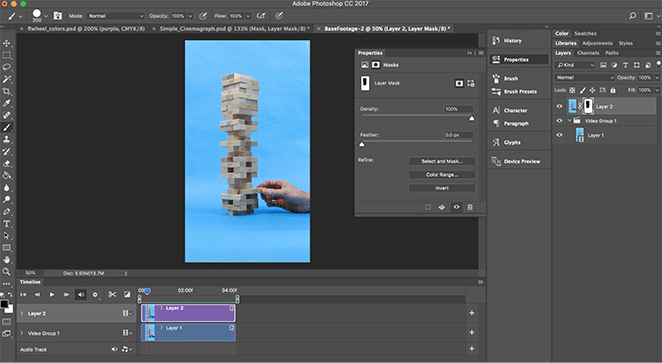
4. Create the Masking Layer
Now you’ll create the “photo” aspect of the cinemagraph. Pause the video on the “image” you want to create, and then select the entire area. Copy and Paste this into a new Layer.
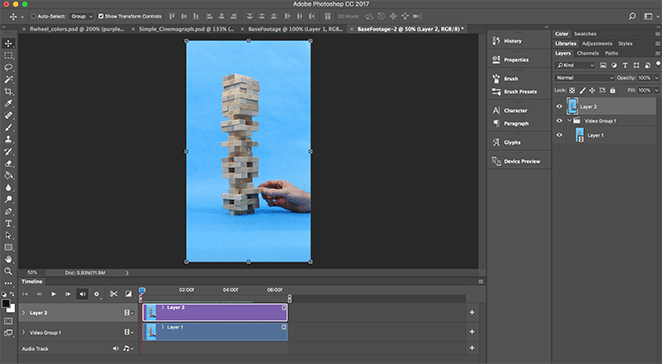
If you hit play, you’ll notice that now you can’t see any of the video, because the still later is on top. Now it’s time to add a mask, which will allow us to choose the exact movement we want to show!
Go ahead an add a Layer Mask, either from the option at the bottom of the Layers panel or by going to Layer > Layer Mask > Reveal All.
5. Isolate the Movement
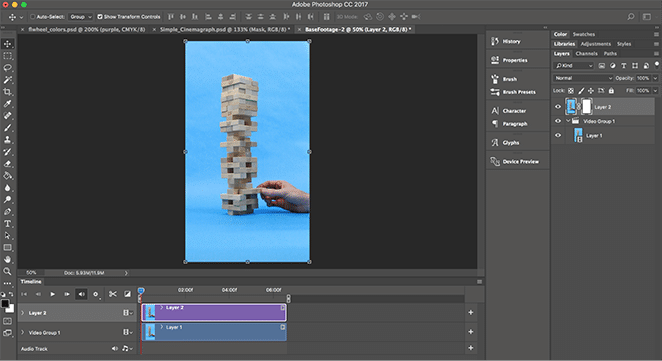
Make sure you have the Layer Mask selected (instead of the layer itself) and then grab the Brush Tool. Just like any mask, brushing with black will conceal the mask (revealing the content from the layer underneath) while brushing with white will reveal the mask (hiding the content from the layer underneath).
For this example, I wanted the movement of the Jenga tower to show while the hands stay static. To accomplish that, I painted the mask black over the top of the tower and left the rest white.
This allows you to isolate the movement, revealing only the motion you want your cinemagraph to show while keeping the rest frozen still.
6. Export as a Gif
Once you’re happy with your cinemagraph, it’s time to export it! Simply go to File > Export > Save for Web (Legacy). There are lots of options you can experiment with here, but the two most important ones are:
- Save as a gif (located near the top of the dialog box)
- Set the looping options to Forever (located near the bottom of the dialog box)
There’s always a little bit of a balance between file size and quality, so I definitely recommend experimenting with the settings to make sure you’re getting exactly the export you need.

And that’s it! You’ve just created your very own cinemagraph to share with the world. How’d it turn out? We’d love to know in the comments.
How to Use the Photoshop File
When you open this file into Photoshop, you’ll see the finished cinemagraph. You’re welcome to use it if you like, or you can play around to see how we set everything up!
Start by unmasking all layers, except for the “Base Footage.” That’s the original movie file we started with. If you hit play, you’ll be able to see how much the hand moves to shake the Jenga board!
Then we added the masking layer to isolate the movement, and let me tell you – choosing a geometric shape like this on top of a solid background made the masking process super simple! Depending on your video file, you may need to be a little more exact, but we’ll leave that up to you.
Next, we decided to focus on just a segment of the video that looped well together, to create that timeless effect. We left the whole file in there, however, so you could see the whole thing!
Last, we altered the Curves to correct for some of the color in the file. You may or may not need to do that, depending on your video, but remember: You can always continue editing once the cinemagraph is made!
And that’s it! You’ve got a cinemagraph that’s ready to be displayed on your site. To make sure it loads quickly and correctly for your audience, be sure to choose the best WordPress hosting possible!