


How To Create a Duotone Image in Photoshop
As you’re working on your next site design, there’s a common type of background you may be considering: photography. While this trend isn’t necessarily unique, it sure is effective at setting a scene and immersing a user into the environment of a site. If you’re looking for a way to use photography but with a little more pizazz, you could always try a duotone image—they’re both interesting to look at and easy to create!
Before we learn how to create a duotone image in Photoshop, let’s dive a little deeper into this design trend.
What is a Duotone Image?
At its core, a duotone is simply an image that’s made of two colors. You’ve probably seen them before in campaigns like Spotify’s 2015 Year in Review.
This is becoming increasingly popular, especially among agencies and smaller brands. Duotone effects are a great way to incorporate and reinforce your brand and its colors throughout your work and your website.
If you’re interested in trying out this technique, you’ll want to be strategic in the photo you choose to manipulate. While technically you can apply the duotone effect to any photo, it’ll look better on an image with lots of contrast. We’d also recommend using an image with a solid background, preferably white—that makes it easier to establish the base color you’re looking for!
If you have access to a studio and are interested in taking custom photos, just keep these tips in mind while you set the scene. If you’re working with existing content, you can always manipulate the photo first to boost the contrast or change the background color.
For the rest of the tutorial, we’ll cover two methods you can use to manually create a duotone image in Photoshop. The first is the built-in Photoshop option and the second uses a gradient map.
Once you’re ready, load your image into Photoshop and create a duplicate layer of the photo. By editing the duplicate (instead of the original, bottom layer), you’ll always have an unedited version of the photo to fall back on.
Ready to create a duotone image in Photoshop? Let’s get started.
How To Use the Default Photoshop Duotone Option
Convert the Image to 8 Bit Grayscale
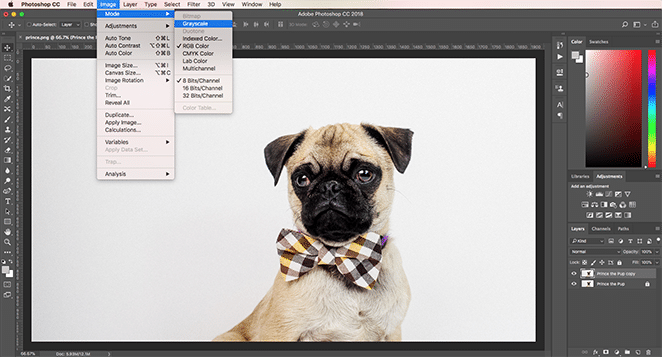
In order to use the duotone option that’s built into Photoshop, first you’ll have to convert the image to an 8 bit grayscale. Select the copy of your photo and head up to Image > Mode > Grayscale. Also verify the 8 bits/Channel option is selected under the same Mode menu.
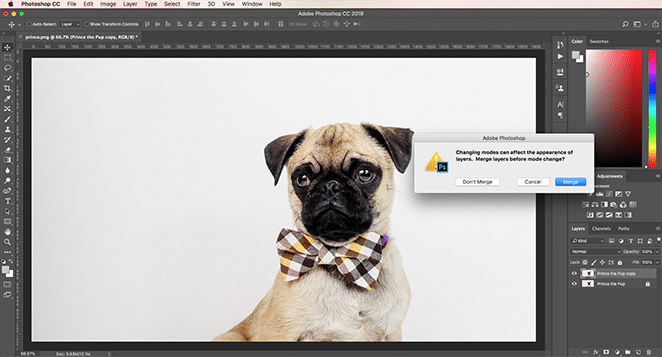
When you select this option, a couple notifications are going to pop up. The first asks if you want to flatten the image or merge the layers before changing the color mode.
If you have a lot of layers, the color change could affect how things display (in which case, flattening could be helpful for preserving your work), but in this case, don’t worry about flattening the image. If you want the original copy, don’t merge your layers.
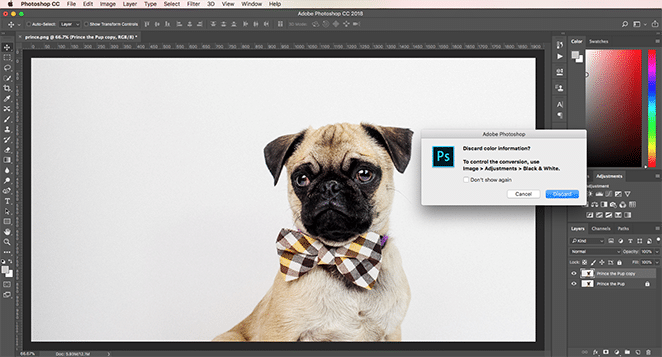
The next notification asks if you want to discard color information. You’ll have to do this in order to use the default duotone option, so go ahead and click “Discard.”
Convert the image to a duotone
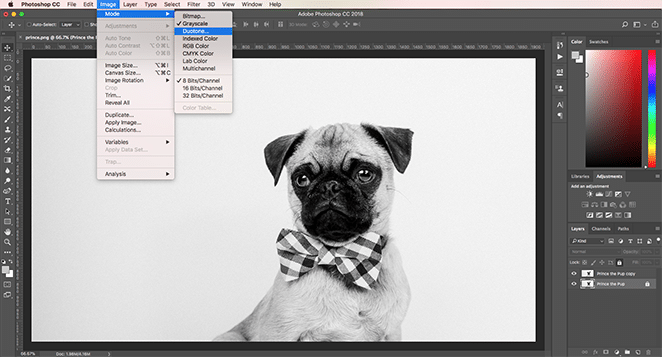
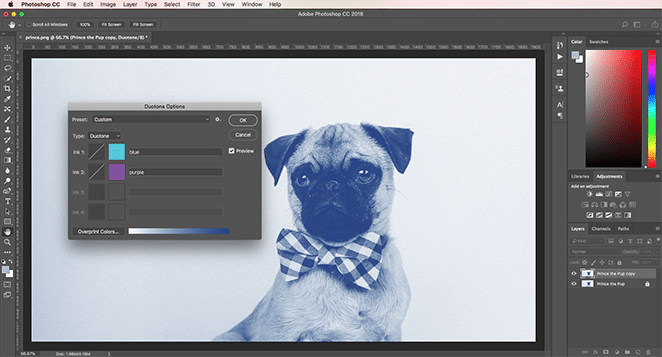
Once your image mode is in an 8 bit grayscale, you can use the default duotone option in Photoshop. Select the layer, and then go to Image > Mode > Duotone.
Select your colors
Once the image is in duotone mode, you can start selecting your colors. The nice part is that as soon as you select a new color, the image will update so you can see how things look (as long as the Preview checkbox is checked).
Beyond that, the process starts to get a little clunky. You technically can adjust the curves for each color, but the image doesn’t update in real-time, making it a little difficult to see what’s happening and resulting in a lot of back and forth. Play with the colors and settings until you find the desired effect.
We’d suggest playing around with these settings for a minute, just to get a feel for them, but once you’re ready, let’s move on to the second method for creating duotones in Photoshop.
How To Use a Gradient Map To Create a Duotone
Apply a Gradient Map
For this method, you won’t need to worry about altering the image or choosing a specific color mode. Of course, if you do want to edit anything, go ahead, but the photo will work fine just as it is. When you’re ready, select the copy of your image and go up to Image > Adjustments > Gradient Map.
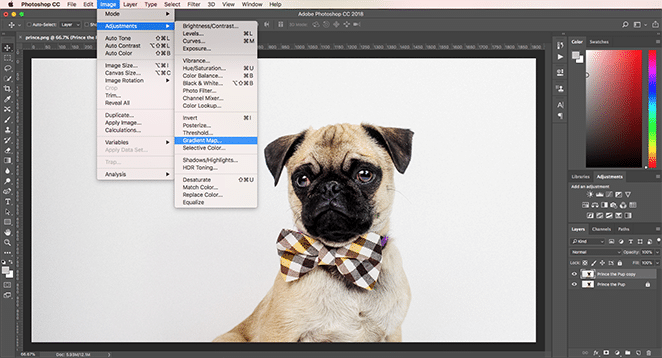
Depending on your default setting, this setting will overlay the image with a gradient for a grayscale mapping. If the default is not black and white, click the dropdown and select that option. If you followed along for the first method, you’ll see that we’re already halfway to creating our duotone.
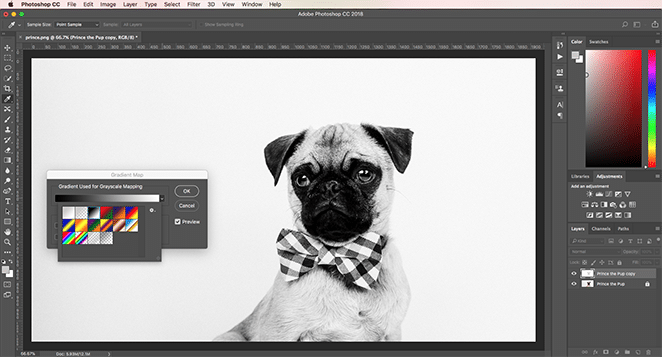
Pro-tip: See the checkbox next to Reverse? By clicking that, you’ll invert the colors in the photo. For this tutorial, we’ll leave it unchecked, but if we wanted the background to be darker than the subject, that option can help you switch things up.
Choose your colors
By clicking on the gradient bar, you’ll open the Gradient Editor in a new window. Here you can select your colors and adjust how they display over the image.
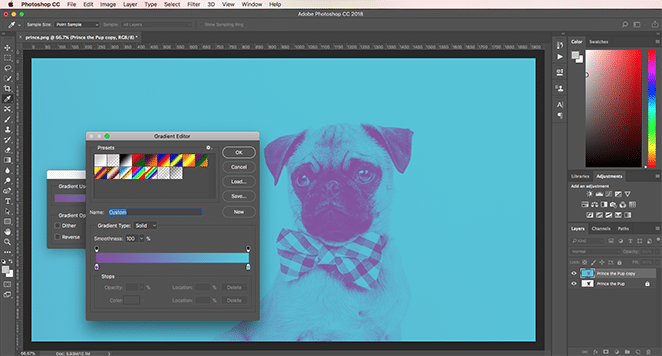
As you can see, the final images look quite a bit different from each other, but both result in wonderful duotones. Gradient Map is our preferred option, simply because it’s a little easier to control the intensity of the colors and where the dark and light tones go, but both methods are easy to use.
How To Use the Duotoner
Install the Action
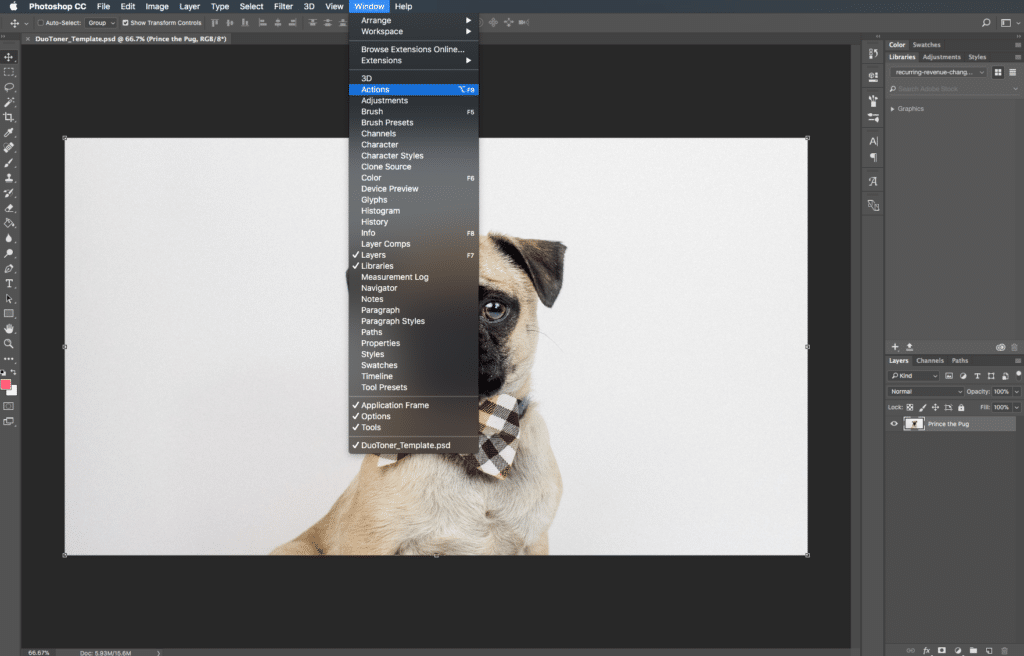
To get started, you must first download the Photoshop action. Once you’ve downloaded the action, double-click the file to install it. Open the image you’d like to use in Photoshop, and then open the Actions window.
To navigate to the Actions window, select Window > Actions or hold down Shift + F9.
Once you’ve opened the Actions window, select the image layer you want to apply the duotone effect to.
Select and Play the Action
Click the drop-down on the “Flywheel – Glitch-a-tron” folder. Now, select “Glitch-a-tron – Select and hit play” and press the triangle play button at the bottom of the window.
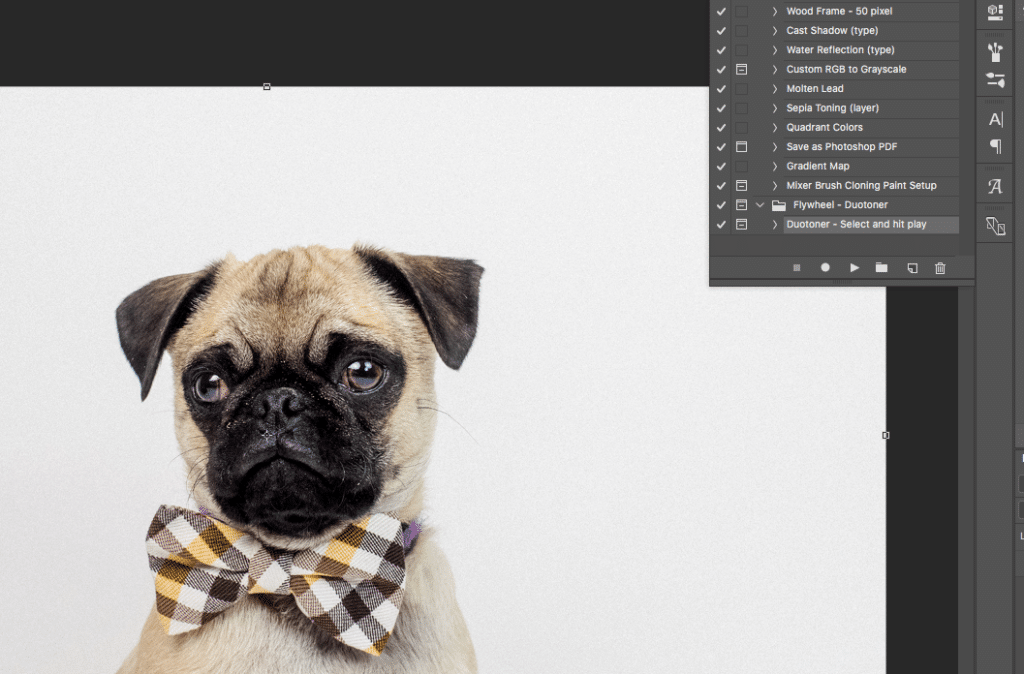
Once you hit play, you’ll see a whole bunch of layers, each one with a different duotone color scheme! To switch, all you have to do is make the layer you want visible.

Note: If you have more than one duotone layer visible, the colors will blend together and you may start to lose some of the detail of your photo. To keep things crisp, make sure you only have one layer visible at a time (or feel free to experiment by layering the duotones for a totally different effect!).
Bonus: Reset Your Image in a Snap
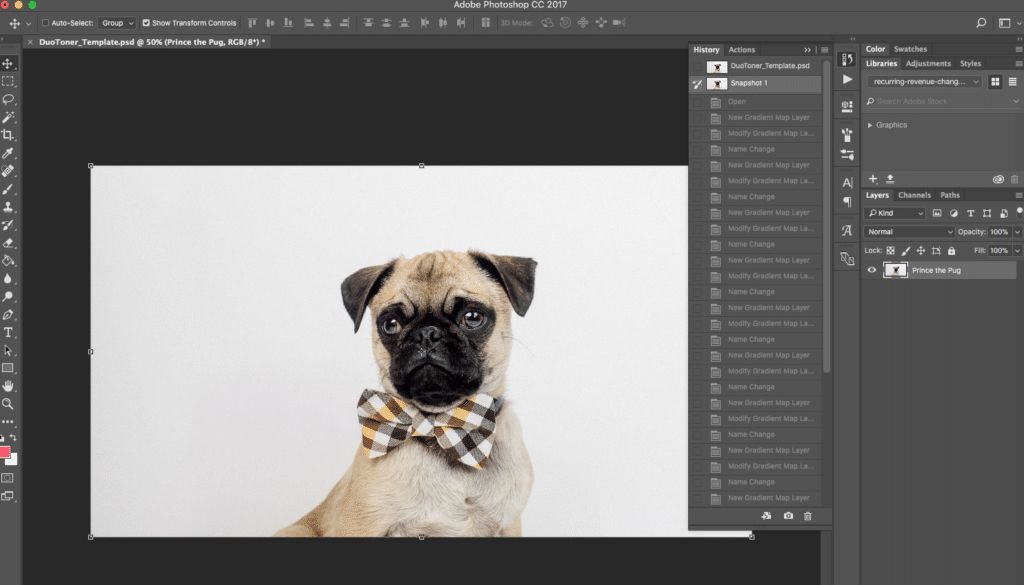
Just in case you want to backtrack, the action automatically creates a screenshot that allows you to go back to your image before the action was applied.
Navigate to the History window by selecting Window > History. Scroll up to the top, and click “Snapshot.” This resets everything so you’re good to go!
What do you think of duotones? We think they’re a strong design trend that provides some contrast to traditional, full-color images.
Want additional resources for building and designing incredible sites with WordPress? Visit WP Engine’s Resource Center for our vast library of educational, how-to content—created for WordPress users of all technical skill levels!
Find out more about WordPress hosting with WP Engine, or speak to a representative now.