


How to Add Custom Fields to the WooCommerce Checkout Page
Powering 25% of all online stores, WooCommerce is the most popular eCommerce platform on the web. With that in mind, the probability of coming across it in your day-to-day development work is very high. Getting familiar with it will go a long way in increasing your value in the highly competitive web design/web development market.
As you probably know, different businesses have different business models, and different business models call for different types of online stores. Due to these dynamics, the need to add, remove, or rearrange the default checkout fields of an eCommerce store is very common. Most eCommerce platforms are pretty rigid and ship with generic checkout fields that are very hard to customize. WooCommerce, however, prides itself in being the most customizable eCommerce platform. Based on my experience, this statement is quite true.
Today, I will show you how to add custom fields to the WooCommerce checkout page. To do this, you’ll need to install a WordPress plugin called Flexible Woocommerce Checkout Field Editor.

Before we go any further, this tutorial assumes you’ve already installed WooCommerce and you are able to produce an end-to-end transaction, from “add to cart” right down to the checkout.
This plugin is by far the easiest and safest way to add custom fields to the checkout page. It doesn’t involve any code changes; everything is managed right from the WordPress dashboard.
Flexible Woocommerce Checkout Field Editor is a free plugin and is available for download on the WordPress plugin directory. Its features go well beyond adding custom fields. It can also rearrange, edit, and hide existing checkout fields.
As of now, it includes the following custom field types:
- Text
- TextArea
- Password
- Select
- Multiselect
- Datepicker
- CheckBox
Let’s go ahead and add two new custom fields, “Your nickname” and “How did you hear about us?”
1. Install the plugin by either downloading it on the WordPress plugin directory and manually uploading, or directly through the WordPress dashboard. Here is the direct link.
2. Once installed, activate the plugin.
3. When activated, the plugin will add a new option to the main WooCommerce link in the WordPress dashboard (see the screenshot below). The new option is labeled “Checkout field editor.”
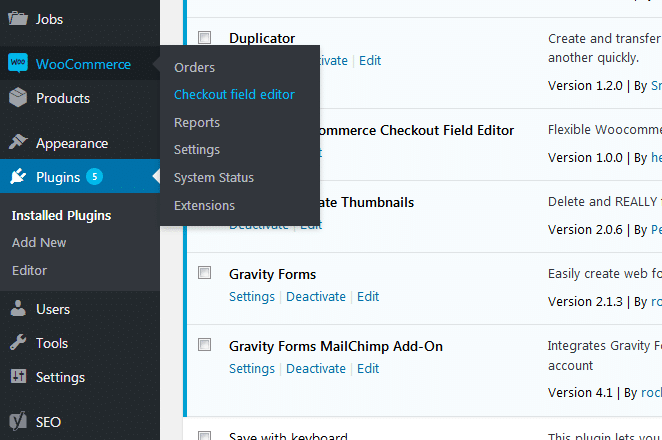
4. Click on the “Checkout field editor” option.
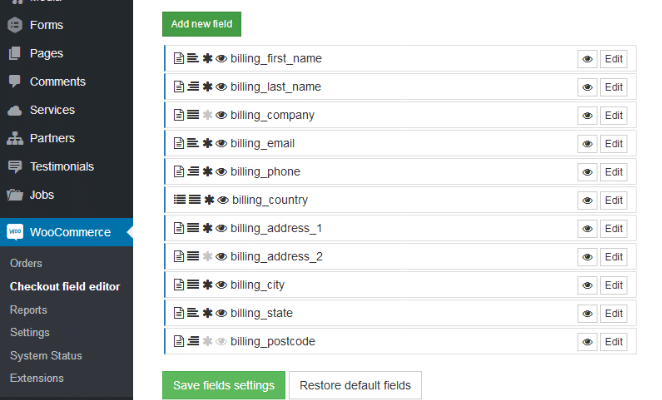
5. This will take you to a screen showing all the active default fields. View the screenshot below.
6. We’re going to add two new fields: “Nickname” to “Billing fields” and “How did you hear about us” to the “Order Fields.” Click on “Add new field.” A pop-up will appear on the right with the field options. Let’s fill in the details. For the first one, the label is “Nickname.” We’ll have this field appear on the order page and order email, so check “Show on order page” and “Show on order e-mail.” All the other options are pretty self-explanatory, so let’s jump to “Editor Type.” This is where you pick which type of field you want. For this field, using a simple text field would be ideal. As earlier stated, this plugin includes seven field types, so pick the one that fits your specific use case.
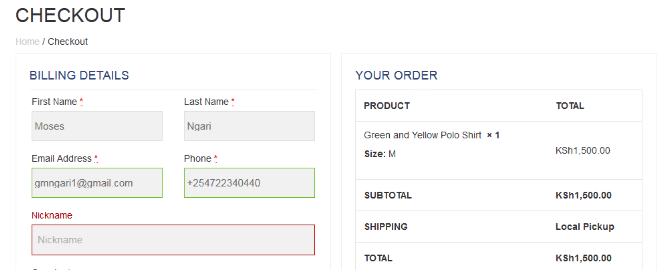
7. Click on “Save field settings.” Just like that, you’ve just added a new custom field to the billing fields on the checkout page!
8. Let’s navigate to the checkout page on the front-end to confirm the change. Here’s a screenshot.
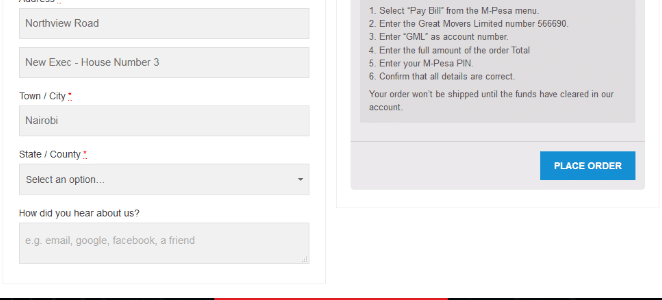
9. Finally, let’s add “How did you hear about us?” You’ll follow the exact same steps as the first one; the only thing that changes is that we are adding it to the “Order fields.” You may also want to change the field type to something different. I chose “Text Area,” so now we have another new field on the checkout page. Take a look at the screenshot.
There you have it, two new custom fields added to the WooCommerce checkout page! This plugin offers a lot of possibilities, so dig in and see how far you can push it.
You can really push the bounds of what WooCommerce offers with WP Engine’s WordPress hosting specific for WooCommerce users!