


Simple Customizations for Your Genesis Child Theme
As web designers, we are always looking forward to working more efficiently. An easy way to get sites up and running quickly is by implementing the Genesis framework.
A framework is essentially a WordPress theme structure that is put in place to be built upon. The Genesis framework is comparable to a block of Legos. It makes the different components of the theme easy to work on and easy to move around. Genesis is a very popular framework because it’s well supported and there are many tutorials that exist if you get stuck during the process.
As we all know, we do not edit the WordPress core. The same goes for the Genesis framework; we do not edit any of the framework files. All of our theme building is done in a Genesis Child Theme, which gives you the flexibility to create the perfect site.
It is highly recommended that any building is done in a test environment when you’re developing your child theme or making customizations. Extensive testing is beneficial so you have the peace of mind that everything looks and functions correctly before officially sharing it with the world.
When you’re creating or modifying your child theme, there are customizations that you may want to make to enhance it. For a few of these customizations, we’ll be using the functions.php file in your child theme. This file is essential when making customizations.
Looking for a Starter Genesis Theme?
Remember, you must have the Genesis theme installed as the parent theme when you are creating a child theme. This child theme depends on the functionality of Genesis. Once you have it installed, there is a great starter theme to use if you’d rather not purchase one.
You may notice that the Genesis Sample Theme looks pretty bare-bones, but to start all you need is a functions.php file and a styles.css file and you can build or adjust as you move along.
Get Genesis Framework & More Themes for Free!
When you host your sites on WP Engine, you’ll have access to several premium WordPress themes (including Genesis!) right from our delightful dashboard. Learn more here.
Add Your Google Analytics Tracking Code
Chances are you’re using analytics of some sort to gauge the traffic for your site. Google Analytics is a great tool. All you need is a unique tracking code and you’re good to go. Signing up for a Google Analytics account is quick and easy. As an added bonus, it is free.
If you do have a tracking code already, be sure to bring this along with your new theme so you can insert it via the Genesis theme settings page. This is easy to do, but not always easy to find.
First, sign into your WordPress admin account. Once you’re logged in, click on Genesis > Theme Settings. You will see options for the Header and Footer. This will be pasted in the Header field.
It should look something like this:

As you can see from the above screenshot, it’s pretty simple to add your tracking code and use the tools in Google Analytics to view your site data. However, this may be limiting depending on how much of data you would like available to you.
What if you want to see other business data besides what Google Analytics offers? If you have a little more WordPress knowledge, there are plugins out there that let you view valuable stats.
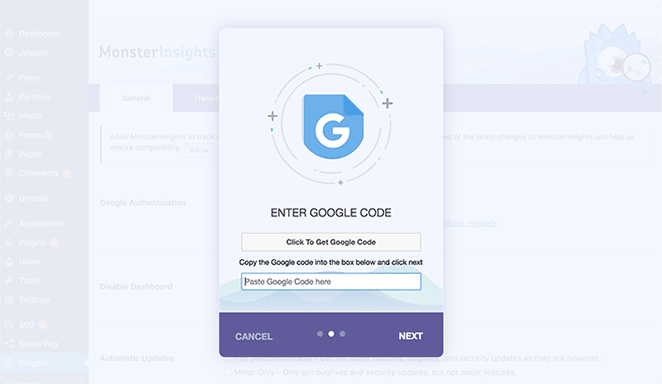
One worth mentioning is Google Analytics for WordPress by MonsterInsights. It connects your site with Google Analytics, allowing you to view performance data.
If you are using a plugin, chances are that you will not need to manually add the Google Analytics tracking code to the header and you’ll follow the plugin guidelines. Often there is a place in the plugin settings where you will add a reference to the snippet to connect to your account.
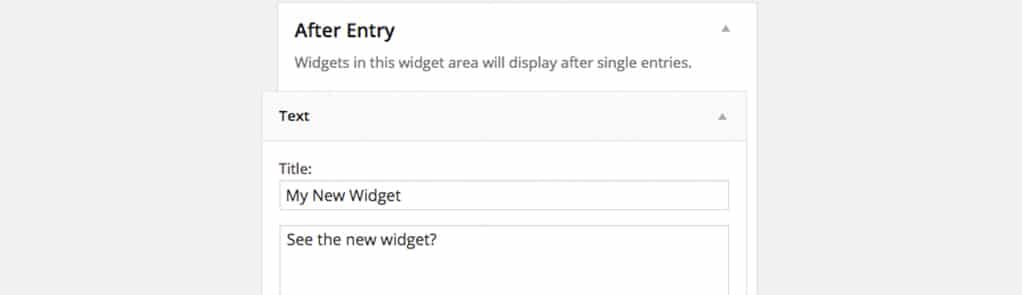
Adding Widget Area
Maybe you want to add a block of text, author box, or something that you’d like to appear after each post. Adding a widget is a quick way to create this functionality.
The Genesis Visual Hook Guide plugin shows the different areas of the page and is helpful when specifying locations for your function. That’s how you will know to reference genesis_before_comments in the function so the widget shows up in the correct place.
This is done in the functions.php file. First, we register our widget area. Then we use a function to actually add it to the page.
[php]
//* Register widget area called 'after-post'
genesis_register_sidebar( array(
	'id'            => 'after-post',
	'name'          => __( 'After Post', 'sample' ),
	'description'   => __( 'This is a widget area that can be placed after the post', 'sample' ),
) );

//* Hook after-post widget area located after post content
add_action( 'genesis_before_comments', 'after_post_widget' );
	function after_post_widget() {
	if ( is_singular( 'post' ) ) {
		genesis_widget_area( 'after-post', array(
			'before' => '<div class="after-post widget-area">',
			'after' => '</div>',
		) );
	}
}
[/php]
Creating a Custom Home Page
This is a scenario where we will create a custom template file for a custom homepage file. In this example, multiple widgets areas are used to build the home page. When using widgets, it is easy to create, maintain and update content.
If your theme has a front-page.php, it already contains a custom homepage. If not, one can easily be created that is named front-page.php.
When created, all you need to do is add the following code in front-page.php:
[php]

<?php

genesis();

[/php]
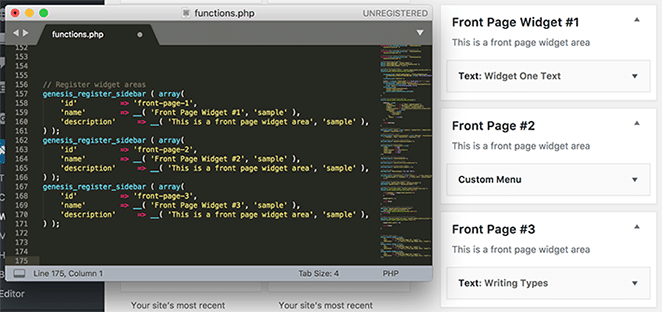
Add Custom Widget Areas to Front Page
To begin adding custom widget areas to your homepage, you will go to functions.php and add those areas. You can add just one, or as many as you need. This example is showing three widget areas.
Make sure that you are pasting this code after the php tag.
[php]
// Register widget areas
genesis_register_sidebar ( array(
	'id'          => 'front-page-1',
	'name'        => __( 'Front Page Widget #1', 'sample' ),
    'description'     => __( 'This is a front page widget area', 'sample' ),
));
genesis_register_sidebar ( array(
	'id'          => 'front-page-2',
	'name'        => __( 'Front Page Widget #2', 'sample' ),
    'description'     => __( 'This is a front page widget area', 'sample' ),
));
genesis_register_sidebar ( array(
	'id'          => 'front-page-3',
	'name'        => __( 'Front Page Widget #3', 'sample' ),
    'description'     => __( 'This is a front page widget area', 'sample' ),
));

[/php]
The widget areas show when you go to Appearance > Widgets, but they will not be shown on the actual homepage yet. To get them to show up on the homepage, this will require markup to actually display the widget.
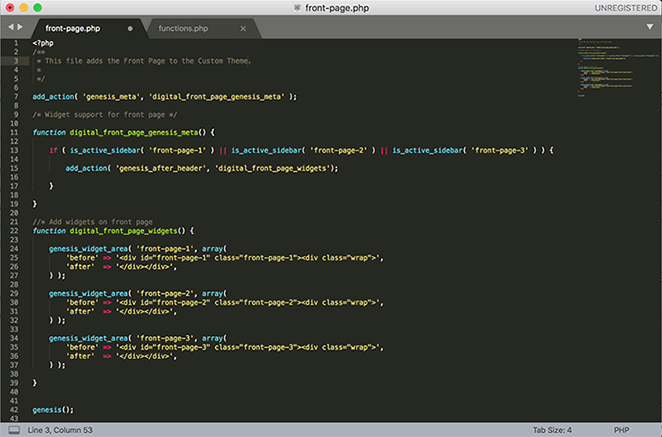
Create Action to Show Widgets
To get it to actually show up on the page, actions and functions need to be added to front-page.php. This will go before we call genesis();.
[php]

add_action( 'genesis_meta', 'digital_front_page_genesis_meta' );

/* Widget support for front page */

function digital_front_page_genesis_meta() {

	if ( is_active_sidebar( 'front-page-1' ) || is_active_sidebar( 'front-page-2' ) || is_active_sidebar( 'front-page-3' ) ) {

add_action( 'genesis_after_header', 'digital_front_page_widgets');

}
}

[/php]

An action was attached and it is checking if there is an active widget and it will determine where it will hook. Here, the widget is going to go after the header, but there are many other places where widgets can go.
Here are just a few examples:
- genesis_before_header
- genesis_before_sidebar_widget_area
- genesis_before_footer
- genesis_before_comments
It’s getting there, but the real magic happens when the function is called to display the widget.
Function to Add Widgets to Front Page
Often this step is done before attaching an action, but it should go under the action snippet. A custom function is created here. The genesis_widget_area function is being called.
You can add as many divs here as you wish. I have an inner one with a class of .wrap, which I find helpful. You can change this to be whatever you’d like. One thing for organization purposes: having an id/class that references the widget with a recognizable naming convention is very helpful.
This array contains markup that can be wrapped around the widget, which is good for CSS styling, which can be modified to be different from this example. Double check that you are still looking at front-page.php, since this snippet also belongs in there.
[php]

//* Add widgets on front page
function digital_front_page_widgets() {

	genesis_widget_area( 'front-page-1', array(
		'before' => '<div id="front-page-1" class="front-page-1"><div class="wrap">',
		'after'  => '</div></div>',
	));

	genesis_widget_area( 'front-page-2', array(
		'before' => '<div id="front-page-2" class="front-page-2"><div class="wrap">',
		'after'  => '</div></div>',
	));

	genesis_widget_area( 'front-page-3', array(
		'before' => '<div id="front-page-3" class="front-page-3"><div class="wrap">',
		'after'  => '</div></div>',
	));

}

[/php]
You can then create a layout and use widget areas for the homepage content.
Adding Your Logo
A logo is a necessary branding element, so adding it to your site will really make your users feel right at home.
Chances are your theme will have the capability to upload a logo file. If you’re using the Genesis Sample Theme, you will. The easiest way is to go to Appearance > Customize and Upload your logo file. You may have to adjust the CSS a bit and add margin and padding if needed.
In the functions.php file, you may find something that resembles this:
[php]

// Add support for custom header
add_theme_support( 'genesis-custom-header', array(
	'width' => 500,
	'height' => 120
) );

[/php]
If you have a different size preference, you can change the width and height values to accommodate your logo.
Changing Footer Credits
Most themes, by default, come with a link to the theme and copyright information. One quick and easy way to change the footer credits uses the functions.php file and shortcodes. There are plugins that allow for simple changing of footer credits, so you can decide which method works best for you.
Say you don’t want the theme information in the footer but you do want to keep the copyright information. This will make a global change to the footer, and you’ll no longer have to see the theme information in the footer.
[php]

//* Customize the footer credits
add_filter( 'genesis_footer_creds_text', 'my_custom_footer_creds' );
function my_custom_footer_creds(){

    $creds = '© 2015 Your Name.';
    return $creds;
}

[/php]
That will work, but what if you would like the information to auto-update when the year changes?
There’s a trick to automatically update the year. Including the shortcode [footer_copyright] lets us set it and forget it.
[php]

//* Use a shortcode instead
add_filter( 'genesis_footer_creds_text', 'my_custom_footer_creds' );
function my_custom_footer_creds(){

    $creds = '[footer_copyright] Your Name.';
    return $creds;

}

[/php]

It doesn’t matter if you prefer to update the footer in the theme or use a plugin to do this. It all depends on preference. If you plan on changing themes often, it makes sense to use a plugin for footer content. The reason for this is that if you have the analytics code in a theme file, you will have to remember to update to the new theme. A plugin will work across all themes. Genesis Simple Edits is the perfect solution for something like this. It’s simple to use and with a small snippet, the footer will stay up-to-date across multiple themes.
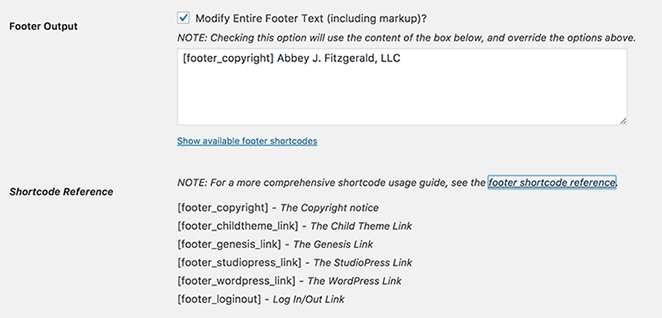
You’ll see the option on the left for Simple Edits under the Genesis heading. This plugin gives you access to a Genesis settings page. If you scroll down to “Footer Output,” you will see how adding a shortcode and text allows for a global change. The [footer_copyright] shortcode makes sure that the copyright year is always up-to-date.
The footer is not the only thing that can be modified with this plugin. In addition to the footer, Simple Edits allows you to modify the post-info (byline) and post-meta on any Genesis theme. Using text, shortcodes, and HTML in the text boxes provided, you can easily edit these areas.
Adding personal touches to your theme is the fun part of the design process! These customizations are great examples of simple changes that help personalize your website and really make it your own.