


Mastering Glitch Effect Creation in Photoshop
One trend we’ve started to increasingly see around the internet is a bit of a throwback: a glitch effect! It adds a great robotic, techno feel to the design and pairs well with other trends, like a duotone effect. And the best part? It’s not too difficult to create!
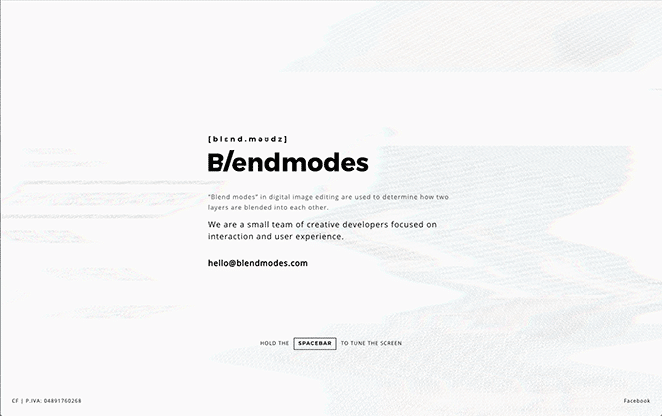
Let’s first start with a little inspiration. Blendmodes Studio has applied a glitch effect to its site and used it as a visual theme to be seen throughout. On this site, they’ve incorporated a sine wave that gives it another glitch vibe. So if you want to give this one a try, follow along in the tutorial and select sine instead of square. They’ve used this effect both in the background and in a text-hover effect, making for a great, interactive site design.
Now that you’ve seen how an agency is utilizing this trend, let’s dive into the ins and outs of a glitch effect and learn how to create one yourself!
Understanding the Photoshop Glitch Effect
The concept of glitches in the digital realm has led to the emergence of glitch art, where artists intentionally manipulate or damage digital media to create captivating visuals. The Photoshop glitch effect is at the forefront of this trend, which stems from exploiting errors in image processing software.
Glitch art traces its origins to recognizing the artistic potential inherent in digital errors. Initially seen as unwanted anomalies, glitches were transformed into a new form of expression by artists who embraced their unpredictability. The Photoshop glitch effect embodies this philosophy, embracing randomness and imperfection as integral components of the creative process.
Step-by-Step Guide to Creating a Glitch Effect in Photoshop
There are two methods we’ll share for creating a glitch effect in Photoshop:
The Manual Photoshop Method
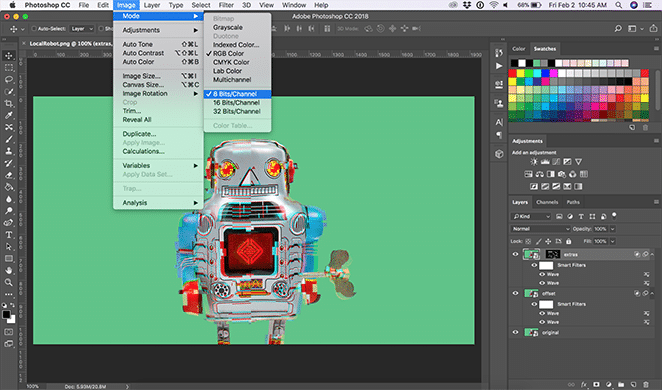
To create the following effects, make sure your document is in 8bit mode. To do this, select Image > Mode > 8bits/Channel.
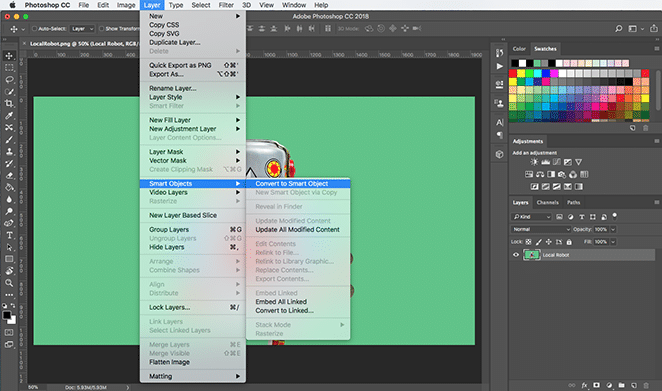
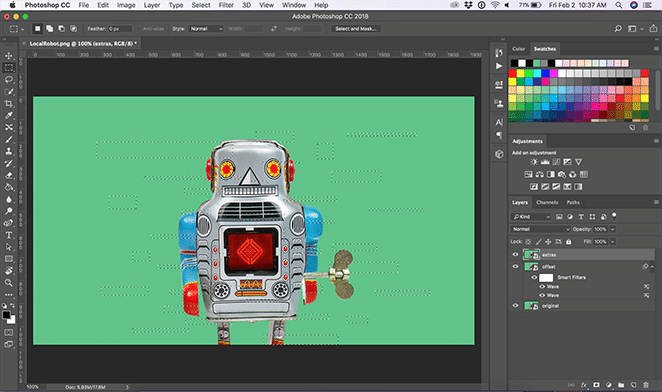
Open Your Image and Create a Smart Object
Open your file in Photoshop. (We’ll be using this photo of the Local robot!) To begin, right-click your image and select Convert to Smart Object or by selecting Layer > Smart Objects > Convert to Smart Object.
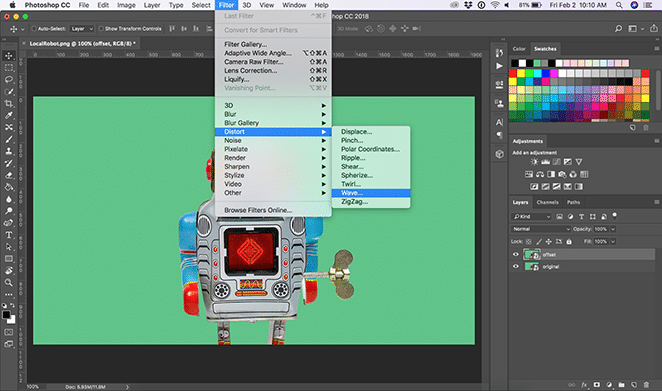
Create a Wave
Duplicate that layer by right-clicking and selecting Duplicate Layer, so you have an original to go back to. Name that layer “offset” and the other “original.”

Now, with the “offset” layer selected, choose Filter > Distort > Wave. For this layer, we’re going to create a subtle effect.
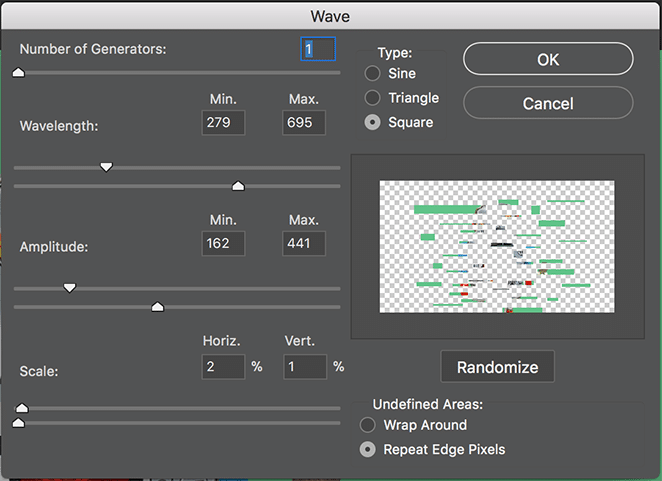
You can adjust any of these options as you’d like, but for this one, we’re going to set the number of generators to 1. Then, change the Wavelength to minimum 279 and maximum to 695 and the Amplitude to minimum 162 and maximum to 441. I also set the Scale to 3% horizontal and 1% vertical.
Make sure your Type is set to Square and toggle on Repeat Edge Pixels under Undefined Areas. Once you have these settings in place, you can click randomize until you see the preview you prefer. You can see more of the adjustments we chose in the image below. This just gives the robot a slight misaligned box effect!

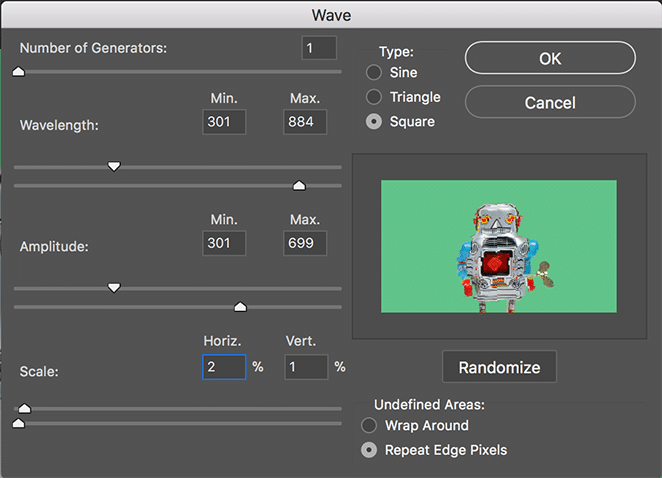
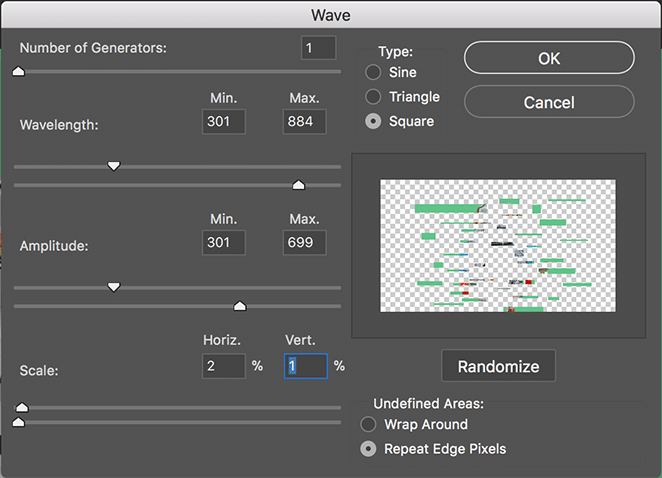
(Optional) Create a More Dramatic Effect with Another Wave
Create another wave on the same “offset” layer using these same steps. This time, I’m going to change the settings slightly and set the number of generators to 1. Then, we’ll change the Wavelength to minimum 301 and maximum to 884 then change the Amplitude to minimum 301 and maximum to 699. We also set the Scale to 2% horizontal and 1% vertical. This gives the robot an even more distorted look.
Create a Distorted Clipping Mask
Duplicate your original layer and name it “extras.” In order to see your selections, reorder the layers by bringing “extras” to the top. Using the Rectangular Marquee Tool, select various parts and sizes of your image you would like to distort while holding down the shift key. The key to getting a really great effect is taking selections from all over your image.
Once you’re happy with your selection, create a mask with the Add layer mask button at the bottom of the layers panel.
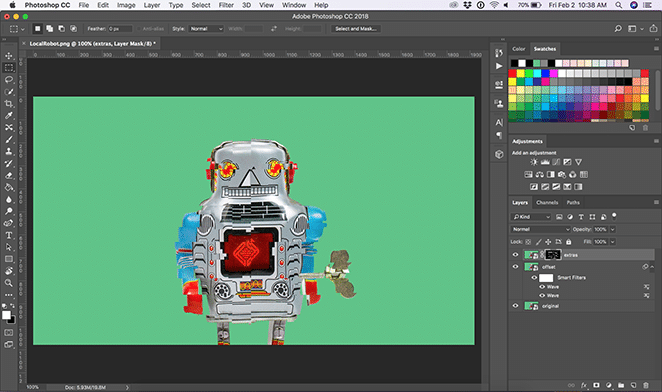
Now, on the extras layer with the image selected (not the mask), add two more waves to the extras layer with Filter > Distort > Wave with similar settings as the step prior.
For a more dramatic effect, unlink the mask from the image. Use the move tool to adjust the location of either the image or mask wherever you like. You can change the effect depending on if you move the mask or the image itself, but when trying to move the image, make sure you’re using the move tool within the masking area.
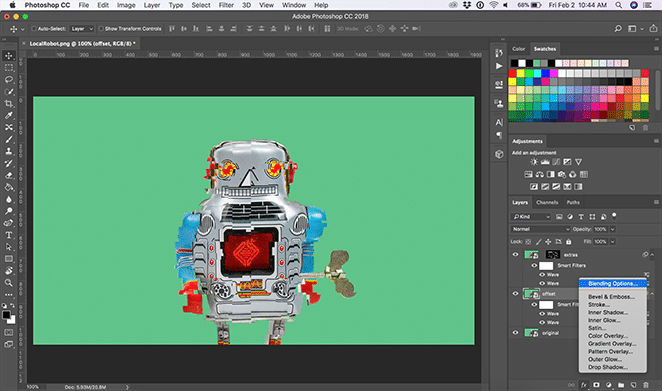
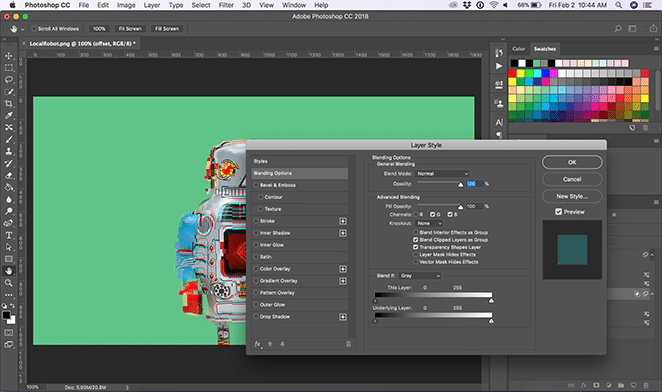
Add Advanced Blending Options

Now, apply advanced blending options to both the “extras” layer and the “offset” layer. First, select the “offset” layer. At the bottom of the layers window, click the Add a layer style button that says “fx.” Then, under Blending Options > Advanced Blending, toggle the red (or R) channel off.
Repeat this same step for the “extras” layer.
Now that you have the glitch completed, you can toggle the waves on and off to get the exact effect you like.
Create Lines Effect
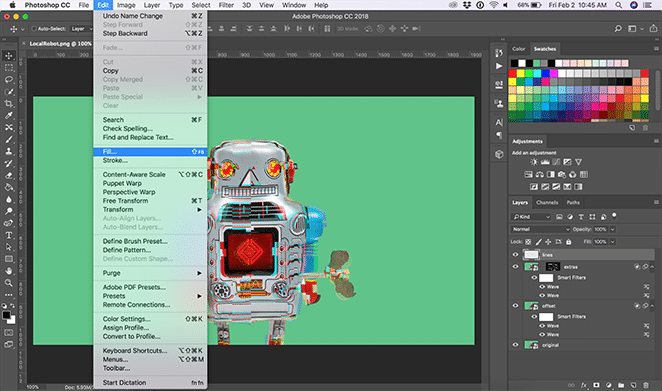
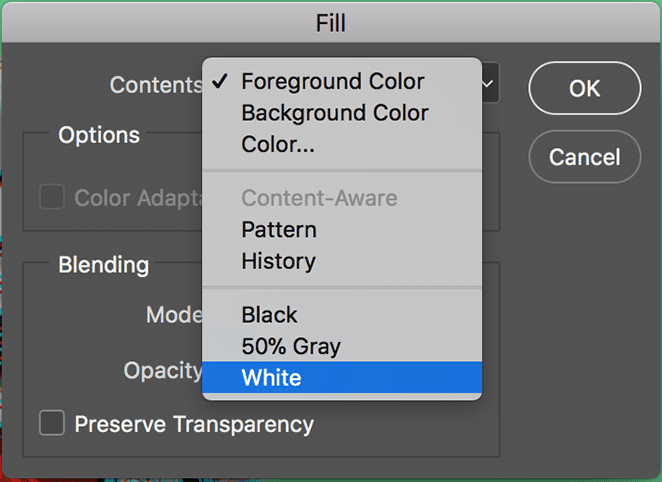
Create a new layer with Layer > New Layer and name it “lines.” Fill it with white by clicking Edit > Fill and from the Contents dropdown, select White.
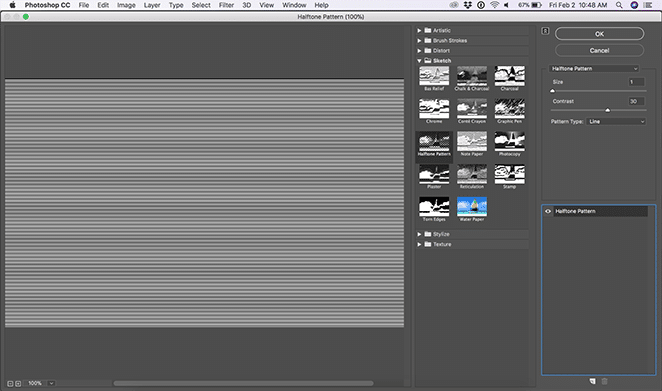
Then, select Filter > Filter Gallery. Under the Sketch dropdown, select the Halftone Pattern and adjust it to your desired effect. For this example, we set the size to 1 and contrast set to 30. Set the Pattern Type dropdown says Lines.
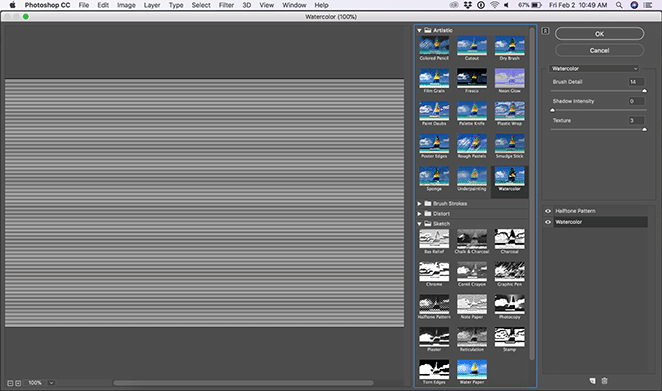
If you want to take it a step further, add another filter by clicking New effect layer under the Halftone Pattern effect. Under the Artistic dropdown, select Watercolor with the brush detail set to 14, shadow intensity set to 0, and texture set to 3.
Note: How you order the effects will change it slightly. When the watercolor effect is above the halftone effect, the image will appear lighter. If the halftone is above the watercolor, the image will appear darker.
Finally, in the layers window, change the blending mode to Overlay and the opacity to 50%.
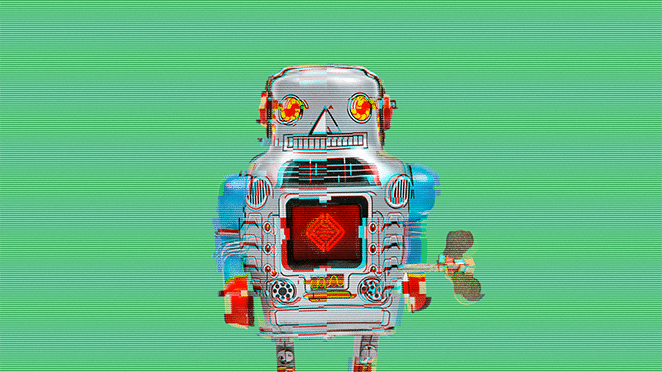
And that’s it—now you have your own glitch effect! Your image should look like it just came out of a 90s computer.
While that (hopefully!) wasn’t too difficult, there is a way to speed this process up.
The Glitch-a-tron: A free Photoshop action!
Our awesome designers have created an easy-to-use Photoshop action that applies these steps to the image of your choice with just a couple of clicks! Download the free tool below and then follow the rest of the tutorial.
How to Use the Glitch-a-tron
Install the Action
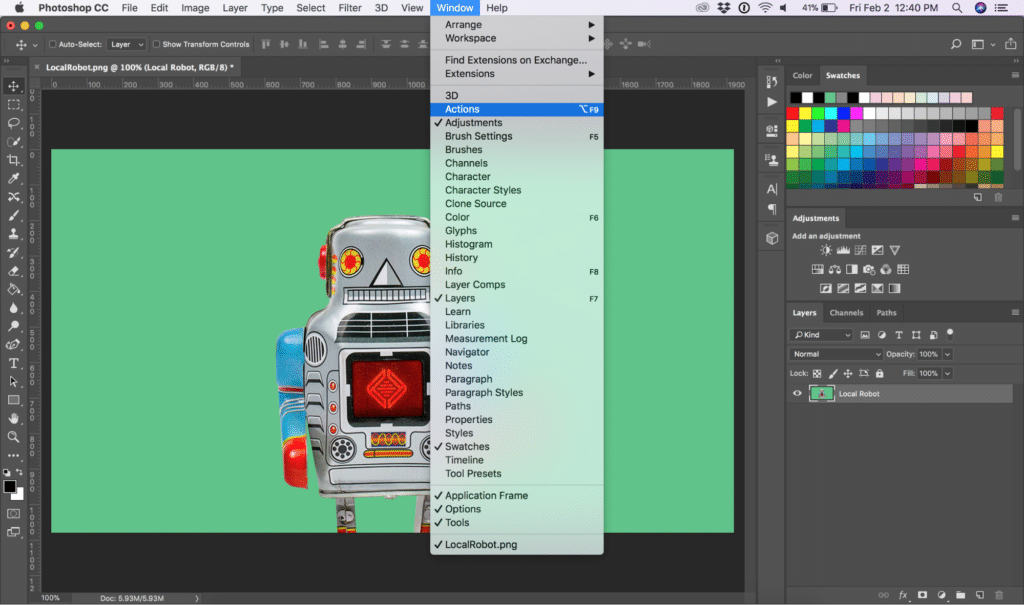
Once you’ve downloaded the action, double-click the file to install it. Open the image you’d like to use in Photoshop, and then open the Actions window.
To navigate to the Actions window, select Window > Actions or hold down Shift + F9.
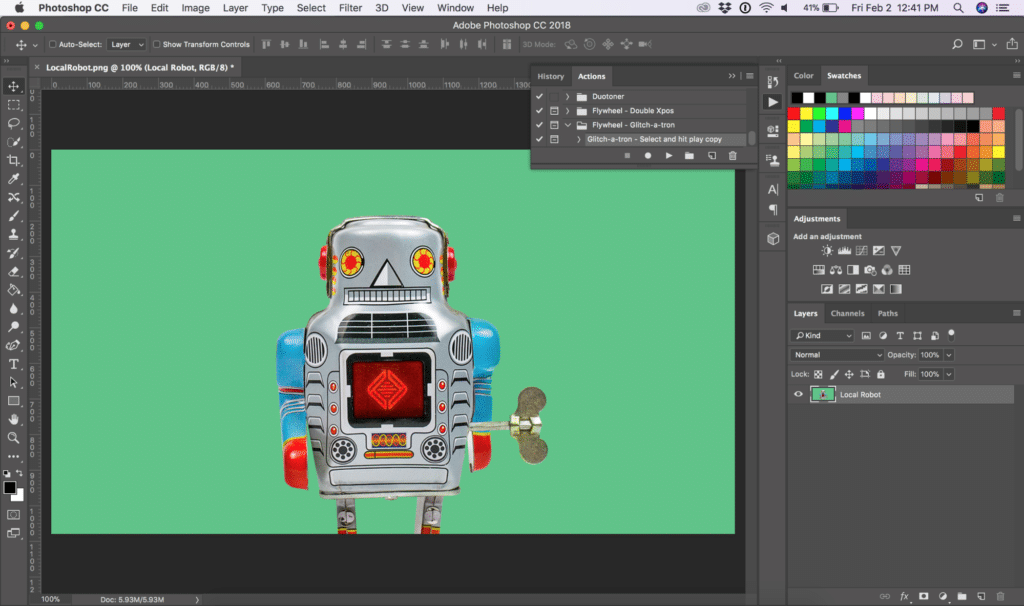
Once you’ve opened the Actions window, select the image layer you want to apply the glitch effect to.
Select and Play the Action
Click the drop-down on the “Flywheel – Glitch-a-tron” folder. Now, select “Glitch-a-tron – Select and hit play” and press the triangle play button at the bottom of the window.
Adjust the image using the layers
Depending on your desired effect, you can toggle various layers on and off, select and move masks or images, and adjust any other setting you choose.
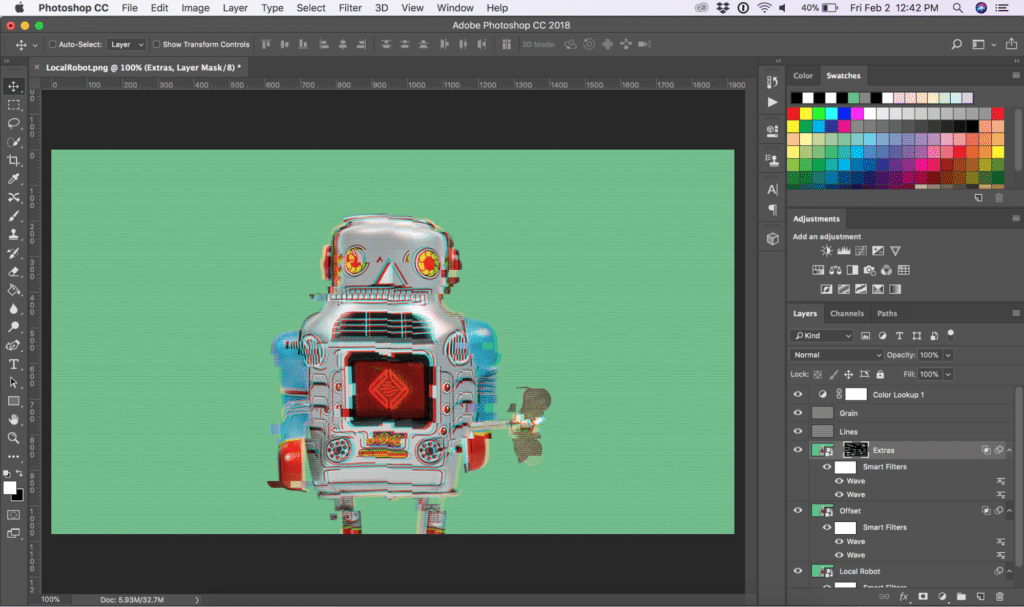
Note: Depending on the size of your image, you may need to resize or reposition the “extras” mask, as it’s optimized for 1080px by 1920px.
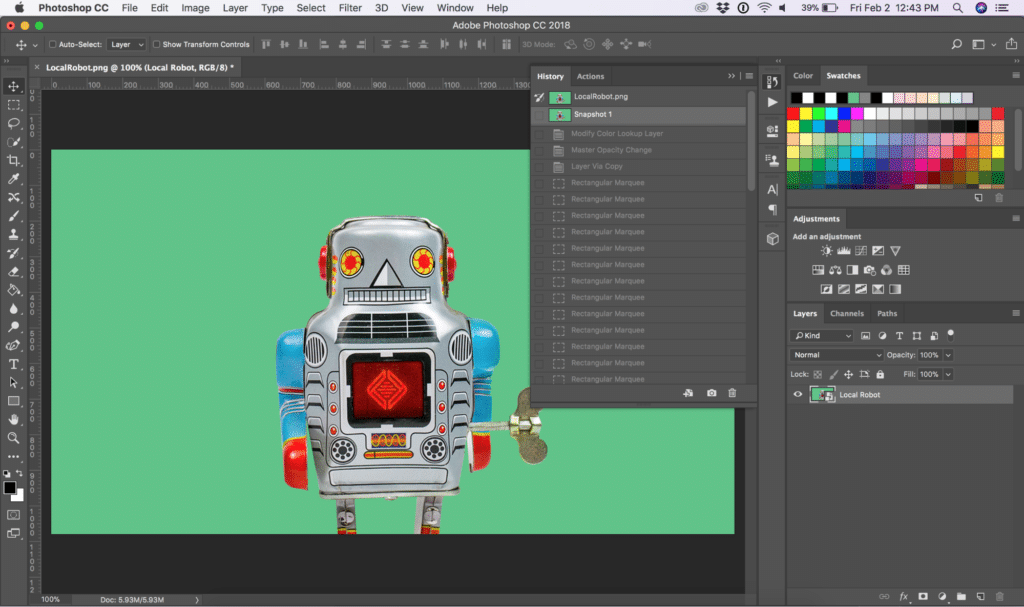
Bonus: Reset your image in a snap
Just in case you want to backtrack, the action automatically creates a screenshot that allows you to go back to your image before the action was applied.
Navigate to the History window by selecting Window > History. Scroll up to the top, and click “Snapshot.” This resets everything so you’re good to go!
There are so many uses for this nifty, time-saving resource. What projects are you going to use the glitch-a-tron for?
Want additional resources for building and designing incredible sites with WordPress? Visit WP Engine’s Resource Center for our vast library of educational, how-to content—created for WordPress users of all technical skill levels!
Find out more about WordPress hosting with WP Engine, or speak to a representative now.