


How to Add a PayPal Donate Button in WordPress
Running a WordPress website for a nonprofit organization will probably require you at some point to collect online donations. In the past, an organization’s website could include an address where people could send a check to help support the cause. This is obviously not the most efficient or practical way to fundraise money, and it has become much more commonplace for users to expect the capability of donating money online.
The most convenient and easy tool for achieving online fundraising is through the use of PayPal. If you are interested in setting up a PayPal account for a nonprofit organization with the intention of raising funds, visit PayPal for nonprofits to open your account. There are advantages to having a nonprofit account, such as discounted rates for the 501(c)(3) organization. PayPal is a safe and secure way of collecting money, and donors do not need their own PayPal accounts to give money; PayPal has an option that allows users to pay with a credit card.
There are some documents that are needed to set up a nonprofit PayPal account, so it is a good idea to have them all together before you start the application process. These include the 501(c)(3) determination letter for your organization, a bank statement or voided check from the nonprofit’s bank account, and information on how the money collected will be used. View PayPal’s site for a full list of documents required for a nonprofit PayPal account.
Once your nonprofit PayPal account is created, you will then be able to begin your online fundraising efforts!
To begin, visit the Create a Button page on PayPal. (This can also be found under “Selling Tools,” then “Create payment buttons for your website.”) Click on “Create new button” from the menu on the right. In Step 1, you will be asked what type of button you would like to create. Choose “Donations” from the drop down menu.
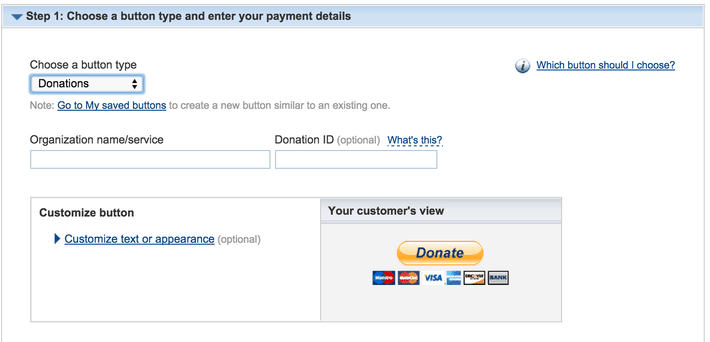
In the “Organization name/service” field, type in the name of your organization. Or, if you are running multiple fundraising events, you can fill in the purpose of this specific donation. The “Donation ID” field is not necessary, but if you want to track your donations, you can use that field to put in an identifying description. If this is not necessary for your purposes, you can leave it blank.
The next set of fields is associated with the look of your donate button. Click on “Customize text or appearance” to expand the button options. The Donate button can have the credit card logos below to show donors what forms of payments are accepted, or it can be removed. There are also two standard button size options from which you can choose. Here, you also have the option to use your own button image if you are not satisfied with the standard button that is provided. To add your own custom button, click to radial button labeled “Use your own button image.” Then, paste in the URL of the location of your own button.
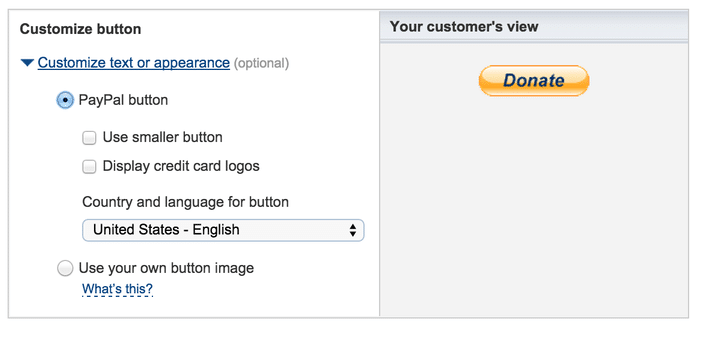
The default currency is USD. If you want to collect a different currency, use the drop down menu to change your selection.

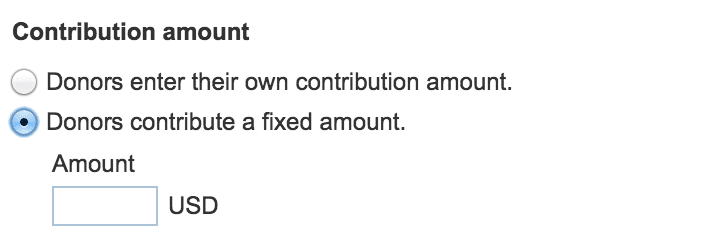
The next section sets the donation amount. If you want your donors to determine their own level of donation, the top radial button reading “Donors enter their own contribution amount” should be selected. If you are fundraising for a specific event, you can determine the level of donation to be a set amount. For this option, select “Donors contribute a fixed amount.” Then, enter the donation amount in the field.
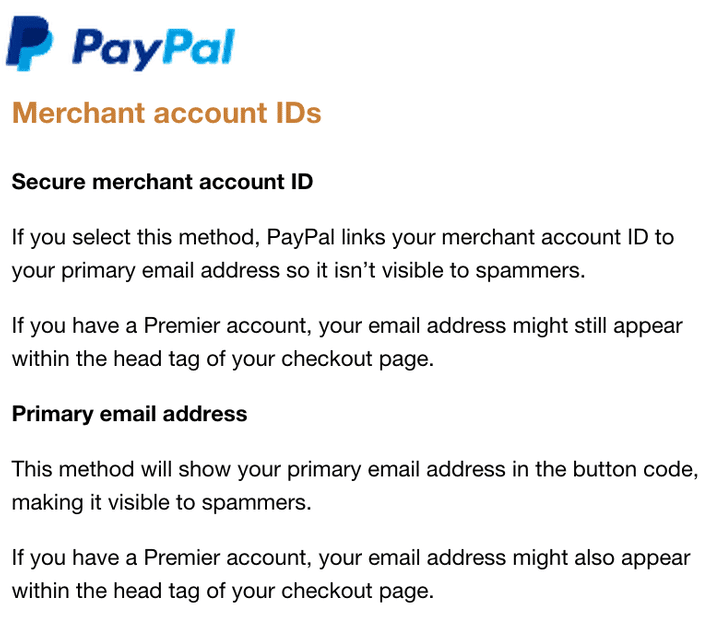
The next section is concerned with your merchant account ID. Choose the option that works best for your organization.
In Step 2, you have the option to save your button to your PayPal account. This is a good thing to do if you will be adding PayPal buttons to your site frequently. If you have it saved to your account, you will not have to go through all of these steps and create a new button for each fundraising effort. With the buttons saved in your account, you will be able to make future buttons using your saved buttons as a template. If you would like to have the button saved, leave “Save button at PayPal” checked. If this option does not interest you, simply deselect the box.

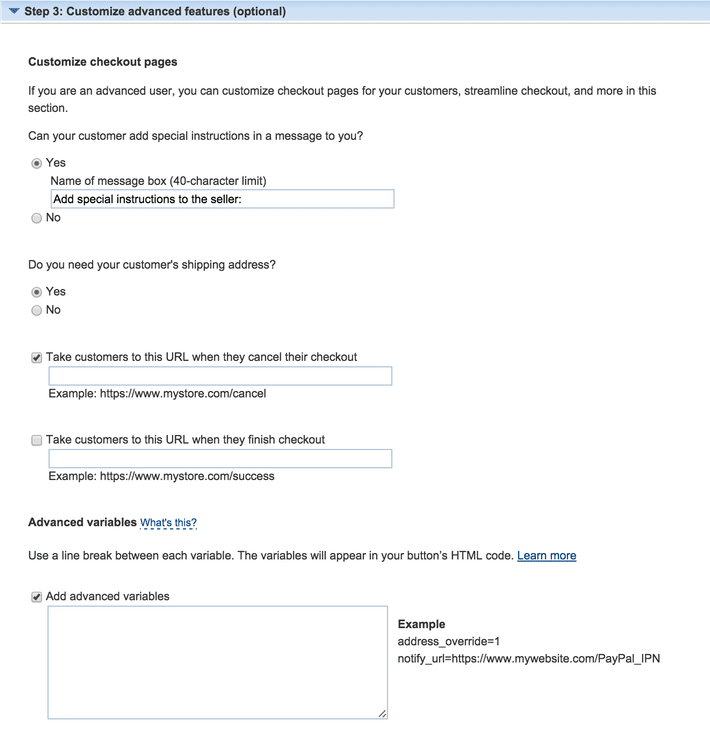
Step 3 is the final customization section before the button is generated. This area deals with more specific details associated with your donate button.
If you would like the donor to add special instructions, check “Yes” under “Can your customer add special instructions in a message to you?” You can then update the text box to the message that your donors will view.
If it is necessary for you to know the shipping address of your donor, check “Yes” under “Do you need your customer’s shipping address?”
Upon completion or cancelation of the checkout process, your donors can be redirected back to your organization’s homepage. This is controlled under “Take customers to this URL when they cancel their checkout” and “Take customers to this URL when they finish checkout.” Both of these URLs can be the same, or they can link to different custom pages that are created specifically for those purposes.
The final section called “Advanced variables” controls advanced options. For your basic donation button options, it is unlikely that you will need this option, so you can leave it blank.
Review all of your fields to make sure there are no typos or errors. Then, click on “Create Button” to generate the code for your PayPal donation button.

You will then be redirected to a page that includes instructions, along with the HTML code for your newly created button.
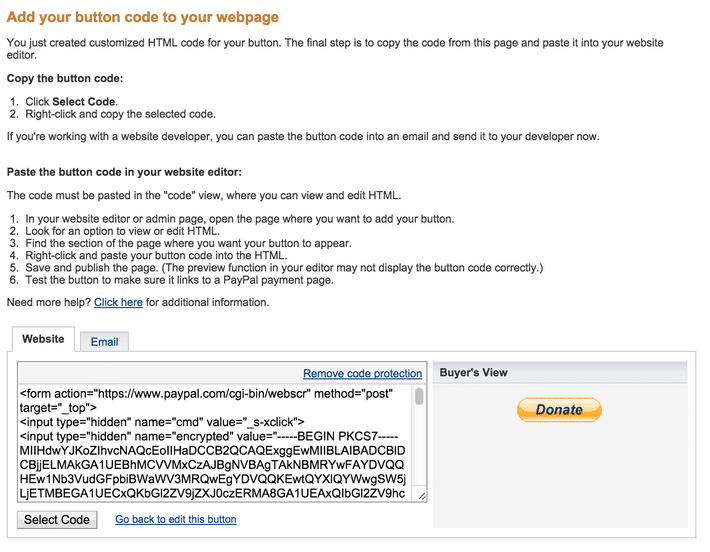
For self-hosted WordPress sites, make sure that the “Website” tab is selected, and select all of the code below, starting with the first “<” and ending with the final “>” at the end of the HTML section. It’s a good idea to paste the generated code into a text program such as Notepad, just in case you copy something else and close your PayPal window. It’s nice to have a “backup” of the needed code.
Now, you will go to your website’s WordPress dashboard, and add the donation button to your site. Login and use the navigation on the left of the WordPress Dashboard to find the page where you would like the button to appear. Your button can appear on either a blog post or a page within your site. You can navigate to the correct section by choosing either “Posts” if you would like the button to appear on a post, or “Pages” if it is to appear on a page. In both of those sections, you can choose whether the donation button will appear on an existing post or page, or if you’ll add a new post or page that will include the button. Once you decide the location of your donation button, navigate to the WYSIWYG Editor.
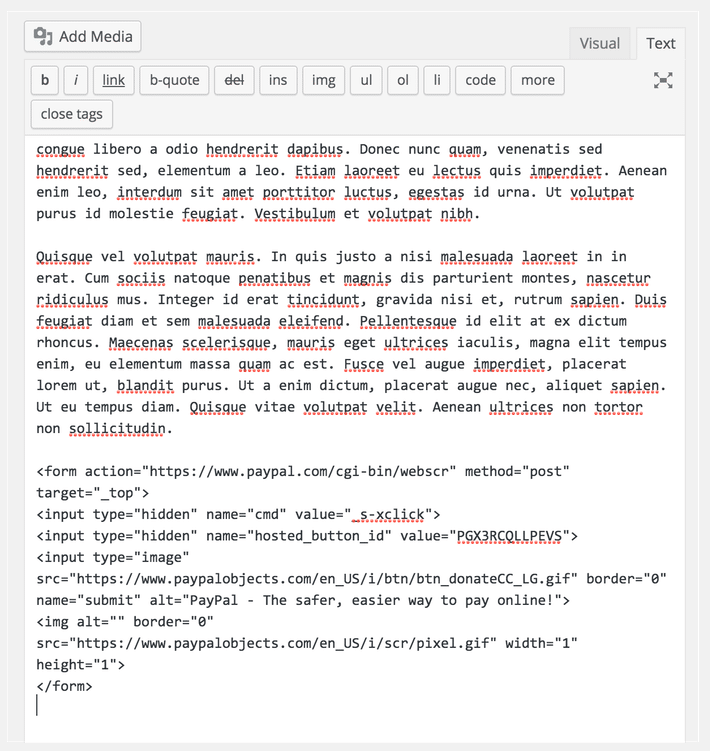
Please note that after the PayPal button code is copied into the WordPress WYSIWYG Editor, it shouldn’t be formatted. If formatting is done after the code is placed, it can sometimes break the button, and it will no longer work. If you want to add a title or format the spacing around the button, it’s best to do so before the code is placed.
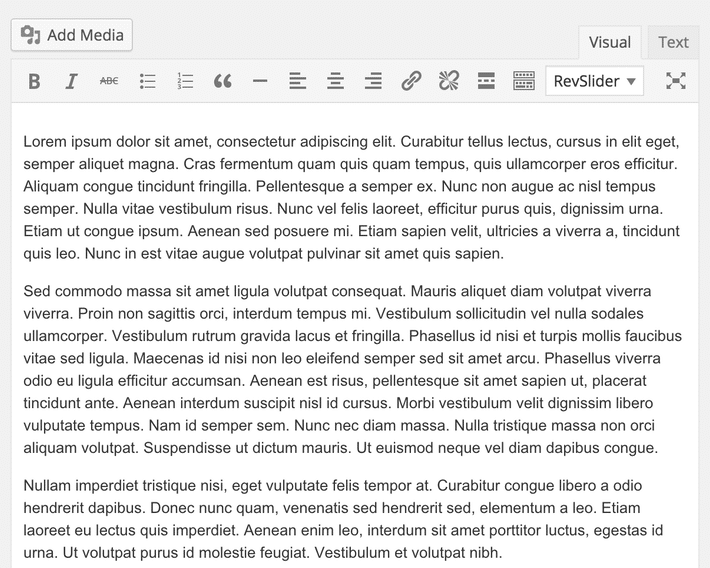
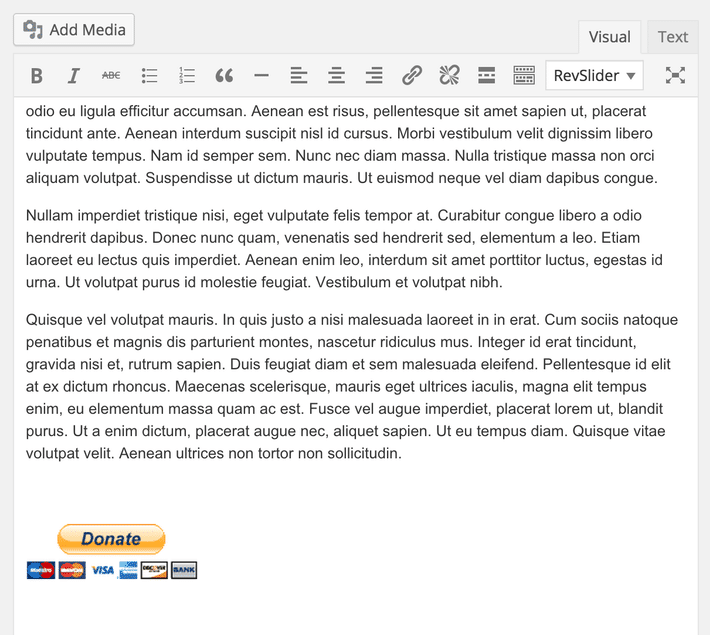
Once you have decided where the PayPal button should appear and have completed any optional formatting, be sure you have the “text” tab selected. The other tab is “visual,” and the visual tab will give you a preview of what the page will look like. The “text” tab is where you can add HTML code.
Place your cursor where you would like the PayPal button to go, and hit either “control + v” on your keyboard, or “Edit” and then “Paste” in your browser’s navigation bar. Your code will look something like this:
You can then switch over to the “visual” tab to see how your button will look. And it should look similar to this:
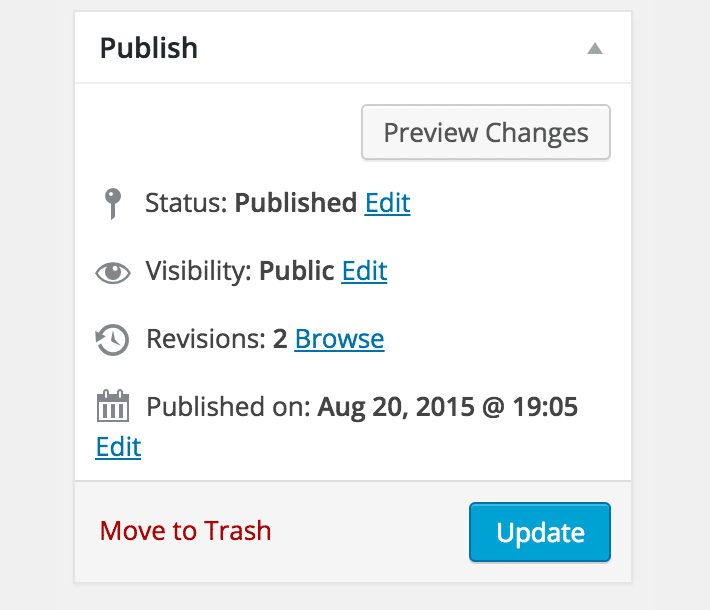
Then, depending on whether this is a new or existing post/page, click on “Publish” or “Update” on the right-hand side of the screen. This will publish your updates.
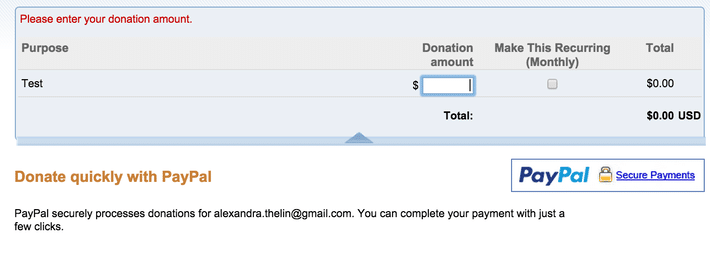
At this point, it’s good practice to visit your published page and click to make sure that your PayPal button works. Be sure you have signed out of your own PayPal account; you want to see what others will see when they visit your site and click on the Donation button.
You should be brought to a screen that looks something like this, depending on the customization options you selected while creating your button.
Your PayPal Donation button should now be fully functional and added to your WordPress site. Good luck on your fundraising!