


How to add options to the WordPress Customizer
One of the great advantages of using WordPress is the abundance of avenues to accomplish the same outcome. This especially rings true when adding options to your theme. I used the Options Page functionality of the Advanced Custom Fields (ACF) plugin quite effectively for some time, but I had been thinking about using the Customizer instead.
Switching to a new system of development is always hard; there’s a learning curve, which means investing time (and I already feel like I never have enough of it). So why change? If it ain’t broke, don’t fix it, or something like that, right?
Reasons for using the Customizer
- If at all possible, I try to make themes that are not dependent on plugins. This is especially true if a plugin has far more features than I need for the purpose of my theme. If the only feature of ACF I used was the Options Page, there was a better way – the Customizer.
- WordPress has been pushing people to use the Customizer for some time, so jumping on board is wise. Accomplishing consistency with the user experience is invaluable to the WordPress community, as a whole. If the platform is universally used as intended, we are all able to limit the potential bugs affecting our users’ sites as they make upgrades.
- Taking advantage of the live preview is a win for clients. This tool helps give our clients confidence in making changes to their websites by giving them a look at the adjustments in real time. If they can see the effects of their changes right in the moment, they can move forward on their own without needing additional assistance from us.
Using the Customizer was a bit overwhelming at first, but once I dove in, I found it easier than expected. So let’s break it down – here’s how to use the Customizer for theme options.
Pro-tip: The codex Theme Customization API is a great resource as well.
Structuring theme files
The following code should go into your functions.php file, or I personally like to create a new file specifically for this information in order to keep my functions.php file from getting too cluttered.
Here are the files I have in my theme folder that I’ll be referencing:
header.phpfunctions.phpinc/customizer.php
In my functions.php file, I include the following line so that it will load my Customizer file:
/**
* Customizer additions.
*/
require get_template_directory() .'/inc/customizer.php';
Add the settings and controls
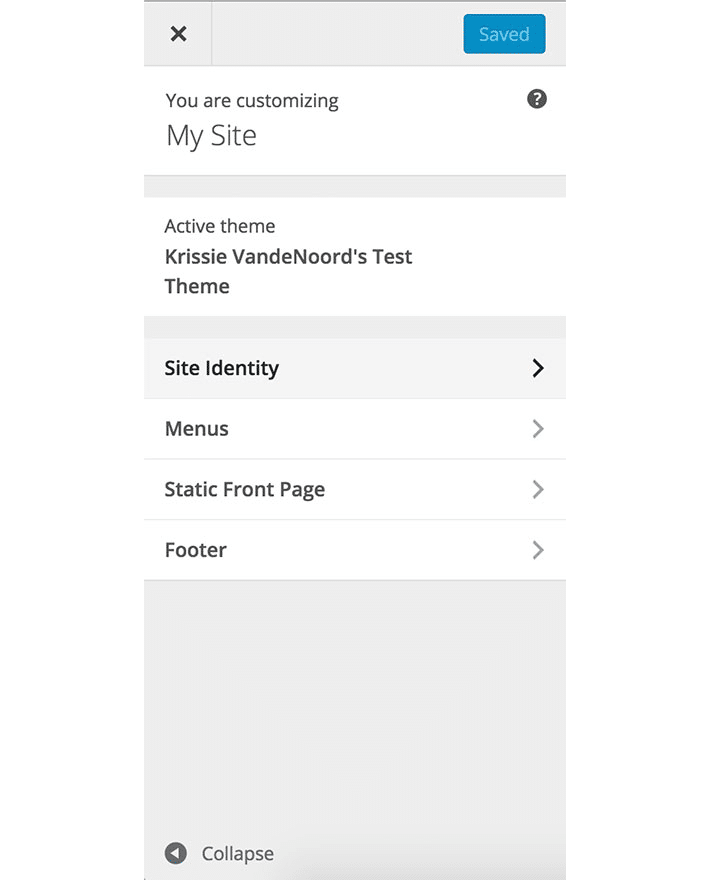
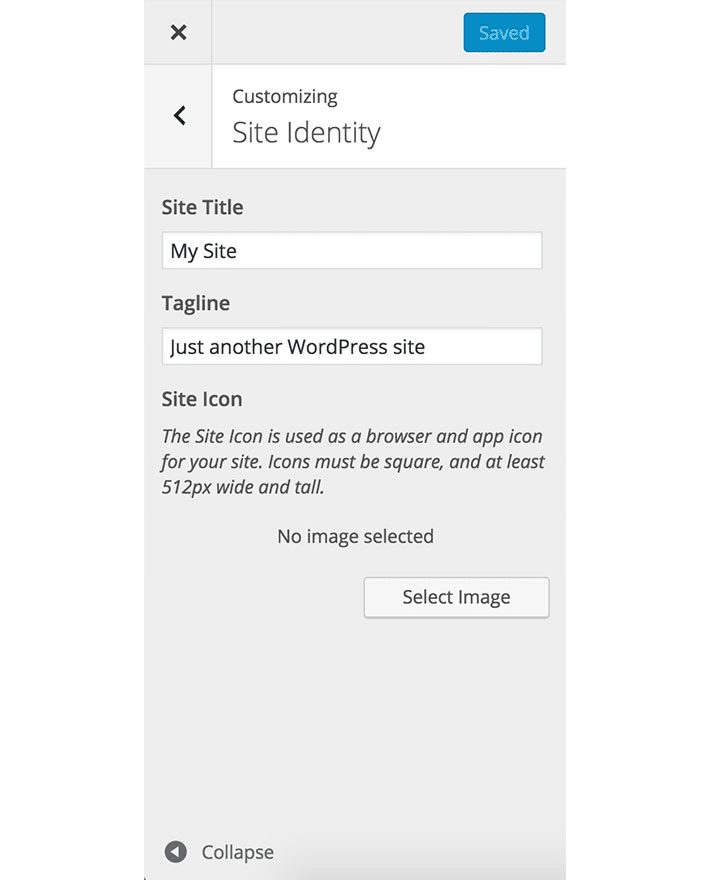
Now, let’s discuss how to add controls and settings to the Customizer. One of the options I always include in my themes is the ability to upload a logo. This is a cornerstone for any business site. By default, WordPress includes a Site Identity panel with a site title/tagline section in the Customizer. This is where we will add our logo field, using the customize_register hook.
We are going to create a unique function that adds the setting so that WordPress knows to store a new value, and then add the control for this setting to the Site Identity panel in the Customizer.
/**
* Create Logo Setting and Upload Control
*/
function your_theme_new_customizer_settings($wp_customize) {
// add a setting for the site logo
$wp_customize->add_setting('your_theme_logo');
// Add a control to upload the logo
$wp_customize->add_control( new WP_Customize_Image_Control( $wp_customize, 'your_theme_logo',
array(
'label' => 'Upload Logo',
'section' => 'title_tagline',
'settings' => 'your_theme_logo',
) ) );
}
add_action('customize_register', 'your_theme_new_customizer_settings');
The fields will now appear in the Customizer for your theme, but we also need to include the logo in the template files.
Use the option in your theme’s template files
So in header.php where you want the logo to appear, you’ll want to insert some code along these lines:
<?php
// check to see if the logo exists and add it to the page
if ( get_theme_mod( 'your_theme_logo' ) ) : ?>
<img src="<?php echo get_theme_mod( 'your_theme_logo' ); ?>" alt="<?php echo esc_attr( get_bloginfo( 'name', 'display' ) ); ?>" >
<?php // add a fallback if the logo doesn't exist
else : ?>
<h1 class="site-title"><?php bloginfo( 'name' ); ?></h1>
<?php endif; ?>
Well done! Your logo will now appear in your theme.
Adding additional panels
You can also add additional panels to the Customizer to better organize your options. I try to think through what is most intuitive and organize accordingly.
WordPress includes the following panels/sections by default:
- themes – Name of the theme
- title_tagline – Site identity
- colors – Colors
- header_image – Header image and site icon
- background_image – Background image
- static_front_page – Static front page
By including the following code in your unique function from the instructions above, you can create a new panel.
// Add Footer Section
$wp_customize-&amp;gt;add_section('your_theme_footer', array(
'title' =&amp;gt; 'Footer',
'description' =&amp;gt; '',
'priority' =&amp;gt; 120,
));It’s important to note that a panel will not appear unless there are settings and controls assigned to it. So make sure to add a control using 'section' => 'your_theme_footer', or whatever you named your new section.
Easy-peasy, right?
So there you have it, go test your new found skills and add some options to your theme using the Customizer.
What’s next?
Don’t try this on your live site! Try out Local! Learn more here.