


How to Create a Double Exposure Photography Effect in Photoshop
Double exposure imagery (also called multiple exposure, depending on who you ask) is a beautiful way to add a classy and unexpected aesthetic to your average, everyday photos. Although it’s commonly used with people, you can use this effect with any object.
In this tutorial, we’ll walk you through how to make a nifty little double exposure silhouette to keep your site lookin’ spiffy! So let’s’ dive into it.
- If you’re interested in joining the course and downloading the free Photoshop resources, jump to this section!
- If you’ve already joined the course, click here to jump straight to the template tutorial!
Selecting Your Photos
First things first: you probably want some resources. Picking the right photos is the key to creating a double exposure effect. For your main image, you’ll want to use a photo that you can easily delete the background from, so the simpler the better. (Headshots tend to be perfect!) Then for the filler image, you’ll want something full and bold that matches the look you’re aiming for. (Think nature or city scenes!)
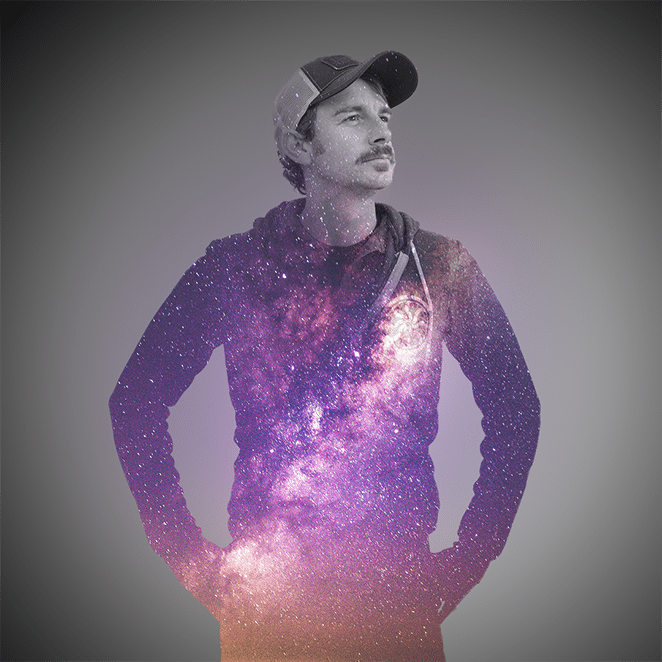
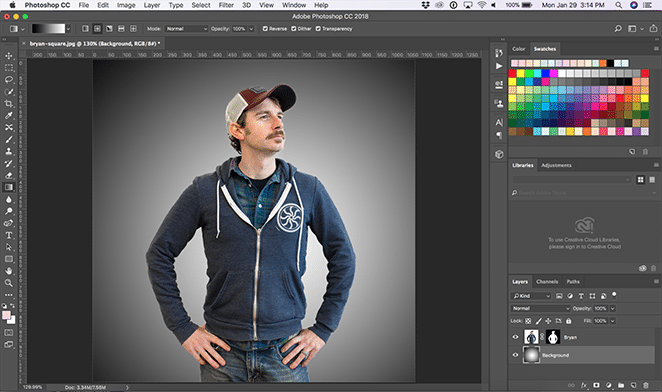
For this tutorial, I’m using an image of Bryan North, and this photo of a colorful starry sky from Unsplash. It certainly fits his shining personality! Here’s what we’ll create:
Make Your Selection
Open your main image in Photoshop, and create a selection using the Magic Wand tool. If that tool didn’t get the exact selection you want, you may want to clean it up a little with the Quick Selection Tool.

Tip: For an image like the one of Bryan I’m using, it may be simpler to select all the white space, then select the inverse.
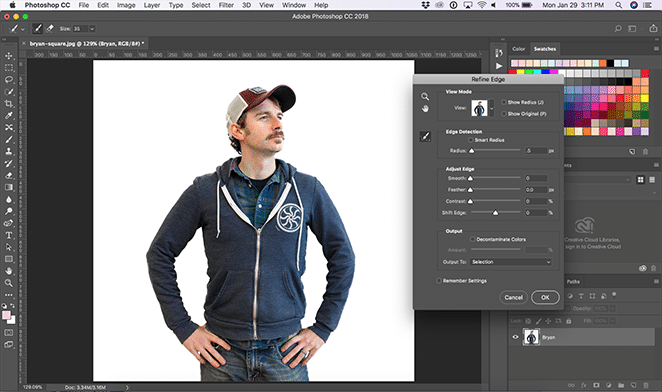
Refine the Edge and Create a Mask
Find the Select menu. Hold down shift and click Select and Mask. This brings up the Refine Edge Tool. Set your edge radius anywhere between 0 and 1.5 pixels. From here, you can draw around the image where the edge might need a little extra attention. A great place to do this is the face and hair.
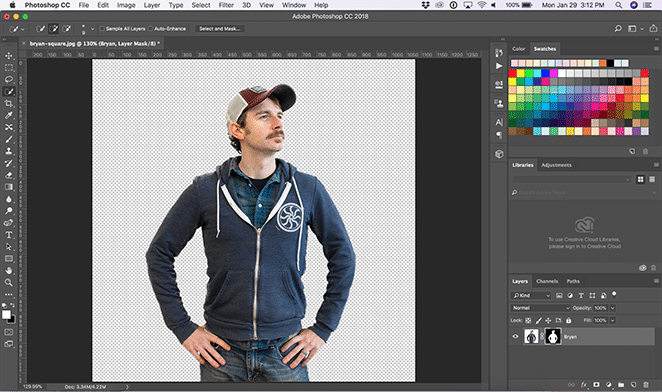
Next, click the mask button at the bottom of the layers panel. This separates the image from your background.
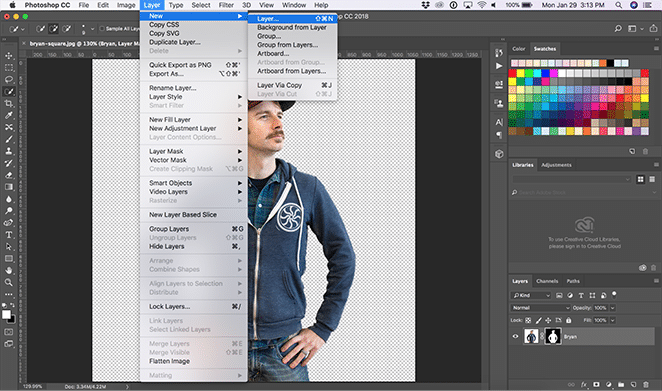
Create Your Desired Background
Create a new layer in the menu with Layer > New Layer. Give this a neutral color.
For this particular image, you’ll want to create a vignette. To do this, select the Gradient tool, choose Radial Gradient, select the black and white gradient, and then choose Reverse. Next, drag the cursor from the center of your image to the outer corners. Try it a few times until you get the desired effect.
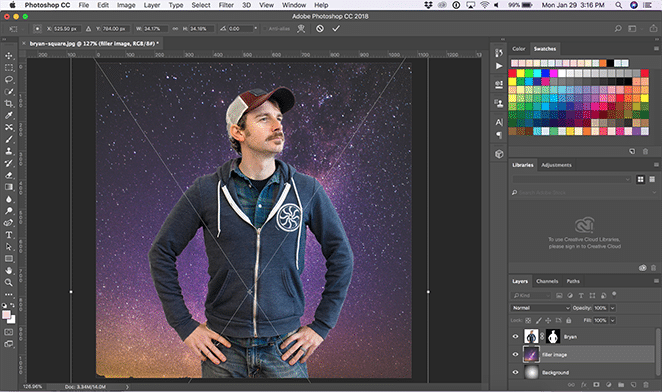
Add and Mask the Filler Image
Add your filler image in a new layer. Move and adjust it however you would like. With this sky image, I’m going to leave it as is with the vibrant color and scale it a little bigger to focus on the bright line of stars.
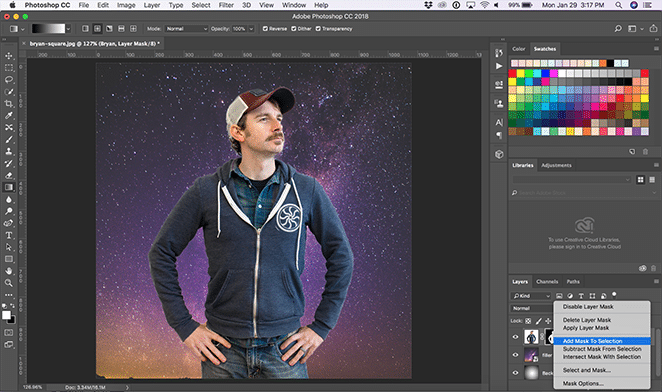
Left click the layer mask from the main image, and select Add Mask to Selection. The outline of the mask should now appear. Then, select the filler image and click the Mask button on the layers panel. Finally, unlink the mask to adjust the position of the photo however you like.
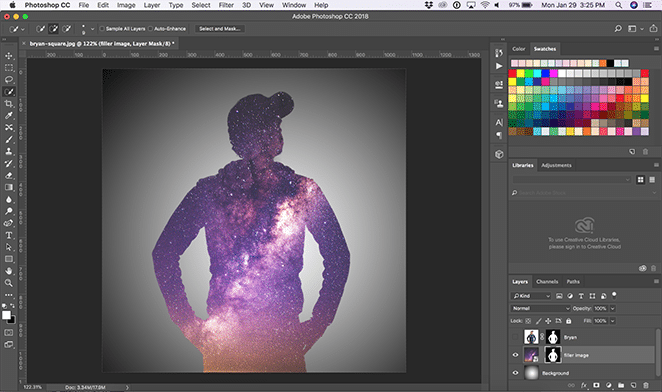
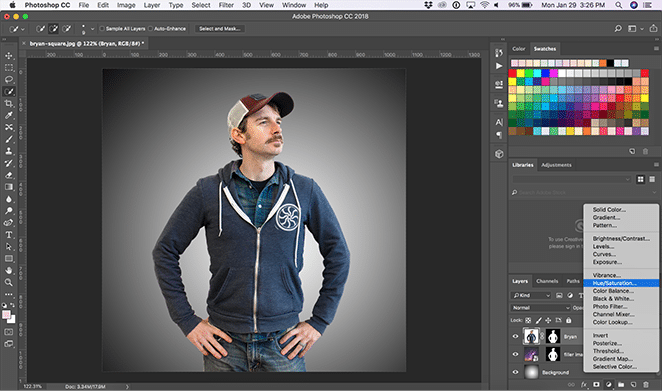
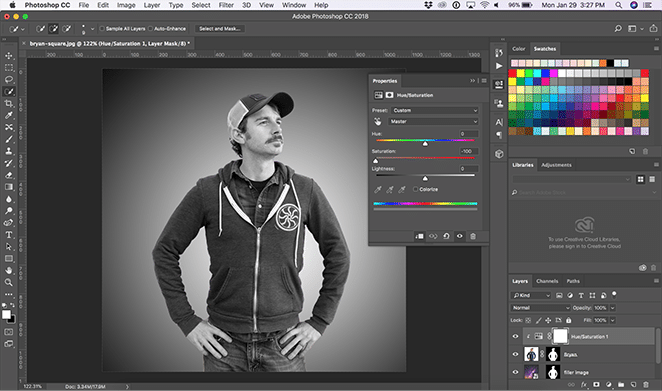
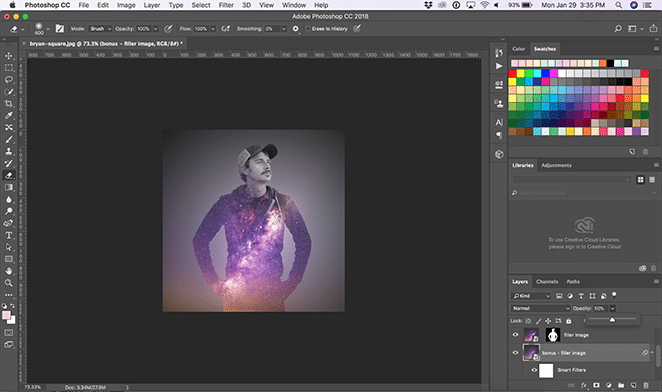
(Optional) For this image, I wanted to give the main image a black and white blending effect. Create an Adjustment layer and set the Saturation to 0. Then clip it to the main image layer below. I’m also going to bring down the lightness just a little for the effect I want. (You may also decide to make adjustments to this after the next step!)
Edit the Main Image Effect
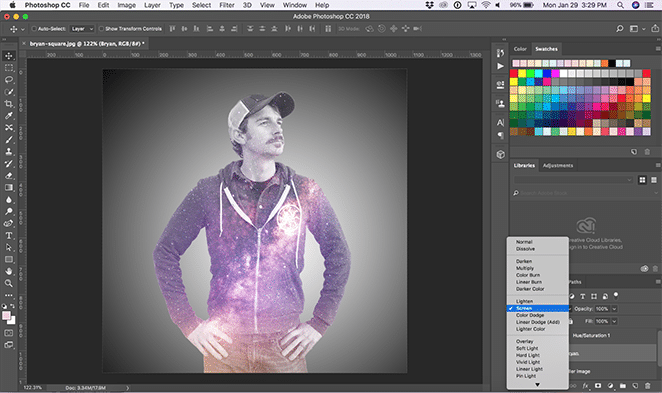
You’ll want to reorder your layers so that the main image (including the hue/saturation adjustment if you completed that step) is above the filler image layer, which is above the background image layer.
Now, depending on your desired effect, you can change the blending mode to Screen or Lighten to show parts of the whole main image showing through the filler image.
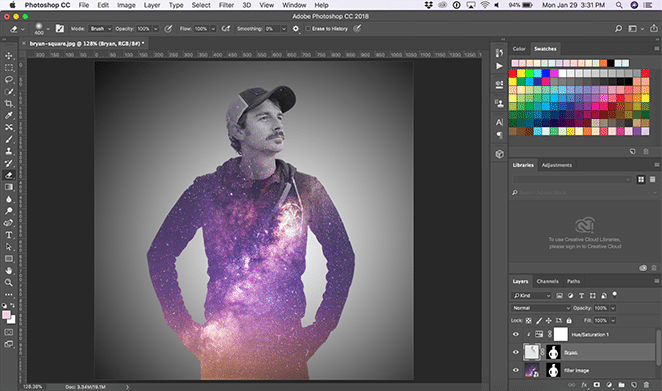
Another way to do this is to take the Eraser tool with a soft brush and gently erase the areas you want to hide on the main image.
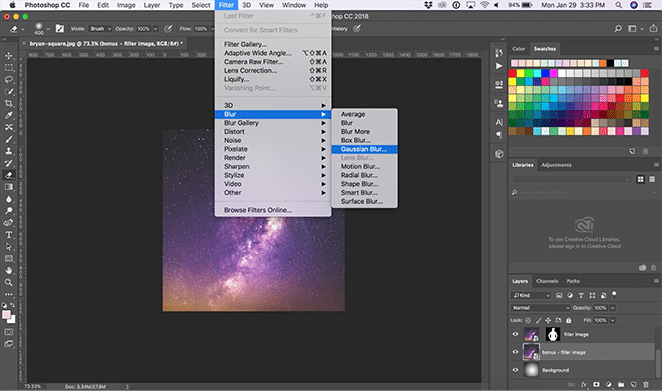
Bonus: Add Background Drama
Add the filler image in a new layer above the gradient background. With that layer selected, go to the menu and click Filter > Blur > Gaussian Blur. Then bring down the opacity to something like 50%. Then, with the Eraser tool and the large soft brush, get rid of some of the harsh lines to bring out the vignette.
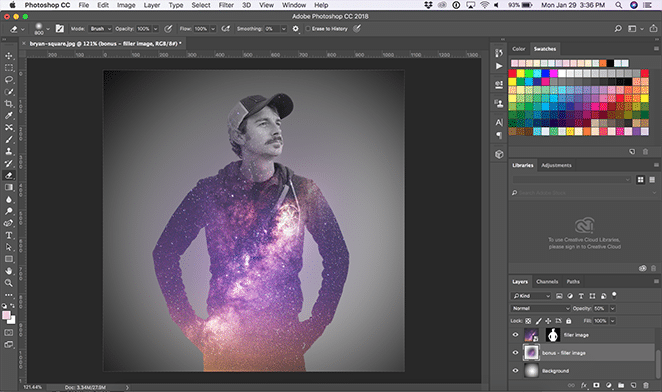
And that’s it! Now you have a beautiful double exposure image.
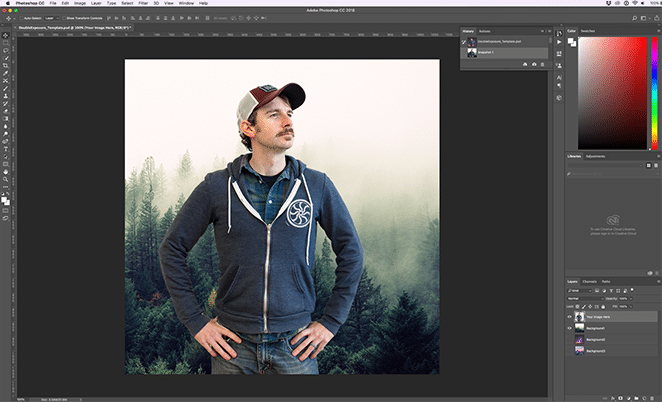
How to Use the Photoshop Action and Template
Open the Template
Once you download the template and the Photoshop action, double click to install the action. Then, open the template in Photoshop.
Want you use your own files? You can do this one of two ways. First, you can open the template and replace the files with your own. Second, you can open your own Photoshop file and load your main image with the background already cut out of it and your desired filler image.
Important note: The main image without a background should be in the layer above the filler image. If you’re using our template and want to try another background, you need to toggle the visibility with the layer you want and move it below the main image.
Before continuing, make sure the main image with the transparent background is selected.
Start the Action and Generate Your Image
To use the Photoshop action you’ve installed, navigate to Window > Actions.
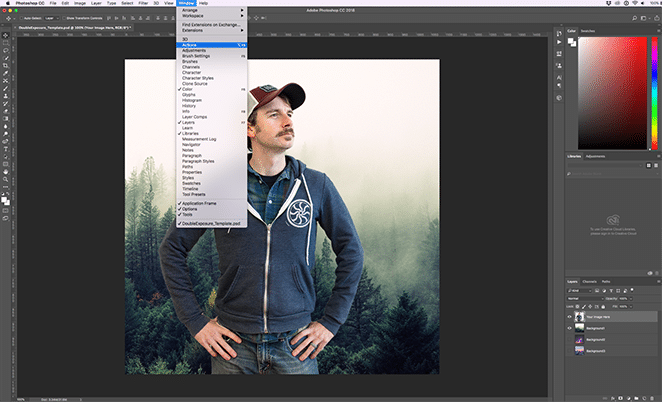
Now, open the “Flywheel – Double Xpos” folder with the dropdown arrow, and click “Double Xpos – select and hit play.” This generates your image with the double exposure effect!

Edit the Layers for Your Desired Effect
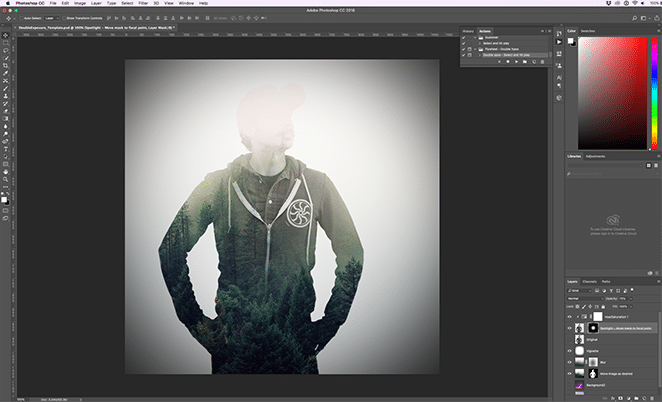
Select the mask on the layer that says “Spotlight – Move mask to focal point” and, just as it says, move the spotlight to the area you’re trying to highlight. For this example, we want to shine some light on Bryan’s face.
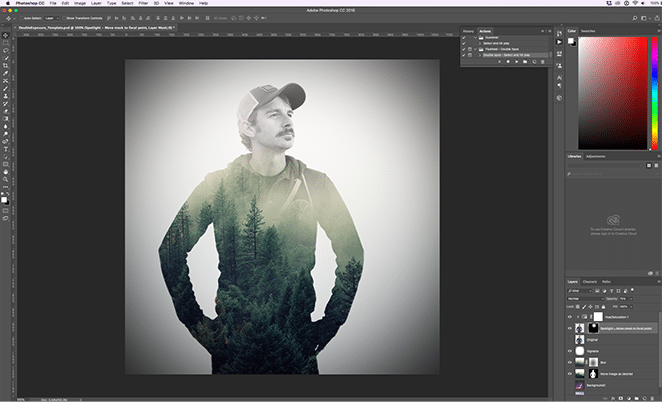
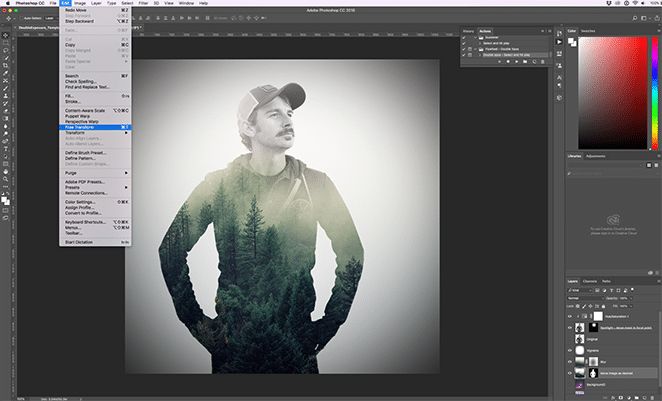
You can also move and transform the filler image. Select the Move tool and the filler image layer with the mask called “Move image as desired.” This will allow you to adjust the image. If you want to resize it, you can also select Edit > Free Transform or Command+T if you’re on a Mac. This allows you to resize and move the original image as you please!
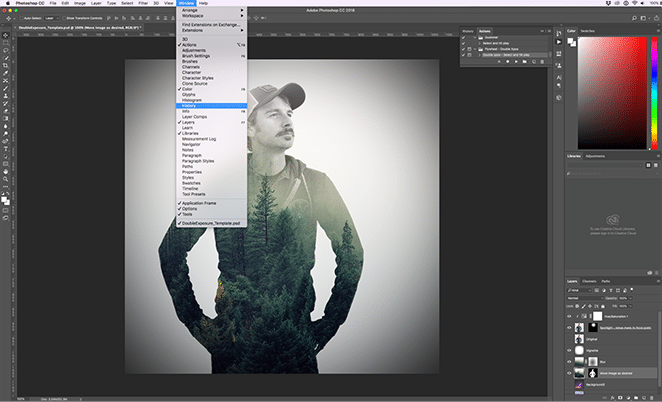
Bonus: Reset Your File
Navigate to Windows > History. From here, you can scroll back to the top and see a Snapshot. By selecting this, you’ll be able to reset your Photoshop file to the original before you used the action.
And that’s it! Now you have a beautiful double exposure image to show off. What projects are you going to use this action for? Give it a try, and let me know how it goes in the comments!