


How to Create a Multilingual WordPress Site
As the world’s leading CMS platform, it’s no surprise that plenty of international organizations – as well as individuals who just want to show their content in a variety of languages – are using WordPress to power their websites. Having your content available in multiple languages can be a great way to widen your reach and increase visitor counts, but where do you start when looking to go multilingual?
As with all things WordPress, there are a variety of ways to achieve this goal. Here I’ll explore two very different ways of creating a multilingual site that sit at either end of the spectrum in terms of available budget and translation requirements.
WordPress MultiLingual
WordPress MultiLingual (WPML) is probably the most well-established plugin that can help you create a multilingual site. This premium plugin comes in a number of versions for a variety of budgets (you can view them here) and provides the capability to add translated content to your site in a range of languages.
I won’t lie, if you choose to use WPML, there is quite a bit of reading to do. The documentation provided is extensive, but that’s just because of how powerful and flexible this plugin (or perhaps more accurately, suite of plugins) actually is. In addition to the core WPML plugin, there are an array of add-ons which may or may not be useful, depending on your own specific WordPress setup and translation requirements.
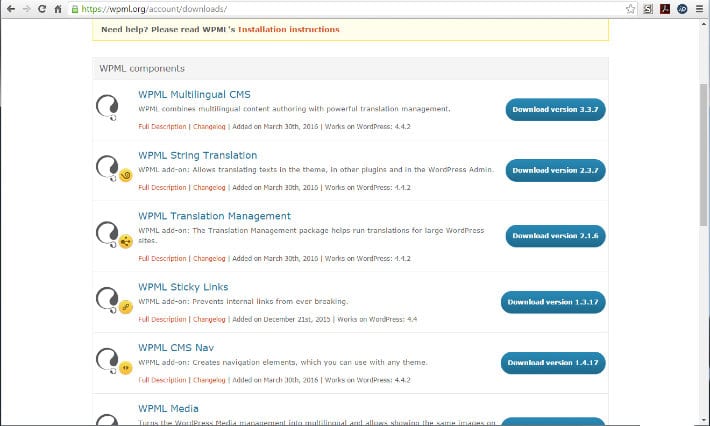
Setting up WPML requires a bit more than the average WordPress plugin installation. First, head to the WPML site, choose the level of plan that suits you, and purchase a license. You’ll then be able to head to the Downloads page to download the core plugin and any additional add-ons that you feel are necessary.
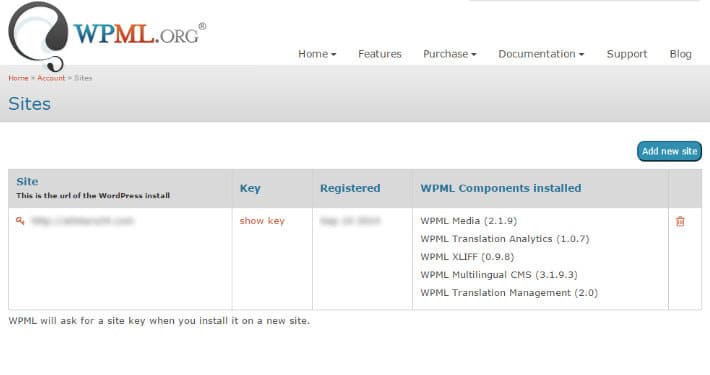
Once you’ve downloaded the plugin, you will then have to log in and upload it to your site through the usual “Add plugin” menus. Part of the set-up process when adding to a site for the first time requires a site key. This is to verify that you are a paid subscriber of WPML and stops users from sharing freely with others. To add a site key, head back to your WPML account and select the “Sites” option. Here, you’ll see an “Add key” button. Clicking this gives you an area to fill out the URL of the site that you’re adding WPML to. Once filled, a site-specific key is generated that you then need to copy and paste into the relevant area within the back end of your WordPress site.
After registering your site, you’re ready to start configuring WPML.
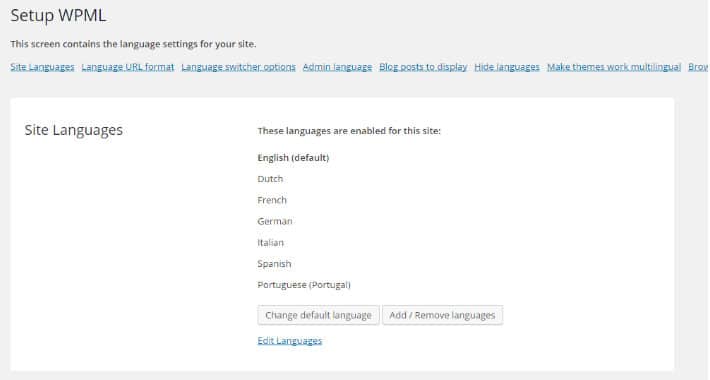
There are a number of choices to make depending on how you want to manage the translation of the content, with options to give translators direct access to the back end of the site with varying degrees of authorization, automatic duplication of featured images and media, the different languages that you are looking to translate to and much, much more.
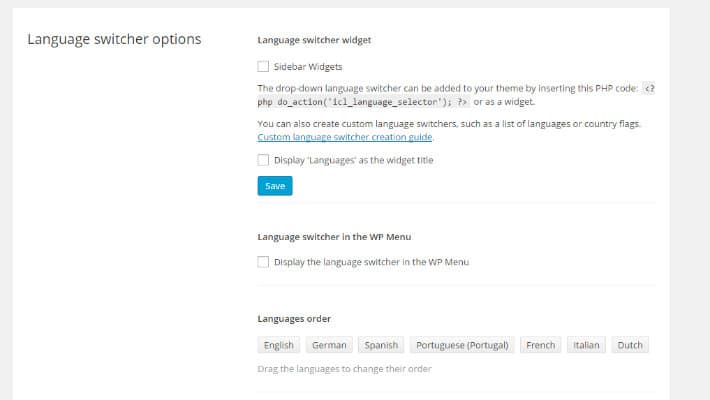
In addition, WPML lets you decide how you would like visitors to view your translated content, including dynamic targeting based on visitors geographic locations, language drop-downs, flag icons, and whether you want the whole site to remain within the translated language for the duration of the visit.
And remember, this is very much a snapshot of just some of the flexible settings that are available – there are many more options to play with.
WPML provides easy to understand menus and adds translation columns into the pages and posts summary within your WordPress installation to allow you to instantly see what pages have been translated and into which languages.

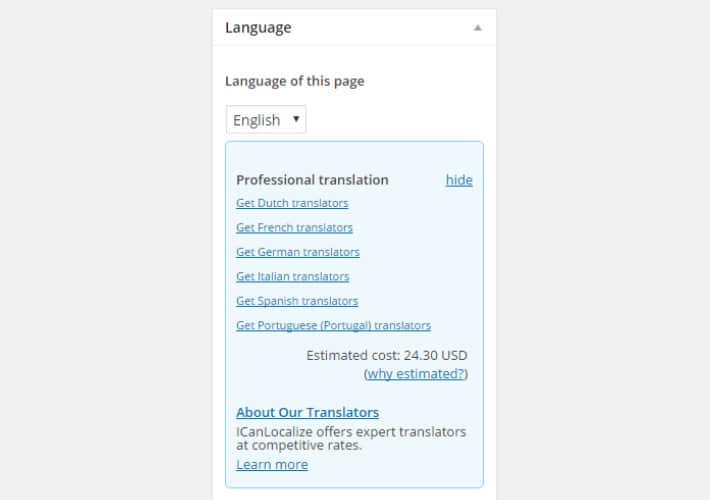
When editing individual pages and posts, you’ll also see a new sidebar that provides instant, post-specific access to translation options, which also includes an estimated cost of translating the current content of the page or post using a bank of WPML’s recommended translators, and (depending on the add-ons installed) options such as whether to duplicate or translate media items.
You can add the language switcher to the WordPress menu as a widget or by using a line of PHP, if you’re comfortable with your code, so there’s plenty of flexibility in terms of where users can change their language preferences.
In addition to providing plenty of pre-sales and set-up documentation, the plugin is incredibly well supported with a comprehensive forum, tutorials, and the speedy response times that you would expect from a premium plugin.
Put simply, if you have the budget available and are either planning on carrying out the translations in-house or employing professional translators, this is probably the best place to start. Just make sure that you also put adequate time aside to set up and configure the plugin, and be ready to do some reading!
Transposh
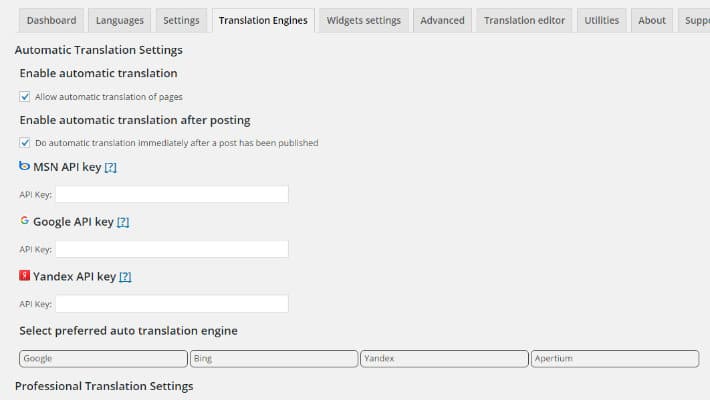
This second option sits squarely at the other end of the spectrum from WPML. Don’t get me wrong, it’s still a very powerful plugin, but in a very different way. Transposh provides a way of using machine translation to turn a single language site into a multilingual one in just a few clicks. Initial translations are handled by engines such as Google Translate, Bing Translate, or Yandex, which automatically turn your content into any of their supported languages – with a choice of up to 95 in total!
The issue here, of course, is whether these automatic translations are particularly accurate. For example, your messaging may change completely when turned from English into Greek, as colloquialisms and dialect-specific sayings are translated on a word by word or more verbatim basis. If you don’t speak the language yourself or have a trustworthy source to check it for you, you could be seriously damaging your brand, or worse, insulting your visitors without even knowing it.
All that being said, once the content has been auto-translated, Transposh provides the option to manually edit translations, therefore providing a way to alleviate this issue… if you know your languages!
Setting up Transposh is a simpler process than WPML. The team behind Transposh have said that they no longer keep the version in the WordPress repository updated (for unknown reasons) so if you want the latest version, you’ll first have to head to the Transposh site and download the plugin zip file from the “Download” tab on the menu.
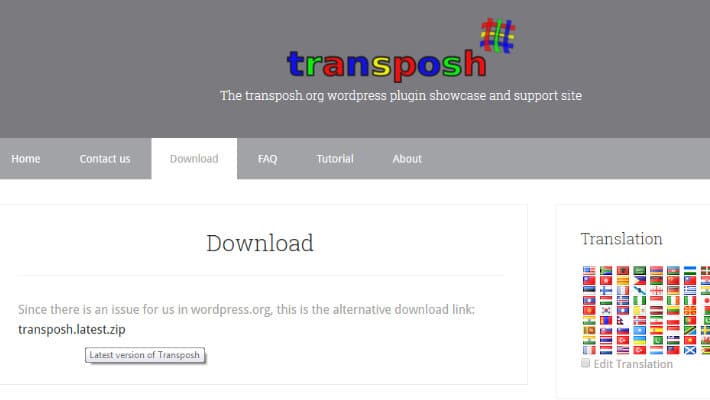
This will download a zip file that you can then upload to your WordPress site through the standard WordPress plugin uploader, or if you prefer you can add it via FTP.
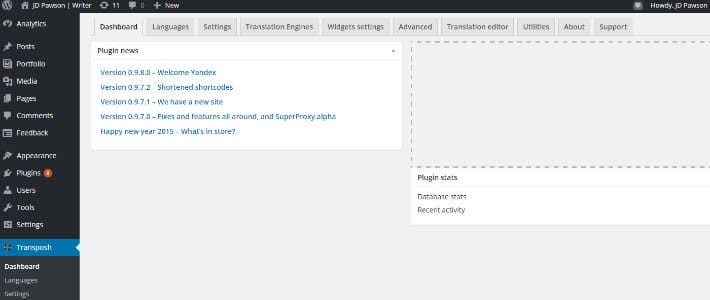
Once you’ve installed and activated the plugin, you’ll see a new menu item that gives you access to all of the Transposh options.
Starting with the dashboard, Transposh’s settings are laid out using a horizontal tab structure that makes configuration a nice, step-by-step process.
First up, the “Languages” tab instantly gives you an idea about just how many languages are supported by Transposh.
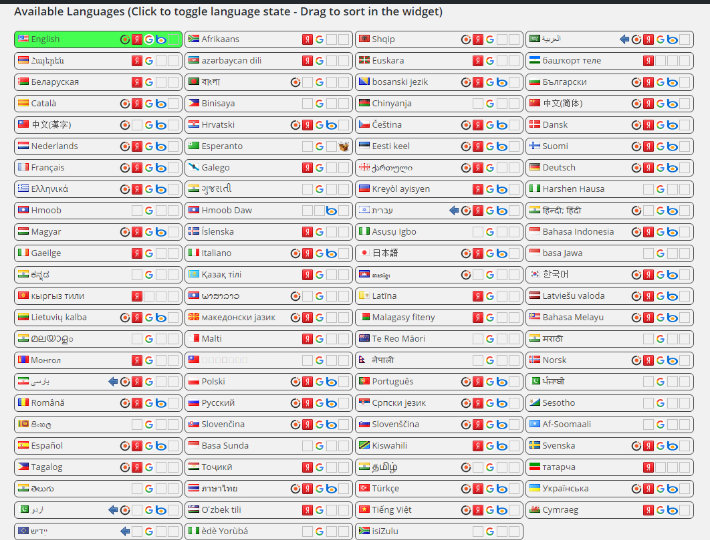
You can also choose which language is the default and whether to show the language names in English or the native language itself.
The “Settings” tab allows you to choose various configuration options such as what level of user can edit translations, allowing search in translated languages, and so on.
Note: I recommend that you change the check boxes for “who can translate” immediately here to ensure that only trusted individuals are able to make changes to the content on your site. This will vary depending on the user levels that you use on your site, but I strongly recommend that you deselect the “Anonymous” box, as this will allow any visitor to change the translated content, allowing them to write whatever they want!
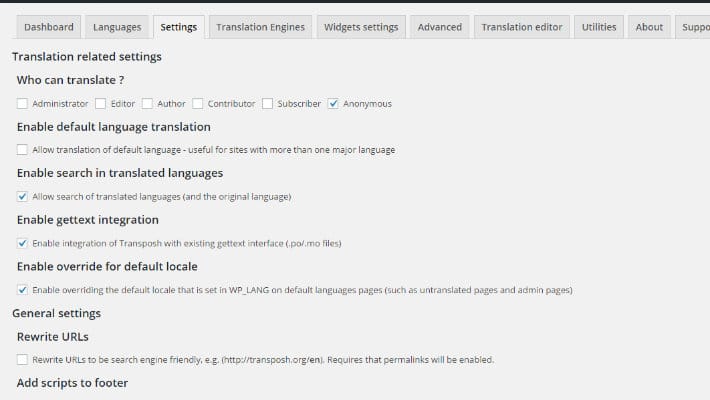
The “Translation Engines” tab allows you to set up various options for the automatic translations while the “Widgets settings” gives a few options for how you want the language switcher (which sits in a widget area) to behave.
Advanced options can, for the majority of people, be ignored, but if you are an advanced user, you may want to look under the hood here to see what you can tinker with. The next menu “Translation editor” is where you can manually change the automatic translations provided by the translation engines. This is where you’ll want to head if you find out that your automatic translation isn’t actually translating your message as intended.
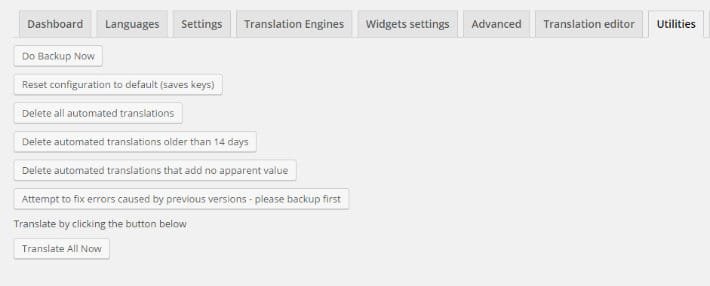
In the “Utilities” tab, there are various options that will allow you to translate all content with a single button click, remove all translations, and so on.
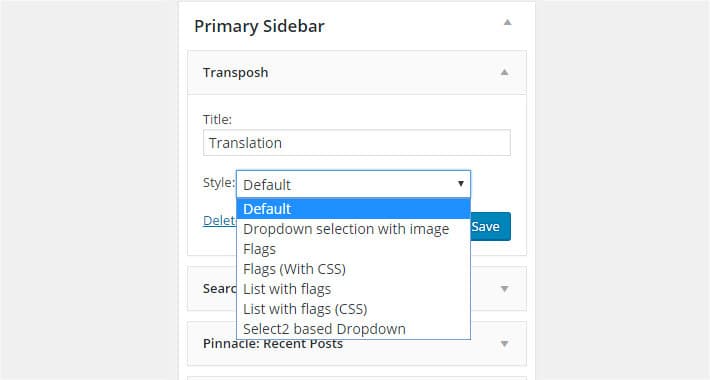
Then you’ll just need to add the Language Switcher to a widget area by using the Transposh widget and choosing a style.
The plugin can be set up to work when you publish a page or post, so if you have content from before you installed it that you want to translate, you can either use one of the utilities as described above to translate all content, or you can manually edit the item that you want translated and then simply hit the “update” button. This acts as if you have published the page or post in the eyes of Transposh and as a result, it will begin translating your content into the languages you’ve previously selected. You’ll see a progress bar appear under the “Transposh” menu in post/page editor.
Once done, you’ll find that your post is available in the language. Alternatively, the plugin can work without this step in the process, and instead translate content on-the-fly.
On running through the process of setting up Transposh, I did run into a small hitch, in that content didn’t appear to be translating properly when Google was set as the default translation engine. Researching this revealed that other users had also been having some issues with Google’s auto-translations of late, but switching to Bing as the primary translation engine sorted this issue immediately.
The plugin’s site does provide some FAQs and quick tutorials to help you get started, and gives you a contact form to get in touch with the developers should you run into trouble. But you may well find that support is not as forthcoming as a premium, paid-for solution – after all, Transposh is free. Transposh is also available in the standard WordPress plugin repository and has a limited set of FAQs, screenshots, and forum entries there, but the developers have made it clear that their preferred method of contact is through their own website.
If you are looking for a very quick way to translate your site, have a very limited budget (or even no budget at all), and would prefer the site to be automatically machine-translated rather than translating content yourself or paying for professional translators, then Transposh is a very good option. If you choose Transposh (or any other machine translation option) then just be prepared for the fact that your content may actually read very differently from your initial intention in other languages.
These are just two examples of a wide array of plugins available that can help you turn your site multilingual; there are many others out there that offer similar features and functionality. However, these two showcase opposite ends of the multilingual spectrum and are a very good starting point when looking into the potentially daunting prospect of turning your single-language site into a multi-language one.
All that’s left to say is bonne chance, viel glück, buena suerte, or good luck!