


How to Use Contact Form 7
Including easy-to-find contact information on the websites you build is a great way to help users get ahold of you (or your clients!) Sometimes, an email address is all you need, but if you’d like to automate the process with a little more functionality, a contact form can help ensure that you always get the information you need from the people trying to reach you.
While you could build your own custom plugin, there are a number of great form plugins already available that you could install—Contact Form 7 is one of them.
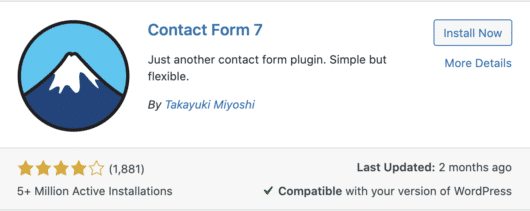
With more than five million active installations, Contact Form 7 is the most popular form plugin in the WordPress plugin directory, and it’s a great solution for many of your form needs.
It’s also regularly updated and includes lots of customizable choices, numerous options for multiple forms, and great support in general.
Ready to give Contact Form 7 a try? Let’s set it up!
Install It
To install Contact Form 7, just go to Plugins > Add New. Search for “Contact Form 7” and click Install Now.
Build the Actual Form
Once you’ve installed the plugin, navigate to the new Contact tab and select Add New.
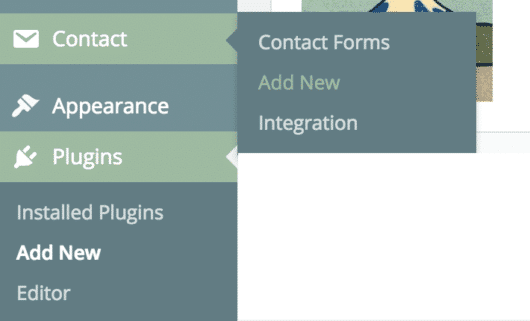
Select the language you’d like to use, and again, hit the Add New button.
Now we’ll build the actual form. As a default, you’ll see a form that asks for “Your Name (required),” “Your Email (required),” “Subject,” “Your Message,” and a Send button.
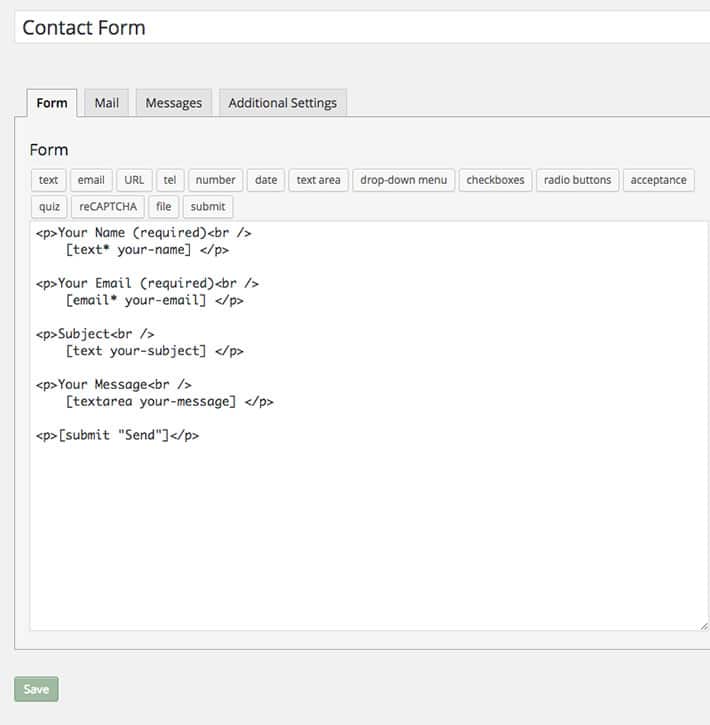
From here you can add, remove, or simply edit any of these fields to meet the needs of your site. To add a new tag to the form, just click the relevant button (text, email, URL, etc.). A new window will open with further options, such as if the tag is required or if you’d like placeholder text until the user fills enters their own.
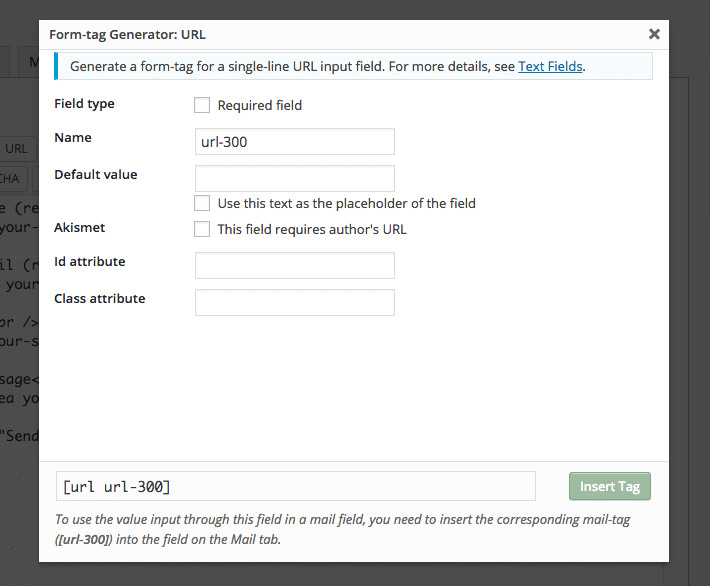
Once you hit Insert Tag, you’ll see a new line added to your form that looks something like this:
[url* url-300 placeholder "www.website.com"]That’s a good start, but you’ll want to add text above that tag so users know what you’re looking for.
Start a new paragraph, enter your text, add a break before the tag, and then close it with a paragraph. It should look like this:
<p>Website URL <br />
[url* url-300 placeholder "www.website.com"] </p>
Once you’re done setting up your form, hit Save. Don’t worry, you can always make changes later on!
Set Your Email Preferences
When someone submits a form, you’ll get an email with all of the information they’ve provided. In the Mail tab, you can arrange the information in that email using the same tags from your form. At the top of the page, it’ll tell you which tags you can use.

In the Message Body section, you can use those tabs to arrange how the email you’ll receive will look. This makes it super easy to see everything your clients submit.
Again, once you’re done, hit Save.
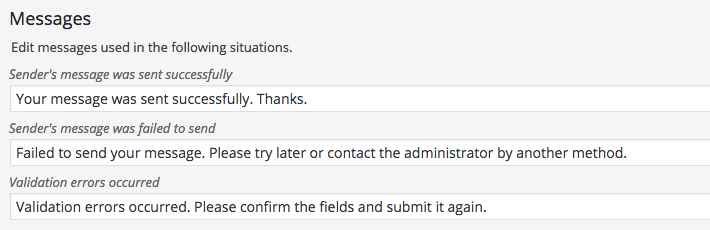
Edit the Automated Messages
The Messages tab allows you to control messages a user sees when they submit a form. This includes anything from error messages to notifying the user that their form was successfully submitted.
There are default messages for just about every use case, so if you’re not too concerned about adding a unique tone of voice, you can probably skip this tab. But if you’d like to add a little personality to your form, these messages are a great way to do so.
Once you’ve made any changes, go ahead and Save.
Add any Additional Settings
The last tab, Additional Settings, allows you to add some specific code snippets to your form. You can view these functions here.
Once you’re finished with any additional settings, hit Save, then copy the shortcode from the top of the page.

Finally, paste that shortcode onto the post or page you want the form on, and voila! You’ve got a contact form on your site.
Contact forms are just the tip of the iceberg when it comes to all of the great marketing functionality available for WordPress sites—what we often forget under the waterline of that iceberg is all the important performance optimizations provided by your host.
If you’re looking for a more performant WordPress hosting partner, check out our plans!