Getting Started With Local as Your WordPress Development Environment
While your websites are (naturally) hosted online, there are plenty of situations in which you may want to create a local WordPress site. For example, you might need to set up a staging environment to develop your site before it goes live, require a safe place to experiment with designs, or perform troubleshooting.
In any of those scenarios, all you’ll need is the right solution. When it comes to creating an offline WordPress site, Local is one of the most intuitive and powerful tools for the job. This solution makes it easy to install WordPress on your computer, clone your site, and even push your local version live.
Here’s what we’ll cover in this article:
- An overview of local WordPress development
- An introduction to Local (a free app)
- A quick, three-step tutorial to get started
Let’s get started!
An Introduction to Local WordPress Development
If you want people to visit your website, it will have to be hosted online. In fact, one of the first things you’ll typically do when setting up a new website is to sign up for a hosting plan.
However, there are times when you’ll want to work on a “public-inaccessible” website. A “local site,” also known as a “development site,” is a website stored on your own computer. This means no one is able to access it unless they’re logged into that specific device (and have the right credentials).
Local sites have many uses. Some of the most common include:
- Experimenting with and learning a new platform.
- Building a new site offline, so no one will see it in a half-finished state.
- Redesigning or making large-scale changes to a live site.
- Performing troubleshooting, to fix a hack, error, or other issue.
- Creating a site for a client, to keep it private but enable collaboration and feedback.
What’s more, you can create a permanently private local site, or make a copy of a live site so you have a version you can play around with. Once you’re happy with the changes to your local site, you can even upload them back to your live site (we’ll talk more about this later on).
Of course, to set up a local site you’ll need the right tool. There are lots of options available, including third-party solutions and applications offered by your WordPress hosting provider. Next up, let’s take a look at one of those tools.
Local: A Development Tool for WordPress Sites
If you’re looking to create a local WordPress website, you can’t go wrong with Local.
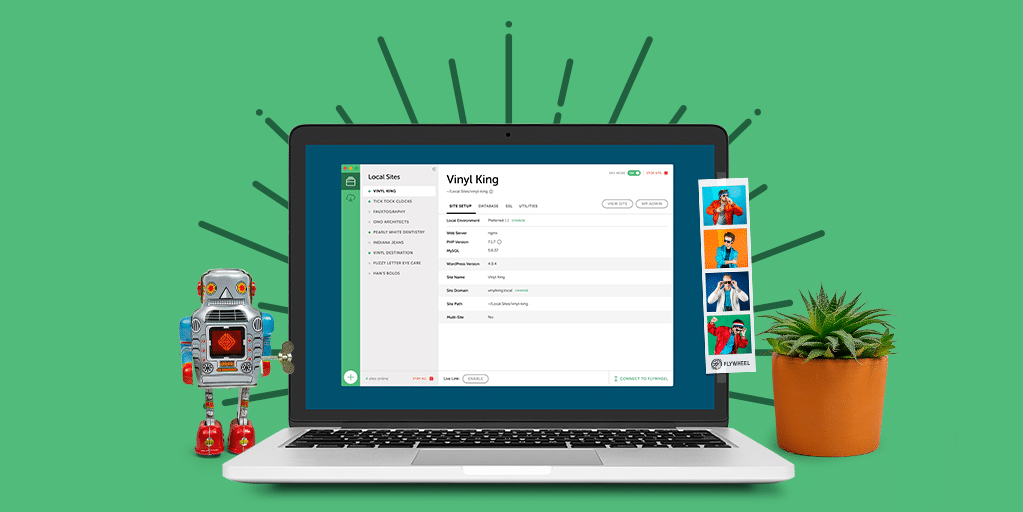
This fully-featured tool contains everything you’ll need to set up and use local sites. It’s simple enough for beginners to use, but also offers plenty of advanced features if you want to customize the way your local environment works.
Some of Local’s key features include:
- One-click WordPress installations, letting you set up your local sites fast
- Local Secure Sockets Layer (SSL) support, to keep those sites safe
- Easy access to your local sites’ root files, via Secure Shell (SSH) access
- Shareable demo URLs, making it possible to show your site to select people
- Customizable environments for developers, helping you configure the way your local site runs
- The option to clone sites, export a live site to a local version, and push a local site to live hosting on WP Engine.
- An Add-ons Library, allowing you to customize your local development environment with the features you need
Best of all, Local is completely free to use for Mac, Windows, and Linux. This means you can try it out without any risks or obligations involved. Let’s see how it works in action!
How to Get Started with Local WordPress Development (in 3 Steps)
Fortunately, setting up Local and using it to manage your local sites is a straightforward process. Over the next few sections, I’m going to walk through how to start using it. The process begins with installing the tool itself.
Step 1: Install Local
To download Local, visit the website and hit the Free Download button. Next, choose your platform, and enter some basic information (only the email field is mandatory, and it’s just so we can keep you in the loop on new features and functionality):
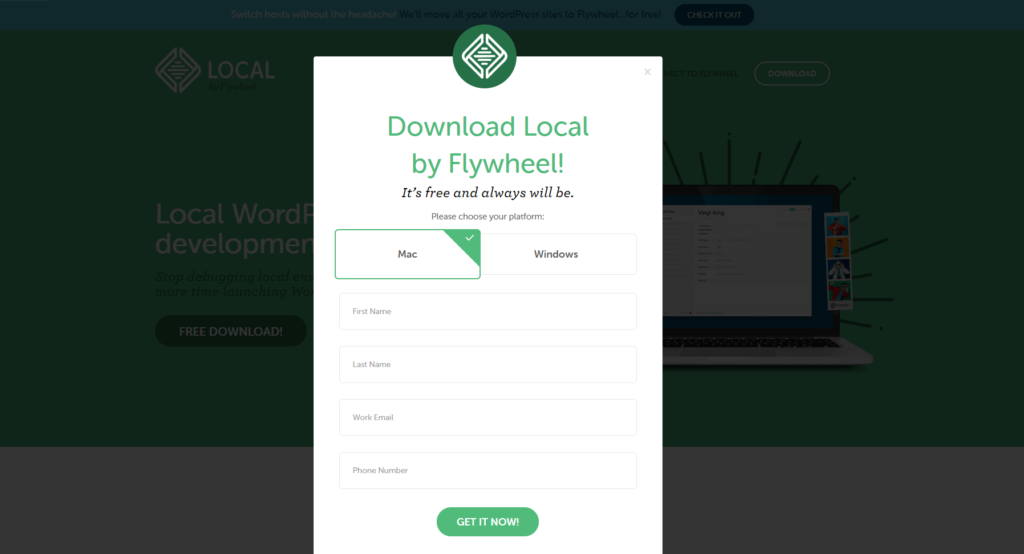
Your download should start right away. Give it a few moments, and then run the installer file. You’ll then be taken to a start-up screen, where you simply need to select the Let’s Go! button.
This will install a few programs that are required for Local to work properly. The installation may take a few minutes to complete. If you receive any prompts during the process, make sure to hit Yes to permit the installer to do its job.
After, you’ll be taken straight to your new Local dashboard:
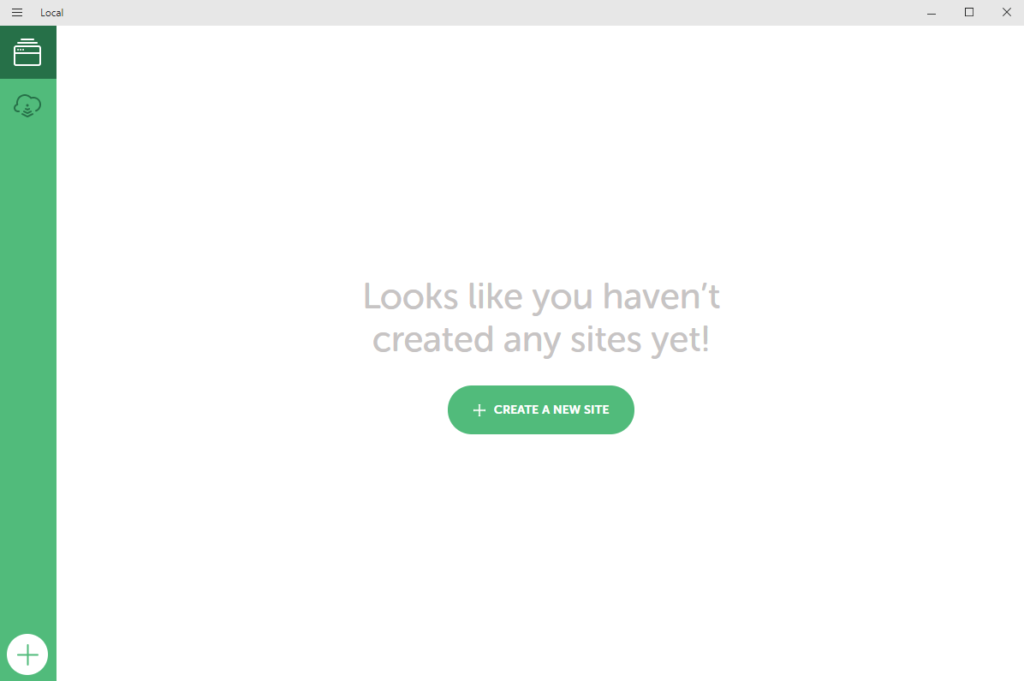
There are several options to choose from. You can create a new site, which we’ll talk about next. You can also select the cloud icon to connect to managed WordPress hosting services, enabling you to make copies of existing sites and push local sites live.
Finally, in the top-left corner there’s an “Options” menu to let you configure various settings and preferences. However, this is optional—right now you’re ready to create your first local site!
Step 2: Create Your Local WordPress Site
Next up, let’s create a brand-new local WordPress website. To do so, select Create a New Site in your Local dashboard. This will take you to a simple setup wizard, where the first step is to create a name for your site:
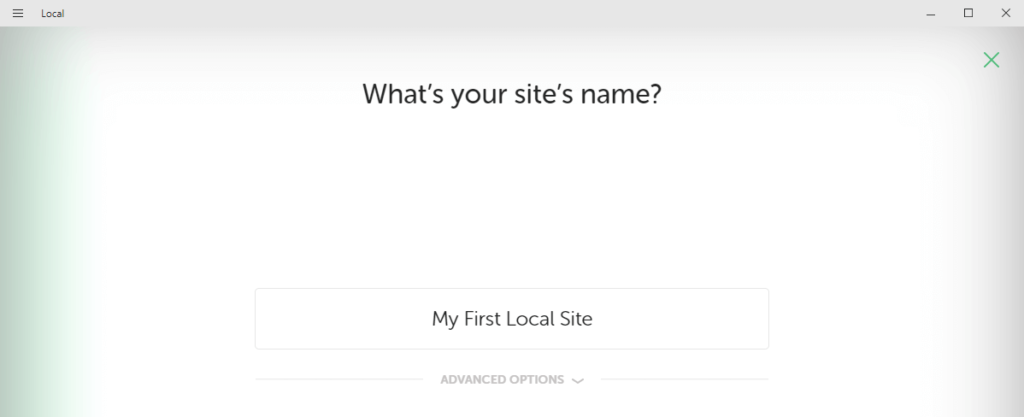
You may want to make this something descriptive, especially if you plan to create multiple local sites. You can always change the name of your site later on.
In addition, you can expand the Advanced Options tab to configure a few optional settings if you’d like:
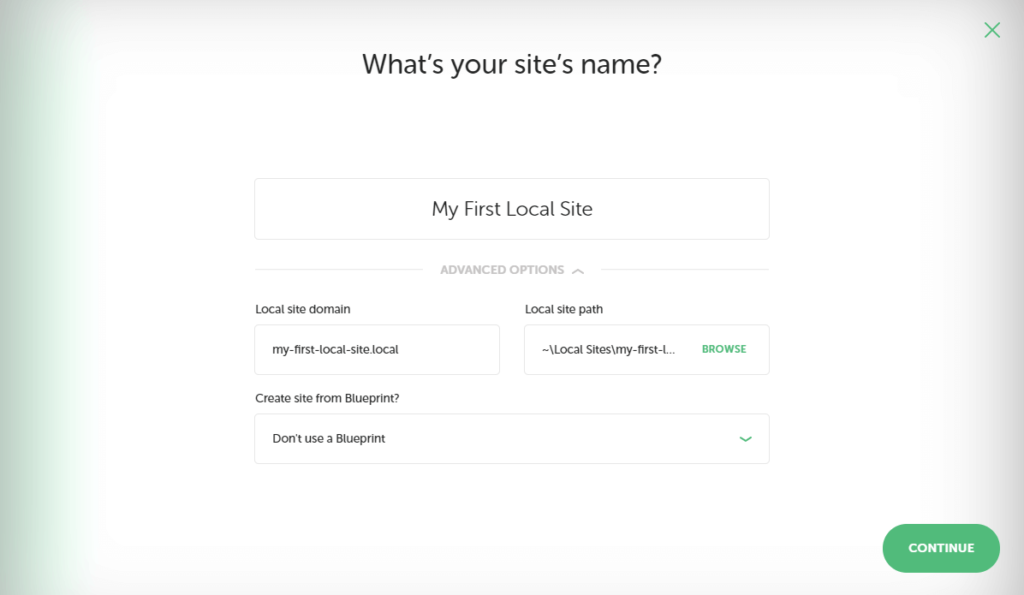
Here you can set a domain and path for your local site, You can choose any domain name and suffix that you’d like, and Local will modify your hosts file to make it work. In our case, we went with my-first-local-site.local.
Local will also automatically create a directory to store your site’s files, but you can also set it to any folder you like.
Once you’ve entered a name for your site, you can continue to the next screen:
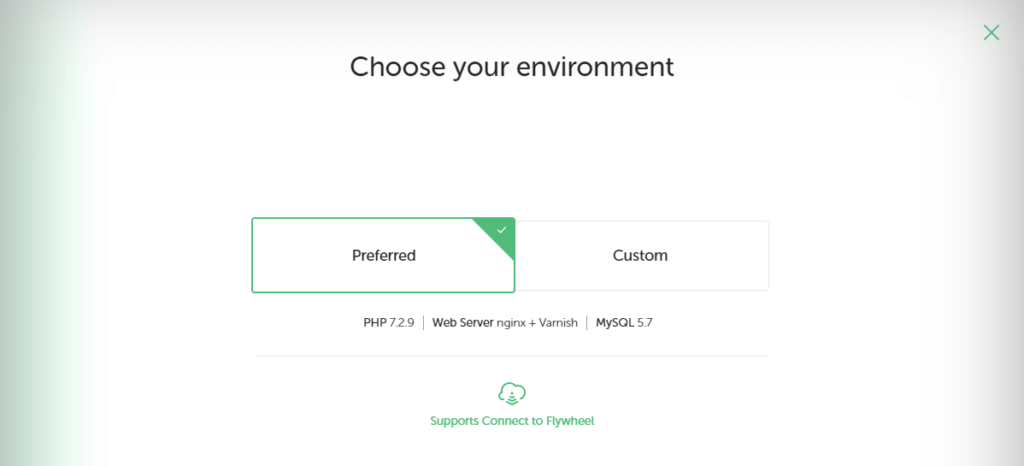
Here, you have two options. You can choose Preferred to set up your local site using a recommended set of tools, or select Custom to configure your environment:
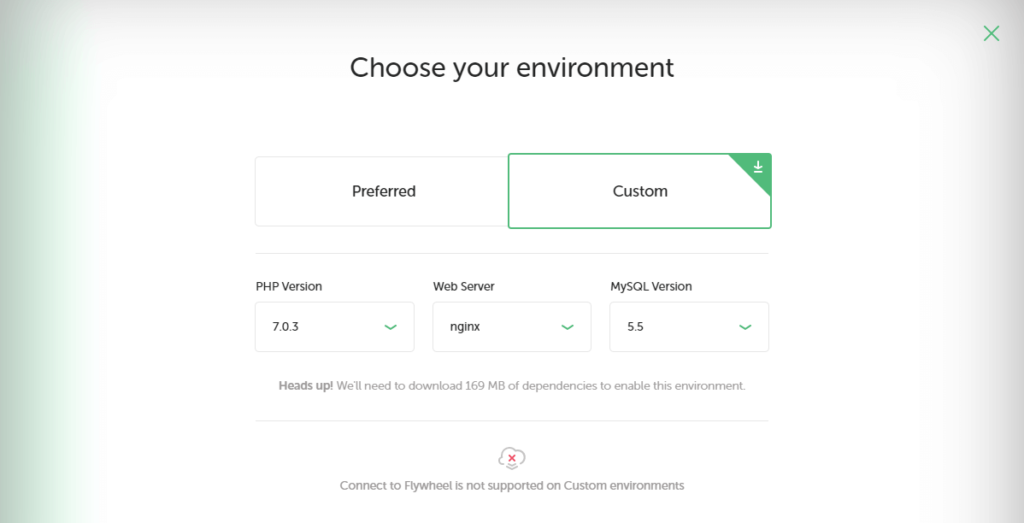
The Preferred option works well for most beginner users, while Custom comes in handy for developers with more specific requirements. Either way, continue to the last step once you’re done here:
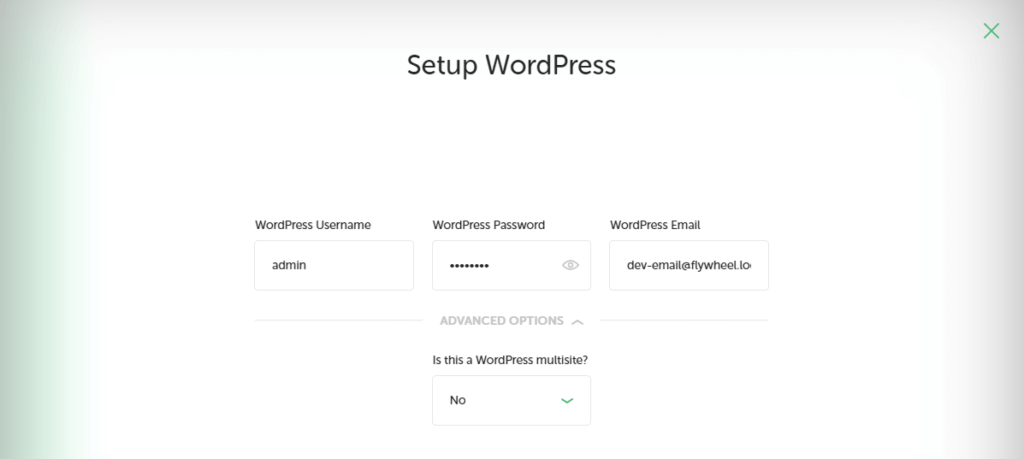
On this screen, you’ll create a WordPress username, a secure password, and an admin email address. Under Advanced Options, you can also specify if you’d like this installation to be a multisite setup. Then, hit the Add Site button.
After a few moments, you’ll see your new site listed in the dashboard, along with all of its information:
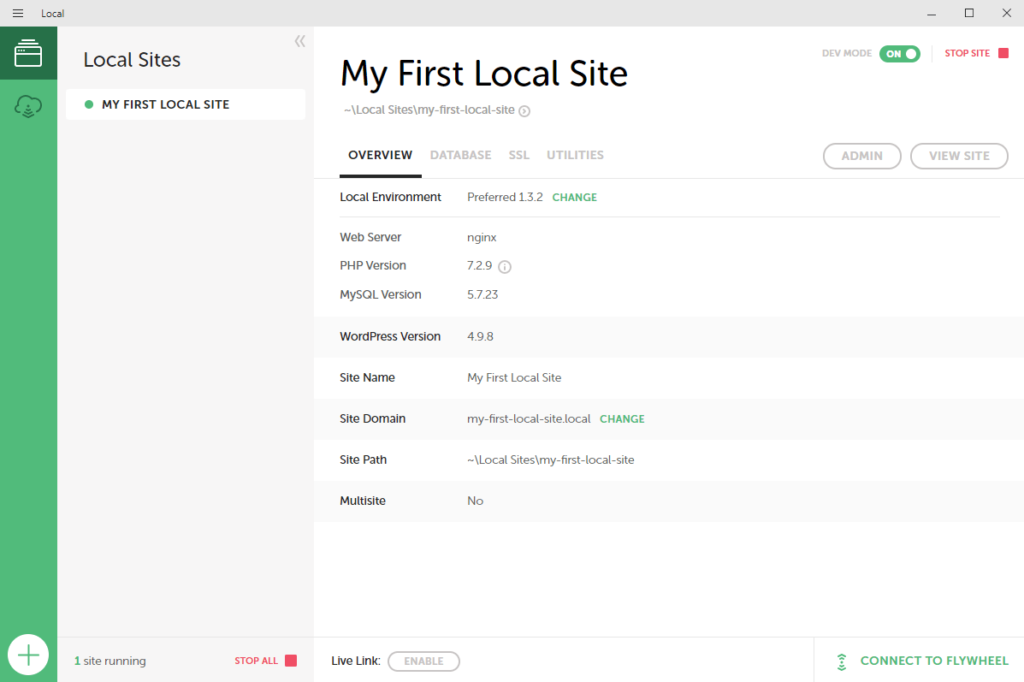
You can now select the Admin button to log into your site and get to work! In addition, you can always come back to this dashboard if you want to make changes to your local site’s setup or domain.
As a note: what you’re working with here is a fully-featured WordPress site, set up in record time! This means that you can install any plugins you want, add custom themes, break it, fix it, break it again, etc. It’s a coding playground, and there’s no risk to a live site!
Step 3: Export Your Site & Take it Live
Technically, the above two steps are all you need to set up and use a local WordPress website. However, if you’re building a site that will eventually go live, you’ll also need to know how the process works.
You can always export your local site and import it to the host of your choice. The steps to import and take a site live vary from host to host, but you’ll likely need to install a plugin, export, import, zip up some files, verify that your migration is working, etc.
We’d highly recommend Local Connect if you’re looking for a quick-click workflow. Using Local Connect, you can easily move a site between a local environment and the live environment on Flywheel Growth Suite and WP Engine. This dramatically streamlines the offline-editing and go-live process, and it’s totally free to use.
You can create or log into your Flywheel or WP Engine account through the Local dashboard. You’ll just need to enter your username and password to make the connection, after which all of your local and live sites will be listed in your Local dashboard!
From there, it’s a matter of a few clicks to push your local website live. Once your account is connected, you’ll have other options here as well. You can make a copy of a live site and turn it into a local site, for example. Then you can make changes, and copy them back over to the live version.
With that, you know everything you’ll need to create and manage development sites through Local. How you use them is up to you!
Conclusion
Being able to quickly create a local WordPress site offers numerous benefits. It lets you develop a new website in peace, and makes it easy to perform testing and troubleshooting without affecting your live site. Local enables you to do all of this easily, while offering plenty of advanced tools to enhance your local development options.
In this article, we’ve shown you how to get started with Local. All you’ll need to do is follow these three steps:
- Install Local.
- Create your local WordPress site.
- Export your site to WP Engine when it’s ready to go.
Do you have questions about what you can do with Local? You can find Local Help Docs here, or speak with a WP Engine representative to find out more!


