How to Set up Google Apps for Your New Site
You’ve just built a new website for, say, your personal business. A lot of people email you, but you’re tired of having your email go to @gmail.com. That seems unprofessional, and it doesn’t drive traffic to your new site.
Wouldn’t it be great if your email address could be [email protected]? Google has a brilliant platform, called Google Apps, that allows you to set up what is effectively Google Mail and all associated products (docs, drive, etc.) for your domain.
It’s a great way to manage your email and collaborate with your users, clients, and friends, all within the scope of your domain. Not only will it look great to have email mapped to your domain, it helps create separation between your work and personal digital lives.
Let’s get started.
1. Sign up for a Google apps account here.
During signup, Google asks if you have a domain already or if you need to create one. Select the option that best applies to you.

2. Once you’ve signed up, Google will create an email account for you at your domain address. Once you join, you’ll need to set up DNS so Google Apps can accept emails on your behalf.

NOTE: You can select Connect Now to call a Google support representative who will walk you through the process. Or, you can follow along with the rest of this tutorial.
3. The first thing you’ll need to do is verify that you own the domain. You can do this with a TXT record that will be added to the DNS zone file of your domain.
NOTE: There are a lot of different ways to modify DNS records, and Google will offer specific instructions for dozens of different providers. For the purposes of this tutorial, we will be using the “other” category and setting up records manually. If you use a domain host such as Hover, Google will actually take care of the record setting for you. If you’re looking to learn more about what these DNS records mean, check out this guide on DNS.
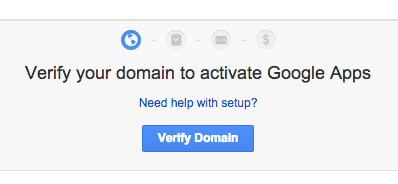
4. Click the Verify Domain button on the admin console once you’ve logged in.
5. Once a popup appears, select either your host and follow along with specific instructions or click the Other button from the dropdown as displayed here.
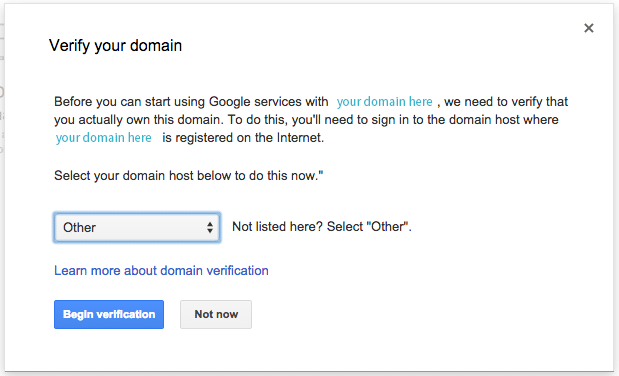
6. Click Begin Verification.
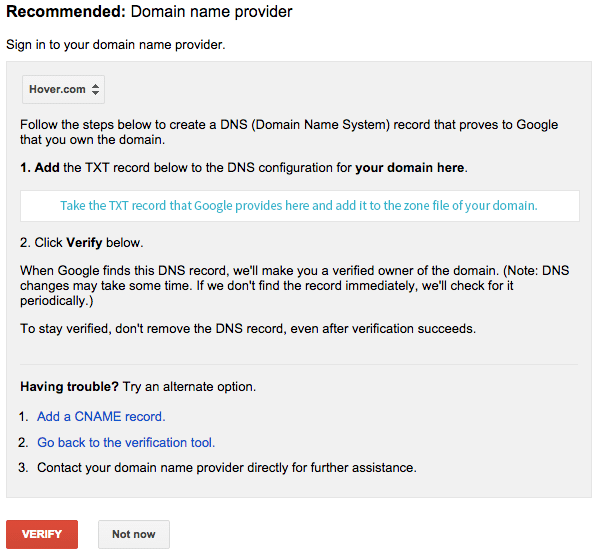
7. Take the TXT record that Google generates for you and add it as a TXT record to your DNS zone file. Google will provide specific instructions for your host. Once you’ve finished, click Verify.

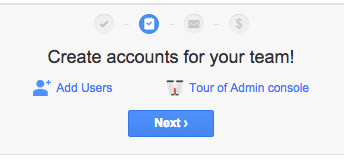
8. Once you’ve verified your domain, you can add user accounts to Google Apps.
NOTE: Your default admin account has already been added, and if you’re the only user, you can safely skip this step. If you have other users, such as employees or community members, you can add them or import their accounts from another service here.
NOTE: Your default admin account has already been added, and if you’re the only user, you can safely skip this step. If you have other users, such as employees or community members, you can add them here.
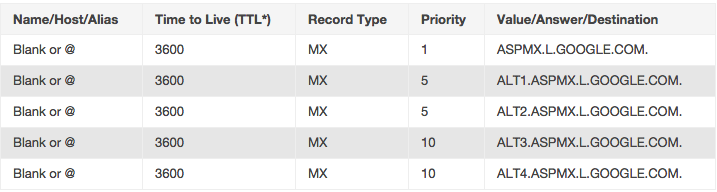
9. Now all that’s left is to add a few more DNS records so mail actually gets to your servers. There are two ways to do this. If you click the Set up Gmail button, Google Apps will attempt to set up DNS records for your specific host automatically. If that doesn’t work, or if you’re using a different host that isn’t covered, you can just add DNS records manually. Here are the MX records you’ll need to add:
10. Finally, complete the billing process by clicking the Complete Billing button on the right hand side of the screen
Once you’ve completed these steps and allowed a few hours or more for DNS records to propagate, your Google Apps account will be set up! You can now start sending and receiving email from your domain’s new email account, as well as using the rest of Google’s services.
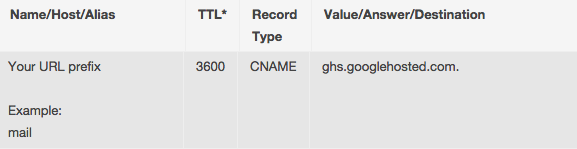
Optional: 11. Add a CNAME record so that mail.yourdomain.com redirects to Google Apps. In your DNS records, add a CNAME record to reflect these changes: