


The Basics of WordPress Multisite
WordPress Multisite is exactly what it sounds like: it’s a way to have multiple sites that share a single WordPress installation. This install lives just once on your server, but you can run as many sites as you want with it.
It’s not as intimidating as it sounds. Multisite has the same structure, core files, and code files as a standard, single install, so really, it’s not much different.
Updates are the same, and will be global throughout all the sites sharing it. Because everything is shared, themes and plugins are stored just once, no matter how many sites use them. Why does this matter? Well, if you’re hosting lots of sites with virtually the same content, you’ll use a lot less server space with WordPress Multisite. Also, it is easier to maintain because any updates will take place only once; there is no need to go through every site and update themes and plugins.
Differences from a Standard WordPress Install
Interface
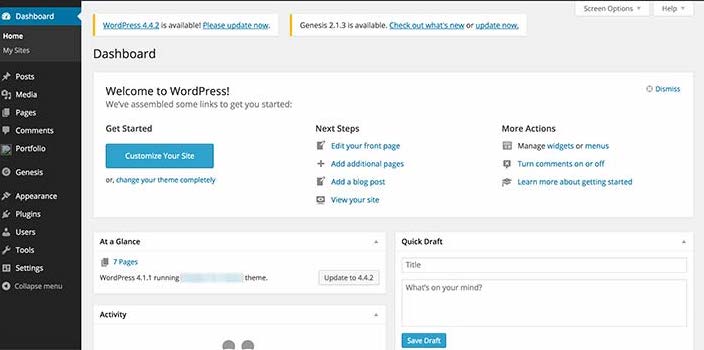
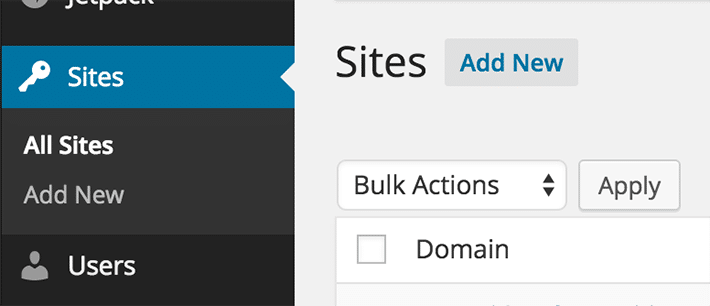
Things look a little different in a Multisite environment. When you activate it, you will see some extra screens added to your admin screen, with options for managing the network. Here is the special dashboard for managing the network:
Different database tables
Tables are a bit different between single installs and Multisite, but these table names should ring a bell from a typical single install:
- wp_posts
- wp_postmeta
- wp_comments
- wp_commentmeta
- wp_terms
- wp_term_taxonomy
- wp_term_relationships
- wp_users
- wp_usermeta
- wp_options
- wp_links
Note: We’re referring to the table’s prefixes using the default prefix of wp_, but often this prefix is changed for security reasons, so yours might look different.
Database Organization in WordPress Multisite Installation
When converting to a Multisite, you are creating a “network” of individual subsites. The first subsite is the site where the conversion to Multisite started from. When you think of the overall network, this is what the database sees as the overall structure. It classifies this network as a site, which is labeled as wp_site and then each subsite is classified as a blog, wp_blogs.
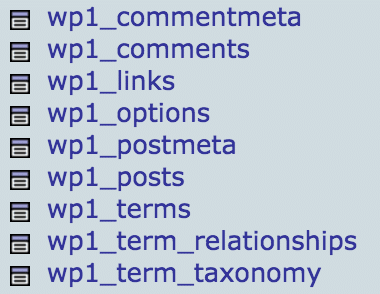
Within the database, these individual subsites have tables with the same naming convention for each one. Every time a new subsite is created and added to the network, a new set of tables is created.
It may seem complex and hard to imagine how all of this is organized in the database. Luckily, there is a naming convention that helps keep things straight. Each set of tables is differentiated by the blog_id for the subsite used in the table prefix, such as wp2_posts.
The following tables are subsite-specific:
- wp(xx)_posts
- wp(xx)_postmeta
- wp(xx)_comments
- wp(xx)_commentmeta
- wp(xx)_terms
- wp(xx)_term_taxonomy
- wp(xx)_term_relationships
- wp(xx)_options
- wp(xx)_links
You may notice a few are missing here. What about wp_users and wp_usermeta tables? They aren’t in the individual site list because they are now global across all the subsites in the network. When the greater network is installed, a couple of extra columns are added to the wp_users table.
There are a few more that are included in the Multisite environment. These are for the purpose of managing the network:
- wp_site
- wp_sitemeta
- wp_blogs
- wp_blog_versions
- wp_signups
- wp_registration_log
This is a very basic explanation of the different database tables, but keep in mind that we’re just scratching the surface.
Files
The learning curve shouldn’t be too big when it comes to files in a Multisite mindset. There are just a couple differences with the files and folders, specifically the wp-config.php file and the wp-uploads folder.
The wp-config.php will have extra lines that actually activate Multisite and tell WordPress details on how to run it. The wp-uploads folder has an extra layer of folders. Each folder will contain a subfolder for each site, which coordinates with the site’s numerical ID and name.
There’s no need to move files manually; WordPress takes care of this for you.
“Super Admin”
We are all used to administrators with our WordPress sites; you most likely are one. With Multisite, there is an additional admin tier—”Super Administrator,” who manages the entire network. This role allows you to install themes, plugins, and create/manage sites across the multisite network.
Site Administrator
This will look familiar to you; the admin screens that each site admin can access are similar to a standard WordPress site. There are just a couple things that cannot be done by the site admin in Multisite: installing themes or plugins. Activating plugins is also limited; the site admin can only activate those that have been installed on the network.
When to Use a Multisite
There are occasions where Multisite is sure to come in handy. Some that come to mind would be a network of sites/blogs for a business, clients with multiple sites, and a network for users who want to add their own site. Remember, these are responsibilities of the “Super Admin” and they are responsible for maintenance of this network.
As a designer, you may find a use for this if you have multiple sites. You could use Multisite to create a network to host all of your sites, such as a personal portfolio and then one for your business.
Knowing the goals of the sites and network will help you architect the best solution. Multisite is not for every scenario. If you just want a single site or blog, Multisite does not make the most sense. Just as if you are creating sites for multiple clients, and each is hosted separately, this is not the ideal tool. Keep the “network” idea in mind, which will help you determine the best solution.
Remember, the database is organized a certain way with Multisite. If each site needs its own database, you will want to stick to a single install. If each site needs its own IP address, or your WordPress hosting provider doesn’t have the right hosting technology for Multisite, Multisite may not be the best option. If the admin will need to install themes or plugins, remember that those options are limited to the “Super Admin” and may be a limitation.
How to Implement Multisite
We’ve talked an awful lot about Multisite, but how do we actually “get” it? One may think it’s a plugin that you install. In reality, WordPress comes with Multisite capabilities and you just need to make a few simple customizations to make it happen.
Remember, it is a good idea to try this in a testing environment first. Also, it is important to keep a copy of your wp-config.php file before you get started.
Step One: Add to the wp_config.php File
Look for this commented line:
/* That's all, stop editing! Happy blogging. */Add this:
define( 'WP_ALLOW_MULTISITE', true );
When you are done, make sure to save the file. If you are trying this on an existing install, it is suggested that you deactivate your plugins.
Step Two: Activate Multisite
We will go into the WordPress admin and actually install Multisite now.
- Go to Tools > Network Setup. Choose subdomains or subdirectories for your installation.
- Choose a title for your network and email address of the network administrator
- Click the Install button.
Step Three: Setting up the Network
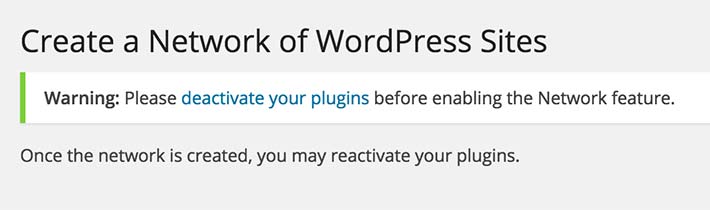
- Confirm that you see a screen with a bunch of code on it. It will say something like “Create a Network of WordPress Sites” at the top. This is the Network Install screen. Code snippets will need to be added to the files to complete the network setup.
- Open up the
wp-config.phpfile and add the provided code to it and then save. - Next, open up the
.htaccessfile and add the provided code and then save.

You’ll see the new dashboard.
Creating your First Site
The whole point of Multisite is to add sites. Let’s take a look at how to do that.
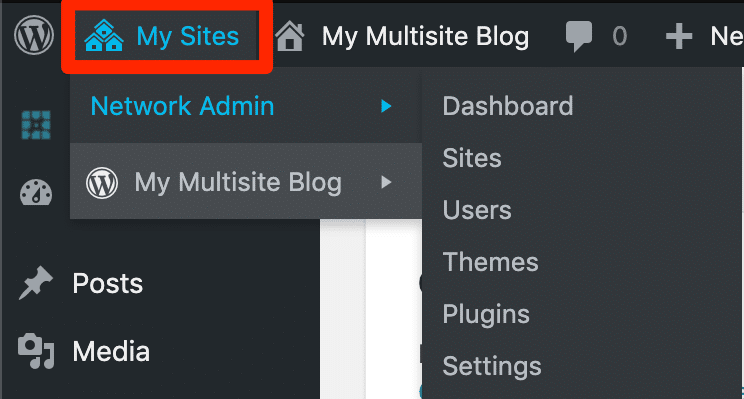
- Go to My Sites > Network Admin in the admin menu
- Next choose Sites > Add New
- Enter the site address, site title and the email address of the site administrator
Now the new site is created!
With just a few minor modifications you can take a single site and make it a Multisite. When implemented, it can help you work more efficiently with your network of sites. It’s important to know when to use Multisite, however, and to make sure it’s the right choice for your sites.
Want to learn more? See how B&G Foods used WordPress Multisite to migrate more than 40 websites from legacy systems to create a single, unified WordPress install.