


How to Speed up Your WordPress Site Using GZIP Compression
When it comes to providing a strong user experience on your website, performance is key. If your site takes a long time to load, you’re likely to see a rise in ‘bounced’ users before they’ve even had a chance to experience it properly. This is why optimizing your site for speed is so important.
While there are plenty of ways to keep your site’s loading times to a minimum, one of the lesser-known (yet still useful) options is GZIP compression. This compresses your site’s files to make them faster to transfer, which helps to cut down your load times.
In this article, I’ll introduce you to the basics of GZIP compression and how it works. Then I’ll then show you how to implement it on your WordPress site. Let’s go!
- Why your site’s loading times are important
- An introduction to GZIP compression
- How to use GZIP compression on your WordPress sites (in 3 steps)
- Conclusion
Why Your Site’s Loading
Times are Important
Before we get into the specifics of how GZIP compression can help you speed up your site, let’s first look at its importance. In fact, if you’ve spent any amount of time online, you should already be intimately aware of the effect slow loading times can have on a website.
In fact, nearly half of internet users expect a site to load in just two seconds or less. Every second beyond that will lead to exponentially higher page abandonment, which could in turn negatively affect your conversion rates. As such, making sure your site doesn’t leave visitors waiting should be a prime priority.
Fortunately, there are plenty of things you can do to optimize your site’s speed. Some of the most commonly discussed ones include compressing your images, using a Content Delivery Network (CDN), and implementing caching. However, one method that’s often overlooked (but just as valuable) is GZIP compression. Let’s look a little closer at what this is and how it works.
An Introduction to GZIP
Compression

At its core, GZIP is similar to other compression types, such as ZIP and RAR files. Basically, it compresses your site’s files to make them significantly smaller, and therefore faster to send. The files are then uncompressed by the end user’s device.
Not only does this help to decreases site load times, it can also help you keep bandwidth usage down. Since less data needs to be transferred, you’re putting less strain on your server. Since GZIP compression can be vast, it’s a very important aspect of keeping loading times down.
GZIP compression is usually enabled on a server level, so double-check whether yours is already activated. However, if not, you’ll need to get to work!
How to Use GZIP Compression on Your WordPress Site (In 3 Steps)
The easiest way to implement GZIP compression with WordPress is simply to use a web host that offers it out of the box. For example, WP Engine enables GZIP compression by default for all WordPress sites, as well as a built-in caching solution and CDN. This ensures your site will always perform well, without requiring you to worry about implementing these solutions yourself.
However, if your host doesn’t provide this feature, you’ll need to take matters into your own hands. As is common with WordPress, there are plugins offering GZIP compression as part of their feature set, such as WP Fastest Cache. However, if you don’t want to rely on a plugin, there’s also a manual method you can use.
1. Open Your Site’s .htaccess File
In order to set up GZIP compression manually, you’ll need to edit your site’s .htaccess file. This is responsible for many important functions that power your WordPress site, including how it interacts with your server.
Before you carry on, I recommend creating a backup of your site. Given that .htaccess is a WordPress core file, having a backup ready will help safeguard yourself in case the worst happens—even for relatively minor changes such as this.
Once you’re ready, you’ll want to access your site’s server using File Transfer Protocol (FTP). I recommend the free, open-source FileZilla—and you may want to brush up on your skills, too. You’ll need to log in using the FTP credentials provided by your web host, and once you’re in, you’ll see the following screen:
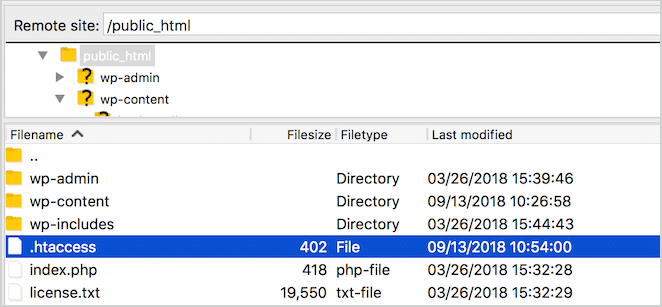
You should be able to see your .htaccess file in your site’s root directory (usually called public_html, but it also could be the name of your site, or www). Right-click on it and select View/Edit to open the file in your default text editor:
Next, we’ll be adding code to this file.
2. Edit the File to Enable GZIP Compression
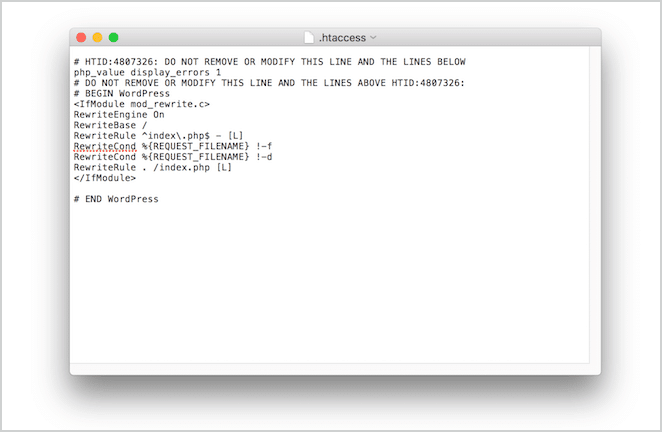
You’ll now need to add a few lines of code to tell your server to compress and deliver your website’s files as GZIP.
You’ll want to add a new line above # END WordPress, and paste the following code:
<IfModule mod_deflate.c>
AddOutputFilterByType DEFLATE text/html
AddOutputFilterByType DEFLATE text/css
AddOutputFilterByType DEFLATE text/javascript
AddOutputFilterByType DEFLATE text/xml
AddOutputFilterByType DEFLATE text/plain
AddOutputFilterByType DEFLATE image/x-icon
AddOutputFilterByType DEFLATE image/svg+xml
AddOutputFilterByType DEFLATE application/rss+xml
AddOutputFilterByType DEFLATE application/javascript
AddOutputFilterByType DEFLATE application/x-javascript
AddOutputFilterByType DEFLATE application/xml
AddOutputFilterByType DEFLATE application/xhtml+xml
AddOutputFilterByType DEFLATE application/x-font
AddOutputFilterByType DEFLATE application/x-font-truetype
AddOutputFilterByType DEFLATE application/x-font-ttf
AddOutputFilterByType DEFLATE application/x-font-otf
AddOutputFilterByType DEFLATE application/x-font-opentype
AddOutputFilterByType DEFLATE application/vnd.ms-fontobject
AddOutputFilterByType DEFLATE font/ttf
AddOutputFilterByType DEFLATE font/otf
AddOutputFilterByType DEFLATE font/opentype
# For Older Browsers Which Can't Handle Compression
BrowserMatch ^Mozilla/4 gzip-only-text/html
BrowserMatch ^Mozilla/4\.0[678] no-gzip
BrowserMatch \bMSIE !no-gzip !gzip-only-text/html
</IfModule>
The above should work for most servers. However, if not (we’ll discuss how to test this in the next section), the following snippet should work instead:
<ifModule mod_gzip.c>
mod_gzip_on Yes
mod_gzip_dechunk Yes
mod_gzip_item_include file \.(html?|txt|css|js|php|pl)$
mod_gzip_item_include mime ^application/x-javascript.*
mod_gzip_item_include mime ^text/.*
mod_gzip_item_exclude rspheader ^Content-Encoding:.*gzip.*
mod_gzip_item_exclude mime ^image/.*
mod_gzip_item_include handler ^cgi-script$
</ifModule>
Once you’re finished, save your .htaccess file. FileZilla will ask if you want to replace the file on your site with the new version, so select Yes when prompted.
3. Test Whether GZIP Compression is Implemented Correctly
At this point, you’ll need to test whether your site now uses GZIP compression as you’ve instructed it to. I already mentioned this briefly earlier in this article, and it’s actually the easiest step in the process. To do it, you can use a site such as Check GZIP compression:
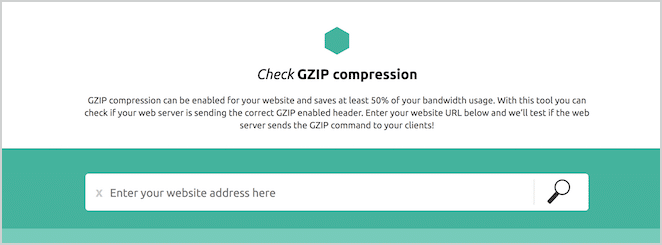
All you need to do is enter your site’s URL and click the magnifying glass icon. The site will then check to see if your files are delivered via GZIP, and return the results. Hopefully, you’ll see the following message:
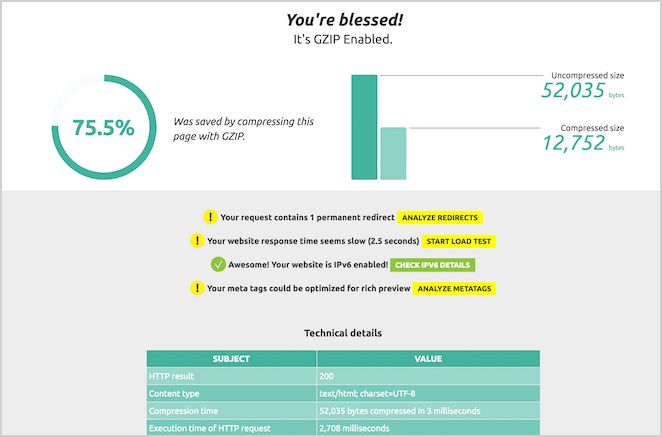
However, if the results state your site doesn’t use GZIP, there are three routes to take. One is to replace the snippets as outlined previously. Alternatively, you may need to wait a while before the changes become active, or even purge your site’s cache.
If this still doesn’t fix the issue, double-check the code in your .htaccess file for errors. If you’re still stumped, my advice is to reach out to your web host’s support team for more assistance.
Conclusion
When it comes to optimizing your WordPress site for speed, GZIP compression is one of the least talked about yet most useful methods available. By compressing your site’s files, you can ensure load times stay low, and your users don’t suffer from unnecessary slowdowns.
In this article, we’ve discussed how you can enable GZIP compression on your WordPress site. While simply hosting your site on a server with compression already enabled is the easiest option, you can also use the following steps to set it up yourself:
- Open your site’s
.htaccessfile. - Edit the file to enable GZIP compression.
- Test whether GZIP compression is implemented correctly.
Do you have any questions about GZIP compression? Let us know in the comments section below!