
WordPress
How to move a brick and mortar shop to WordPress with WooCommerce

I was recently online shopping for nothing of importance when I stumbled on this woman’s incredible jewelry shoppe on Instagram. Everything was gorgeous, so I went to click the link in her bio to head to her site, but there was nothing there. I did some further digging and learned she only accepted Venmo payments and in-person hand-offs. I was bummed, but more importantly thought: “Why doesn’t she have a website?!”
It’s more important than ever to make sure your client’s brick and mortar store has an online presence. While social media profiles and Etsy pages are nice, neither of these are sustainable if their business plan is to grow and sell more and more products. This is why I strongly recommend creating an online store for your client’s brick and mortar business using WordPress and WooCommerce!
In this article, I’ll cover:
- Why WooCommerce is the best eCommerce platform
- How to set up an online store using WooCommerce (and WordPress!)
- Other tips to make their online shop stand out from the rest
Why WooCommerce is the best eCommerce platform
Why do I recommend WooCommerce over other eCommerce platforms like Squarespace and Shopify? While they all offer a variety of features, benefits, and price points, WooCommerce is a trusted WordPress plugin that already powers about 28% of all eCommerce sites! It doesn’t matter if your client owns a small, homemade jewelry store or a multi-chain restaurant, WooCommerce will be perfect for them.

People choose WooCommerce because:
- It’s cost effective (free!)
- It has fantastic support
- It’s extremely customizable
It’s cost effective
Some people shy away from putting their store online because it’s just another cost they have to worry about. But using WordPress and WooCommerce can be super cost-efficient! While there is a cost associated with getting a WordPress site up and running with a great domain and hosting provider, the WooCommerce plugin is 100% free to use and build on. All of this combined averages to cost about $20/month, and with the potential to have more sales now that their brick and mortar is online, that fee should be a pretty easy sell to your client.
It has fantastic support
WooCommerce offers two different methods of support and contact: documentation or submitting a support request. Sifting through their documentation is a great way to search for the answer to a relatively common question. If you’re looking for something more specific though, their support team works around the world providing 24/7 service!

It’s extremely customizable
Just like WordPress, WooCommerce is open-source! This means that you can do as much or as little as you want when it comes to building your client’s site specific for their business. It can be paired with Genesis, Divi, and hundreds of other themes, allowing you to find the perfect theme to match their store’s brand or aesthetic.
In addition to hundreds of accessible themes, WooCommerce has more than 400 extensions, from payments and shipping to marketing and accounting, dedicated to making it easier to use for yourself (and your customers).
You may start to see a pattern here, but just like the WordPress community, the WooCommerce community is a place where people genuinely want to help.
If you’re still wondering if WooCommerce is the best eCommerce platform for you (or need help convincing your clients), check out this article where we break down the pros and cons of WooCommerce, Squarespace, and Shopify!
How to set up an online store using WooCommerce (and WordPress!)
Alright, it’s time to build your client’s WooCommerce site. (Yay!) Here’s a preview of the steps you’ll follow to take the site live:
- Get set up with a domain and a great host
- Choose a theme
- Install the WooCommerce plugin & run the setup wizard
- Add products
- Launch the site!
1. Get set up with a domain and a great host
Before you do anything, you need to make sure your client’s customers can find their website! This is where picking the perfect domain comes into play. Once you and your client have picked a domain, my personal favorite domain company, Hover, will get the domain (and email!) all set up for a super affordable price. Once you’ve selected that, it’s time to choose a great host.
While there are plenty of super cheap options in the market, we highly recommend going with a partner like Flywheel and WP Engine that offers WooCommerce hosting—an optimized WordPress hosting solution. For $15/month, their site will be in the hands of experts, so you can focus on creating a beautiful digital storefront, while we handle things like blazing site speed, hacker-free security, and 24/7 support if you or your client ever have any questions!
2. Choose a theme
Domain and hosting set up? Check! Now it’s time to make the site look and feel more like your client’s business and brand. Introducing: Themes! WordPress has loads of free design options, but an easy way to get started is to search for themes compatible with WooCommerce. (If you sign up with Flywheel, you’ll have access to more than a dozen WooCommerce-friendly themes for free!)
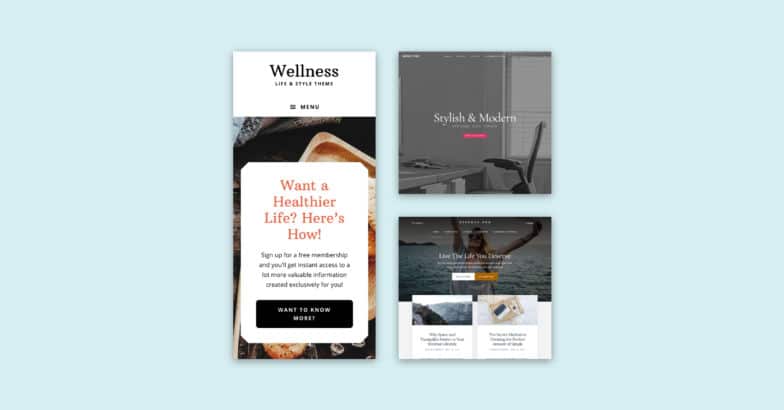
I know choice paralysis is a very real struggle, so if you’re looking to keep things simple, WooCommerce’s Storefront is a free theme built and maintained by WooCommerce (so you know the integration is water-tight). But, one of the pros to choosing WordPress over any other competitor is the opportunity to customize themes, which allows the site to truly feel like an extension of your client’s business. Once you decide to choose a simple theme or something more complex, it’s time to take this site and turn it into a store with WooCommerce!
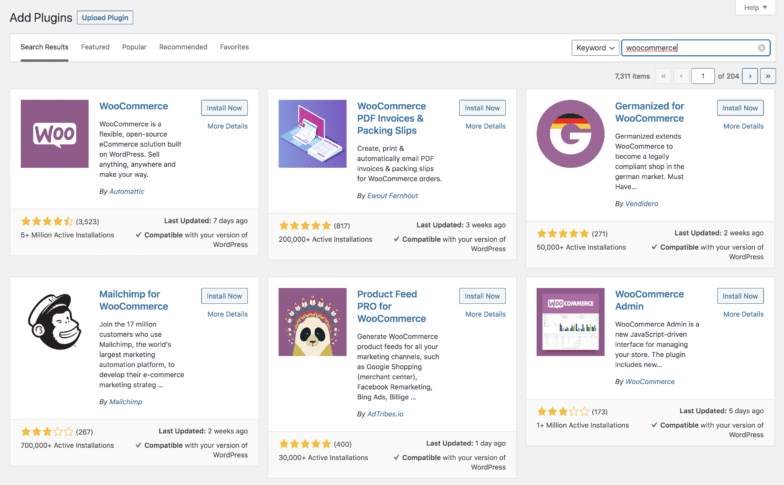
3. Install the WooCommerce plugin & run the setup wizard
To begin, you’ll need to install WooCommerce. This is super easy though since it’s readily available from the WordPress.org free plugin repository (which you can access right from your WordPress dashboard).
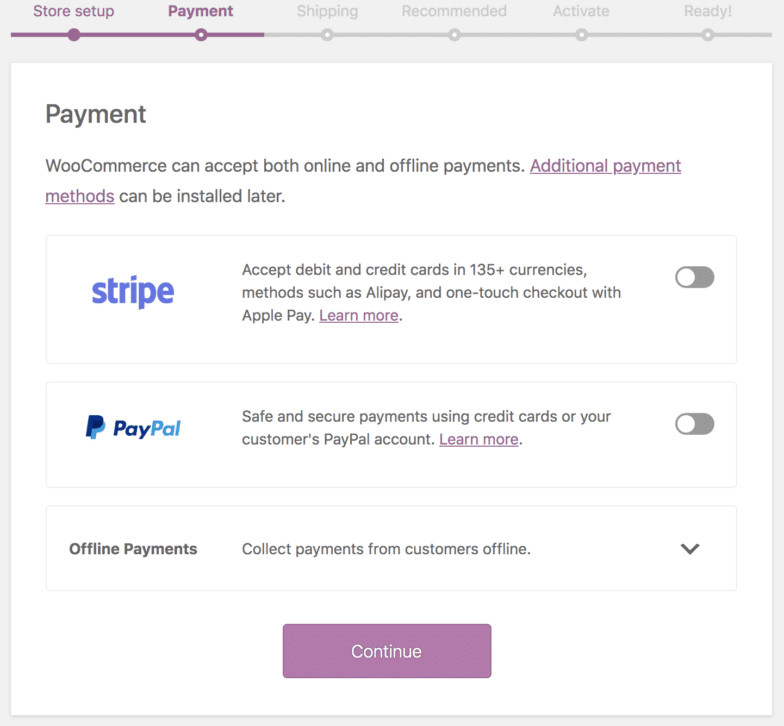
Once it’s installed, you’ll run through the setup wizard, which includes steps like adding which currency you’ll be selling in, shipping options, and adding a payment processor. (Remember those extensions we talked about earlier? Well, turns out there’s one for most payment processors, like PayPal, Square, and Stripe which makes setting up payment super simple!)
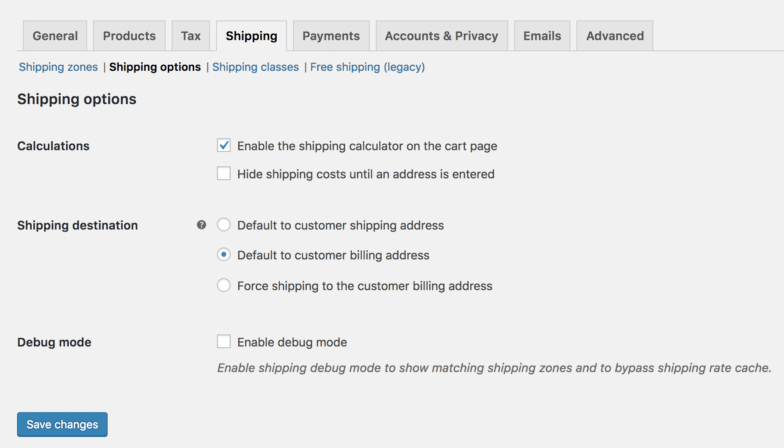
Once you’ve run through the setup wizard, we highly suggest going back into your WooCommerce settings through wp-admin just in case you need to tweak things like adjusting free shipping, adding a coupon for first time buyers, or resetting some automated email options. If everything looks good to go, it’s time to add some products!
4. Add products
It’s time to share your client’s products with the world! First, you should add some product categories so you can organize their offerings (this is especially important if they have a lot of product—it’s best to keep things organized!). To add categories go over to Products > Categories in your dashboard. Give the category a name, a slug for the URL, and an image if necessary.
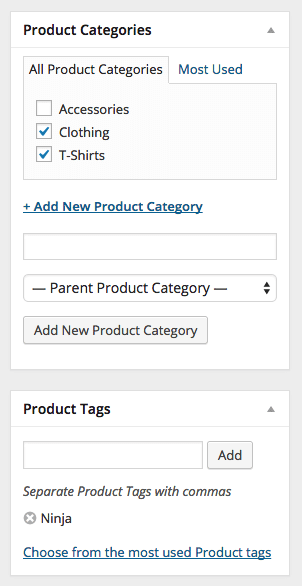
Once you’ve added categories you can move on to adding tags. This isn’t necessary but can help customers find exactly what they’re looking for. You might create tags for more specific item descriptions like contemporary or boho. Once you’re done with tags it’s time to add your products!
Click on Products > Add New. WooCommerce has everything you need to add your products with plenty of room for information and pictures to keep customers (and SEO algorithms) happy.
First, name the product, assign any categories or tags, and add a featured image (plus additional photos, if applicable). Then in the first text box, add a long item description. In the second text box add a short product description to be shown alongside your product images (a few sentences and bullet points work great here).
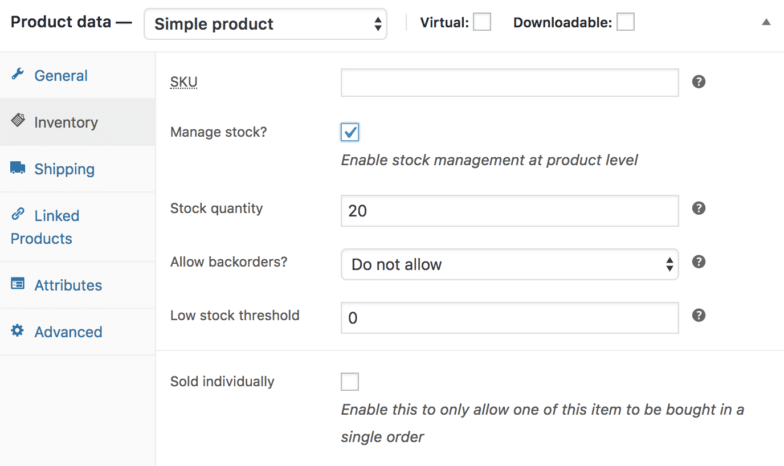
Then, you’ll move into the “Product Data” section, where you can fill out the SKU number (for personal tracking), manage inventory, and put a price on the item. You’ll also find additional shipping options here if you need to specify the product weight and dimensions on a particular item, as well as advanced settings for adding a purchase note and enabling/disabling the product reviews. Once you’re done here, you can publish the product!
After you’ve added the first product, continue this process until all the items you want to sell are uploaded to the site.
5. Launch the site!

Hit the button, because you just took a brick and mortar store and turned it into an online shop! Take a moment to acknowledge how exciting this is for you and your client’s business, launch your site into the world, and then continue reading this article because we have a few more tips to make sure this site is standing head and shoulders above the competition.
Other tips to make an online shop stand out from the rest
You did it! Long gone are the days of your client losing sales because they don’t have a website. It’s now up and running and is accessible for anyone to find. While these next few things aren’t essential for their business to run online, they will help bring in more business.
- Use social and their online store hand-in-hand
- Make sure they have stellar photography of their products
- Promote their products
Use social and their online store hand-in-hand
So, if your client is anything like that jewelry shoppe I mentioned earlier, they too may have only been functioning their store off of Instagram. But, now that they have a shiny new site displaying all of your gorgeous products, they can promote it across their social media channels! This is a sure-fire way to increase traffic to their site (and an easy way to get more paying customers!).
If their social channels could use some love, and you’re confident in your copy skills, now’s the perfect time to add social content creation and management to the bill! You can start posting more regularly scheduled content that sends their followers to their site. (P.S. Don’t forget to add social icons to the site so their customers can easily follow them.)
Make sure they have stellar photography of their products
One consistent problem agencies run into when creating an online store is not having professional photos of their client’s products, as this can make or break someone’s digital shopping experience. This is why I recommend creating a light box or purchasing an affordable one off of Amazon (Here’s one that our photographer recommends!). You may also consider purchasing a backdrop to make their product really pop!
Even if you aren’t a photographer, but have a decent phone, you could take these photos for your client and charge them for it.

In addition to how the photo looks on the site, it’s also important that the description of the photo is as thorough and accurate as possible. Alt text helps screen-reading tools describe images to visually impaired readers and allows search engines to better crawl and rank your website. So, if the product images have descriptive alt text, it will help boost traffic to your newly crafted site!
Promote their products
While getting your client’s site online was a huge feat (and I’m so proud of you for doing it!), now comes the most difficult part: getting traffic to their site. There are dozens of ways to try and boost visits and conversions, but a few of our favorites are:
- Start a referral program: Are you seeing the same group of core customers buying product? Start a referral program and invite them to spread the word! The site will receive more traffic, and in turn, the customer will get a nice perk or two (this could be free shipping, 10% off their next order, you name it!)
- Ensure the site is super speedy: I know you just built it, but maybe set up reminders every month to check in on how your site is performing. (This is another great way to earn recurring revenue.)
- Run a promotion: The simplest way to do this is by offering a discount using the coupon feature that’s already built into WooCommerce! Just work with your client to see what’s feasible.
There you have it, everything you need to know about moving your client’s brick and mortar shop to WordPress with the help of WooCommerce! We covered why WooCommerce is best, how to use WooCommerce to transform an online store to a digital shopping experience, and a few tips to earn recurring revenue once their site is live. Now you have everything you need to build, manage, and grow your client’s eCommerce site, and now I’ll be able to find it next time I’m scrolling through Instagram!


Comments ( 0 )