
WordPress
How to implement custom post types and custom fields in WordPress

WordPress isn’t just limited to blogging anymore — it’s a fully featured content management system capable of displaying and formatting any kind of content you give it. So let’s talk about two great ways to extend WordPress: custom post types and custom fields.
Custom Post Types
Looks like our test site, Monday Morning Mug (which we used in our email integration blog post), has a new problem to deal with. Our blog has gotten so large that we’ve hired a full-time coffee reviewing staff. They’ve been busy brewing coffee and writing up reviews. They’ve been posting these reviews to the blog, but our readers told us that all of these reviews are getting in the way of our “real” blog content. We need to make a separate place for our coffee reviews, but normal WordPress pages just aren’t going to cut it. The reviewers have also been suggesting that they’d love to have a place to easily store information, such as the country the coffee is from and tasting notes, on the website. This sounds like a perfect use for a custom post type, a WordPress feature that allows us to create new content sections on our site.
Custom post types are incredibly flexible and can be implemented for any kind of content: quotes, videos, and different shades of paint are all examples of what a custom post type could be.
We’re going to want to add a new section of our website in the /coffees/ subdirectory that is full of coffee reviews. This is going to require a bit of code wrangling, but it should be a relatively easy process.
Note: To do this, you’ll need to be able to edit the .php files in your WordPress install directory, which usually requires FTP/SFTP/SSH access. Make sure you have this before you proceed.
Every WordPress theme can utilize a functions.php file, which is located at:
/wp-content/themes/your_current_theme/functions.php
This file is generally used for theme-specific site changes as well as smaller custom site modifications, like the one we’re about to do.
Note: We will be adding code to the functions.php file, which will mean it is theme-specific. If you add this to your functions.php file and then change the theme on your WordPress installation, you will remove the custom post type from your website. You can maintain custom content types by utilizing a plugin, such as Custom Post Type UI.
1. Open up your functions.php file and add the following code at the bottom of the file:
function create_new_post_type() {
$labels = array(
'name' 			 => __('Coffee Reviews'),
'singular_name'  => __('Coffee Review'),
);
$args = array(
'labels'      	 => $labels,
'public' 	  	 => true,
'has_archive' 	 => true,
'menu_position'  => 5,
'description'    => 'Reviews And Types of Coffee',
'rewrite'     	 =>
array('slug' => 'reviews'),
'supports'    	 =>
array( 'title',
'comments', 'editor',
'thumbnail', 'custom-fields', 'revisions'),
);

register_post_type('Reviews', $args);
}
add_action('init', 'create_new_post_type');
Because we don’t particularly like utilizing code without an idea of what it does, let’s walk through what this code does.
Note: You may have noticed that $labels and $args are defined outside of the register_post_type() function even though they are just passed as arguments to that function later on. This method aids organization and readability, but you can condense both arrays into a single argument. It would just be more difficult to understand.
The $args array contains all of the specifics we need to define our new content type. Here’s what these do:
‘labels’– An array defining what we will call our content type. There are many more labels available that you can use, and a full list is available in the documentation here.‘public’– A boolean that defines whether or not the post is viewable outside of the Admin panel.‘has_archive’– If true, this boolean will create an archive of this type of custom posts, just like standard WordPress posts.‘menu_position’– This integer changes where your custom post navigation button goes. The number 5 indicates that it will go directly below the posts tab. For a full list of numeric codes, check out the same documentation.‘description’– Describes the post type.‘rewrite’– This changes the slug to be “reviews,” which will help create a usable permalink structure. (Can also be boolean; check the documentation for more information.)‘supports’– An array defining what native WordPress editing/post features are enabled. This one is pretty flexible, and there a lot more options, but we will be needing at leastcustom-fieldsandeditorfor this post.
The register_post_type() function is called next, which creates a new post type called Reviews using the array of arguments we just defined.
Finally, we have to call one last function to complete the process. register_post_type() should always be initialized by the action ‘init’. We can hook our new function to init by calling
add_action(‘init’, ‘create_new_post_type’);
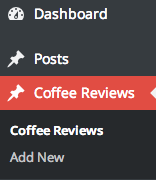
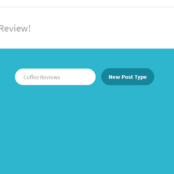
Awesome! Now if we log into our WordPress admin panel, we should see a new tab on the left called “Reviews.”
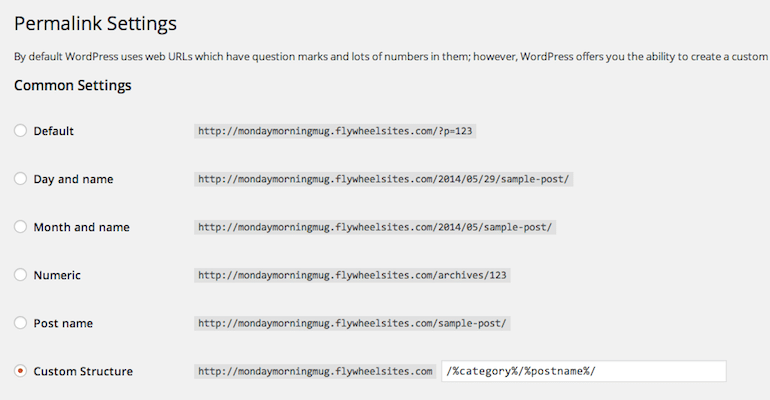
2. Now that we have Reviews set up as a custom post type, we need to update the permalink structure so our readers can easily find our posts. Plus it makes our URLs much easier to read and SEO friendly.
3. Under the Settings -> Permalinks menu bar, you’ll find a bunch of common options for permalink structures. We’re going to change the custom setting to match the field /%category%/%postname%/
This means WordPress will generate URLs to match the category and title of our posts.
Note: This is a site-wide change and will affect your posts in other categories.
Now let’s take a look at the URL of a post our reviewers wrote for the Sumatra Ketiara coffee:
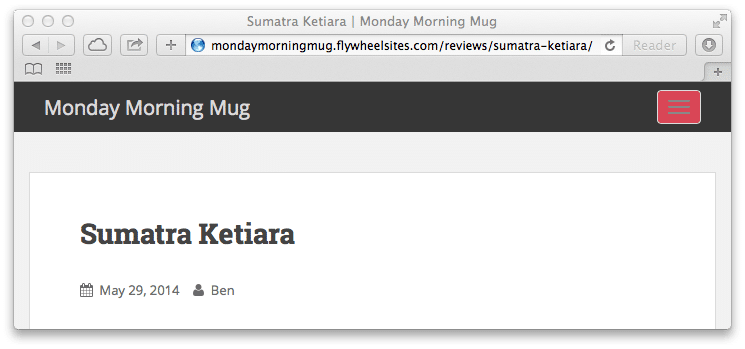
Fantastic! Check out that URL. We have reviews separated into their own directory and the URL is written in plain English. Now our readers know exactly what they’re going to get when they click on a link.
Custom Fields
Although our reviewers love the new Review section, they did ask us to incorporate something on the back end that allows them to enter common info that they write about every coffee, such as country of origin and tasting notes. This sounds like the perfect use of custom fields, which, luckily, are very easy to implement.
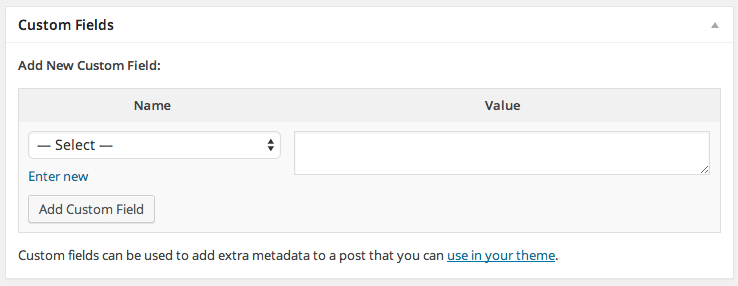
1. On an individual review editor, you will see the screen options button at the top right corner of the editor:

which expands to this when clicked:
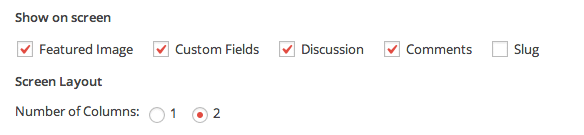
2. Check the Custom Fields box.
Below the editor, you’ll see the Custom Fields box that we just enabled.
3. You can type in anything in both boxes; anything you type and add in the Name field will be saved for later use. Here, we list the area and country that our coffee is from.
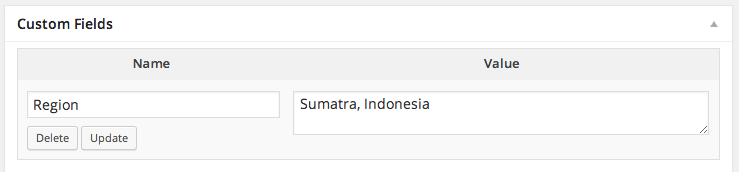
Custom fields make it incredibly easy to standardize data that matters for a category across every post in a separate place. Now we just have to get that information to display on our review.
4. We’re going to add this code tag to one of our theme documents:
<br /><?php the_meta(); ?><br />
Note: In this example, we’re going to put this tag in our content.php file, but you will need to find a suitable location for your table of values to go. You should also style this tag to match the rest of your theme, which you can read more about here.
Checking back to our blog, we can see that our tag has inserted a list into our review.
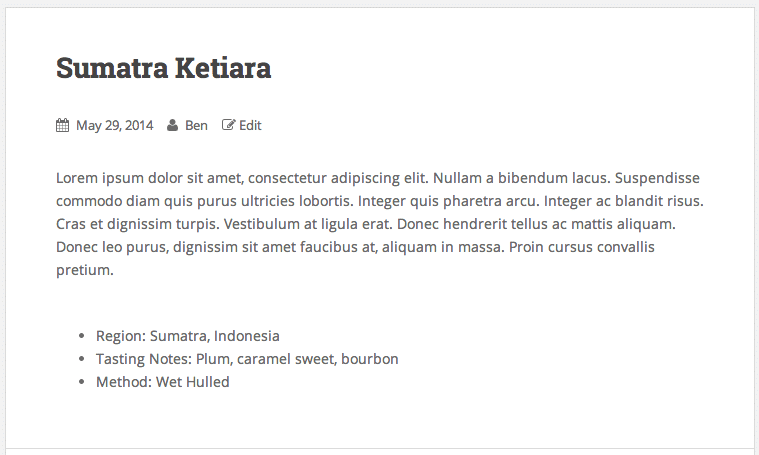
Swanky! Now our readers and our reviewers are both happy. We were able to build a custom post type that allowed us to save reviews about coffee, and we were able to give our reviewers a place to store all of their important information for every different review.


Comments ( 270 )
nfdbethpu
June 14, 2025
While necessary for correct calculation of RGB to XYZ transformation, in practice it may be difficult to notice that two color spaces have different whitepoints. Most color conversion operations will undergo chromatic adaptation and the color of 1.01.01.0 in the source color space will be mapped to 1.01.01.0 in the destination color space. In some cases, one takes one dimension of the color space to be the luminance (specifying the perceived brightness), and the remaining dimensions determines the chromaticity. Chromaticity may further be divided into hue (“type of color”) and color saturation. (Maximum color saturation is obtained for spectral colors, corresponding to monochromatic light.) However, not all color spaces realize such divisions; for example, RGB color spaces do not use a luminance channel.
http://chadstonetabletennis.com/forums/users/bowjehighsu1973/
Interact - E or B Since this is a provably fair game, players cannot hack it or influence the outcomes. Plus, the provider utilizes a random number generator. Are you sure that you want to empty the trash? All trashed folders and Polypads will be deleted. This action cannot be undone. 1win Casino was founded in 2016, and it has Curacao licensure. Periodically, the regulator controls the safety of financial data and openness in a game. You can try more than 10.000 types of games in 1win, including Aviator. For new players, an online casino has a welcome bonus, regular ones should appreciate cashback and loyalty programs. Moreover, sometimes 1win pleases players with special promotions that make the game even more interesting. Menyediakan tabel slot gacor berdasarkan jam dan provider, disertai filter game ringan.
PatrickPoono
June 12, 2025
https://semaglupharm.com/# SemagluPharm
AaronQuelo
June 6, 2025
provigil no prescription online pharmacy: Pharm Express 24 - asda pharmacy viagra prices
Josephner
May 29, 2025
Online drugstore Australia: Buy medicine online Australia - PharmAu24
Rodneysog
May 28, 2025
online pharmacy australia [url=http://pharmau24.com/#]Buy medicine online Australia[/url] Online medication store Australia
Josephner
May 28, 2025
online erectile dysfunction: Ero Pharm Fast - Ero Pharm Fast
Rodneysog
May 28, 2025
buy antibiotics over the counter [url=http://biotpharm.com/#]BiotPharm[/url] Over the counter antibiotics pills
Josephner
May 28, 2025
Ero Pharm Fast: ed pills - Ero Pharm Fast
DanielTem
May 28, 2025
https://biotpharm.shop/# buy antibiotics
Josephner
May 28, 2025
ed treatment online: Ero Pharm Fast - Ero Pharm Fast
Josephner
May 28, 2025
Pharm Au24: Medications online Australia - Discount pharmacy Australia
Rodneysog
May 28, 2025
low cost ed medication [url=https://eropharmfast.com/#]order ed pills[/url] Ero Pharm Fast
CurtisAdurl
May 27, 2025
Pharm Au24: Pharm Au24 - Medications online Australia
Josephner
May 27, 2025
Pharm Au24: Buy medicine online Australia - online pharmacy australia
Davidunlor
May 27, 2025
http://eropharmfast.com/# ed treatment online
Rodneysog
May 27, 2025
get antibiotics quickly [url=https://biotpharm.com/#]buy antibiotics online uk[/url] buy antibiotics from canada
Charlesmub
May 27, 2025
best online doctor for antibiotics: buy antibiotics online - buy antibiotics
Rodneysog
May 27, 2025
Ero Pharm Fast [url=https://eropharmfast.com/#]best online ed treatment[/url] online erectile dysfunction prescription
Davidunlor
May 27, 2025
http://pharmau24.com/# Buy medicine online Australia
Josephner
May 27, 2025
Licensed online pharmacy AU: pharmacy online australia - pharmacy online australia
Lorenhag
May 24, 2025
cialis vs.levitra: Tadal Access - cheap canadian cialis
FrankieLar
May 23, 2025
https://tadalaccess.com/# tadalafil (exilar-sava healthcare) [generic version of cialis] (rx) lowest price
Lorenhag
May 23, 2025
buy cialis pro: when will generic cialis be available in the us - cialis daily vs regular cialis
JosephTes
May 23, 2025
generic cialis from india [url=https://tadalaccess.com/#]buy cheap cialis online with mastercard[/url] us pharmacy prices for cialis
Lorenhag
May 23, 2025
cialis experience reddit: TadalAccess - buy cialis online canada
FrankieLar
May 23, 2025
https://tadalaccess.com/# cialis overdose
JosephTes
May 23, 2025
cialis patent expiration [url=https://tadalaccess.com/#]Tadal Access[/url] cialis available in walgreens over counter??
FrankieLar
May 23, 2025
https://tadalaccess.com/# cialis 20 mg price walmart
JosephTes
May 23, 2025
cialis daily review [url=https://tadalaccess.com/#]Tadal Access[/url] cialis strength
Lorenhag
May 23, 2025
safest and most reliable pharmacy to buy cialis: cialis experience reddit - cialis vs sildenafil
JosephTes
May 22, 2025
pastillas cialis [url=https://tadalaccess.com/#]TadalAccess[/url] cialis generic timeline 2018
FrankieLar
May 22, 2025
https://tadalaccess.com/# cialis for daily use dosage
Lorenhag
May 22, 2025
cialis using paypal in australia: cialis free trial - cialis wikipedia
JosephTes
May 22, 2025
cialis store in philippines [url=https://tadalaccess.com/#]TadalAccess[/url] order cialis online
Lorenhag
May 22, 2025
tadalafil citrate research chemical: tadalafil cheapest price - order cialis canada
FrankieLar
May 22, 2025
https://tadalaccess.com/# how much does cialis cost at cvs
JosephTes
May 22, 2025
mint pharmaceuticals tadalafil [url=https://tadalaccess.com/#]cialis tadalafil 20mg kaufen[/url] whats cialis
Lorenhag
May 22, 2025
purchase brand cialis: tadacip tadalafil - cialis free trial offer
JosephTes
May 22, 2025
pregnancy category for tadalafil [url=https://tadalaccess.com/#]generic cialis tadalafil 20mg india[/url] cialis for sale online in canada
FrankieLar
May 22, 2025
https://tadalaccess.com/# what is cialis used to treat
Lorenhag
May 22, 2025
most recommended online pharmacies cialis: cialis meme - cialis pills
JosephTes
May 22, 2025
generic tadalafil cost [url=https://tadalaccess.com/#]Tadal Access[/url] cialis timing
Lorenhag
May 21, 2025
difference between cialis and tadalafil: TadalAccess - cialis recreational use
JosephTes
May 21, 2025
cialis 10mg ireland [url=https://tadalaccess.com/#]TadalAccess[/url] cialis san diego
JosephTes
May 21, 2025
canadian pharmacy cialis brand [url=https://tadalaccess.com/#]TadalAccess[/url] cialis 20 mg best price
JosephTes
May 21, 2025
cialis pills online [url=https://tadalaccess.com/#]Tadal Access[/url] cialis generics
Lorenhag
May 21, 2025
cialis dapoxetine overnight shipment: cheap cialis pills - tadalafil dose for erectile dysfunction
JosephTes
May 21, 2025
cialis dapoxetine europe [url=https://tadalaccess.com/#]cialis drug class[/url] what is tadalafil made from
FrankieLar
May 20, 2025
https://tadalaccess.com/# canadian no prescription pharmacy cialis
JosephTes
May 20, 2025
cialis for sale online [url=https://tadalaccess.com/#]TadalAccess[/url] maximpeptide tadalafil review
FrankieLar
May 20, 2025
https://tadalaccess.com/# is tadalafil and cialis the same thing?
JosephTes
May 20, 2025
buy cialis shipment to russia [url=https://tadalaccess.com/#]Tadal Access[/url] cialis super active real online store
FrankieLar
May 20, 2025
https://tadalaccess.com/# cialis online paypal
Lorenhag
May 20, 2025
teva generic cialis: buy cialis generic online 10 mg - cialis and alcohol
Scottdroca
May 20, 2025
cialis images: u.s. pharmacy prices for cialis - cialis maximum dose
JosephTes
May 20, 2025
cialis price cvs [url=https://tadalaccess.com/#]sildenafil vs tadalafil vs vardenafil[/url] cialis dosage reddit
Lorenhag
May 20, 2025
is tadalafil from india safe: cialis vs flomax - cialis and dapoxetime tabs in usa
FrankieLar
May 19, 2025
https://tadalaccess.com/# online cialis no prescription
Lorenhag
May 19, 2025
generic cialis super active tadalafil 20mg: cialis mit paypal bezahlen - what is cialis taken for
JosephTes
May 19, 2025
cheap generic cialis canada [url=https://tadalaccess.com/#]TadalAccess[/url] cialis testimonials
FrankieLar
May 19, 2025
https://tadalaccess.com/# buy cialis 20mg
JosephTes
May 19, 2025
cialis pills online [url=https://tadalaccess.com/#]cialis definition[/url] when should i take cialis
Lorenhag
May 19, 2025
buy cialis cheap fast delivery: cialis goodrx - cialis side effects heart
JosephTes
May 19, 2025
cialis one a day with dapoxetine canada [url=https://tadalaccess.com/#]TadalAccess[/url] cialis coupon walmart
Lorenhag
May 19, 2025
levitra vs cialis: what is the generic for cialis - purchase cialis online
FrankieLar
May 19, 2025
https://tadalaccess.com/# stockists of cialis
JosephTes
May 19, 2025
does medicare cover cialis [url=https://tadalaccess.com/#]Tadal Access[/url] buy cialis 20 mg online
FrankieLar
May 19, 2025
https://tadalaccess.com/# tadalafil daily use
JosephTes
May 18, 2025
tadalafil professional review [url=https://tadalaccess.com/#]tadalafil 40 mg with dapoxetine 60 mg[/url] difference between sildenafil and tadalafil
Lorenhag
May 18, 2025
cheap canadian cialis: buy cialis without prescription - cialis 40 mg
FrankieLar
May 18, 2025
https://tadalaccess.com/# sanofi cialis
JosephTes
May 18, 2025
cialis and alcohol [url=https://tadalaccess.com/#]Tadal Access[/url] cialis instructions
FrankieLar
May 18, 2025
https://tadalaccess.com/# canada cialis for sale
JosephTes
May 18, 2025
20 mg tadalafil best price [url=https://tadalaccess.com/#]TadalAccess[/url] cheap tadalafil no prescription
Lorenhag
May 18, 2025
pharmacy 365 cialis: cialis for daily use cost - cialis recreational use
FrankieLar
May 18, 2025
https://tadalaccess.com/# buy cialis online australia pay with paypal
Lorenhag
May 18, 2025
buying cialis in mexico: tadalafil citrate liquid - how many 5mg cialis can i take at once
FrankieLar
May 18, 2025
https://tadalaccess.com/# best place to buy generic cialis online
Lorenhag
May 17, 2025
generic tadalafil 40 mg: Tadal Access - purchasing cialis
FrankieLar
May 17, 2025
https://tadalaccess.com/# nebenwirkungen tadalafil
Lorenhag
May 17, 2025
how many 5mg cialis can i take at once: TadalAccess - cialis and cocaine
Lorenhag
May 17, 2025
cialis sample: TadalAccess - cialis after prostate surgery
FrankieLar
May 17, 2025
https://tadalaccess.com/# do you need a prescription for cialis
JosephTes
May 17, 2025
difference between tadalafil and sildenafil [url=https://tadalaccess.com/#]when will cialis be generic[/url] tadalafil 20mg
Lorenhag
May 17, 2025
where to get the best price on cialis: Tadal Access - cialis pills online
FrankieLar
May 17, 2025
https://tadalaccess.com/# when does cialis go off patent
JosephTes
May 17, 2025
cialis not working anymore [url=https://tadalaccess.com/#]TadalAccess[/url] cialis how does it work
FrankieLar
May 16, 2025
https://tadalaccess.com/# cialis vs flomax
JosephTes
May 16, 2025
cialis 20 mg price costco [url=https://tadalaccess.com/#]TadalAccess[/url] does cialis really work
Lorenhag
May 16, 2025
cialis tubs: TadalAccess - canada pharmacy cialis
FrankieLar
May 16, 2025
https://tadalaccess.com/# cialis when to take
JosephTes
May 16, 2025
what is the cost of cialis [url=https://tadalaccess.com/#]cialis online paypal[/url] generic tadalafil in us
Lorenhag
May 16, 2025
tadalafil generic cialis 20mg: sildenafil vs tadalafil which is better - what possible side effect should a patient taking tadalafil report to a physician quizlet
FrankieLar
May 16, 2025
https://tadalaccess.com/# what does generic cialis look like
Lorenhag
May 16, 2025
cialis prescription online: Tadal Access - where can i buy cialis online
FrankieLar
May 16, 2025
https://tadalaccess.com/# what is cialis pill
JosephTes
May 16, 2025
cialis canada over the counter [url=https://tadalaccess.com/#]cialis online no prior prescription[/url] cialis available in walgreens over counter??
FrankieLar
May 15, 2025
https://tadalaccess.com/# tadalafil 20mg (generic equivalent to cialis)
Lorenhag
May 15, 2025
cialis one a day: TadalAccess - cialis coupon code
JosephTes
May 15, 2025
cialis over the counter at walmart [url=https://tadalaccess.com/#]TadalAccess[/url] buy cialis online overnight delivery
FrankieLar
May 15, 2025
https://tadalaccess.com/# cialis soft
Lorenhag
May 15, 2025
cialis medicine: Tadal Access - tadalafil 5mg generic from us
JosephTes
May 15, 2025
purchase brand cialis [url=https://tadalaccess.com/#]cialis otc 2016[/url] tadalafil tablets
Lorenhag
May 15, 2025
what happens when you mix cialis with grapefruit?: cialis 5mg best price - cialis mexico
FrankieLar
May 15, 2025
https://tadalaccess.com/# generic cialis 20 mg from india
JosephTes
May 15, 2025
cialis coupon online [url=https://tadalaccess.com/#]TadalAccess[/url] cialis coupon walmart
Lorenhag
May 15, 2025
cialis with dapoxetine 60mg: cialis sales in victoria canada - cialis wikipedia
JosephTes
May 14, 2025
what to do when cialis stops working [url=https://tadalaccess.com/#]sanofi cialis otc[/url] overnight cialis delivery
Lorenhag
May 14, 2025
what does cialis look like: reddit cialis - cialis online reviews
FrankieLar
May 14, 2025
https://tadalaccess.com/# cialis maximum dose
JosephTes
May 14, 2025
cialis erection [url=https://tadalaccess.com/#]Tadal Access[/url] cialis how does it work
Lorenhag
May 14, 2025
mantra 10 tadalafil tablets: what does a cialis pill look like - cialis street price
FrankieLar
May 14, 2025
https://tadalaccess.com/# cheap cialis dapoxitine cheap online
JosephTes
May 14, 2025
cheap t jet 60 cialis online [url=https://tadalaccess.com/#]TadalAccess[/url] tadalafil medication
Lorenhag
May 14, 2025
cialis timing: TadalAccess - where to buy cialis over the counter
FrankieLar
May 14, 2025
https://tadalaccess.com/# how much does cialis cost at walmart
JosephTes
May 14, 2025
tadalafil vidalista [url=https://tadalaccess.com/#]generic cialis from india[/url] tadalafil generic usa
Lorenhag
May 14, 2025
cialis manufacturer coupon: vidalista 20 tadalafil tablets - tadalafil ingredients
FrankieLar
May 14, 2025
https://tadalaccess.com/# cialis and high blood pressure
MatthewTom
May 13, 2025
where can i buy generic clomid without prescription [url=https://clomhealth.com/#]Clom Health[/url] buying generic clomid no prescription
Russellfeeve
May 13, 2025
PredniHealth: prednisolone prednisone - prednisone 10 mg tablets
RogerCouct
May 13, 2025
https://clomhealth.com/# order clomid prices
Russellfeeve
May 13, 2025
order prednisone online no prescription: PredniHealth - PredniHealth
RogerCouct
May 13, 2025
https://prednihealth.com/# 50 mg prednisone canada pharmacy
MatthewTom
May 13, 2025
prednisone 50 mg canada [url=https://prednihealth.shop/#]where can i buy prednisone[/url] purchase prednisone canada
RogerCouct
May 13, 2025
https://amohealthcare.store/# amoxicillin 500mg capsules price
MatthewTom
May 13, 2025
Amo Health Care [url=https://amohealthcare.store/#]Amo Health Care[/url] can you buy amoxicillin over the counter canada
Russellfeeve
May 13, 2025
amoxicillin discount: amoxicillin without prescription - Amo Health Care
RogerCouct
May 13, 2025
http://prednihealth.com/# PredniHealth
Russellfeeve
May 12, 2025
can you buy generic clomid price: Clom Health - buy clomid pills
MatthewTom
May 12, 2025
Amo Health Care [url=https://amohealthcare.store/#]prescription for amoxicillin[/url] Amo Health Care
RogerCouct
May 12, 2025
https://prednihealth.com/# PredniHealth
MatthewTom
May 12, 2025
Amo Health Care [url=https://amohealthcare.store/#]Amo Health Care[/url] generic amoxicillin
RogerCouct
May 12, 2025
https://clomhealth.com/# can i get cheap clomid without rx
Russellfeeve
May 12, 2025
how can i get cheap clomid without prescription: Clom Health - how to get generic clomid no prescription
RogerCouct
May 12, 2025
https://amohealthcare.store/# Amo Health Care
MatthewTom
May 12, 2025
can i get cheap clomid tablets [url=https://clomhealth.com/#]can i get cheap clomid without rx[/url] can you buy cheap clomid now
Russellfeeve
May 12, 2025
prednisone price australia: PredniHealth - where can i get prednisone
Jeremyfax
May 11, 2025
Modafinil for sale: buy modafinil online - Modafinil for sale
Albertoseino
May 11, 2025
no doctor visit required: safe online pharmacy - same-day Viagra shipping
LorenzoBlize
May 11, 2025
modafinil legality [url=https://modafinilmd.store/#]modafinil 2025[/url] purchase Modafinil without prescription
LorenzoBlize
May 10, 2025
modafinil 2025 [url=https://modafinilmd.store/#]verified Modafinil vendors[/url] legal Modafinil purchase
RobertKet
May 10, 2025
best price Cialis tablets: buy generic Cialis online - order Cialis online no prescription
Albertoseino
May 10, 2025
buy modafinil online: modafinil pharmacy - verified Modafinil vendors
LorenzoBlize
May 10, 2025
cheap Cialis online [url=http://zipgenericmd.com/#]Cialis without prescription[/url] order Cialis online no prescription
RobertKet
May 10, 2025
cheap Cialis online: reliable online pharmacy Cialis - best price Cialis tablets
LorenzoBlize
May 10, 2025
generic tadalafil [url=https://zipgenericmd.com/#]FDA approved generic Cialis[/url] generic tadalafil
RobertKet
May 9, 2025
buy generic Cialis online: secure checkout ED drugs - generic tadalafil
LorenzoBlize
May 9, 2025
purchase Modafinil without prescription [url=https://modafinilmd.store/#]safe modafinil purchase[/url] modafinil pharmacy
RonaldFOEFS
May 9, 2025
https://modafinilmd.store/# safe modafinil purchase
RobertKet
May 9, 2025
fast Viagra delivery: same-day Viagra shipping - cheap Viagra online
RobertKet
May 9, 2025
cheap Cialis online: cheap Cialis online - affordable ED medication
LorenzoBlize
May 9, 2025
trusted Viagra suppliers [url=http://maxviagramd.com/#]cheap Viagra online[/url] Viagra without prescription
RonaldFOEFS
May 9, 2025
http://zipgenericmd.com/# discreet shipping ED pills
Jeremyfax
May 9, 2025
order Viagra discreetly: same-day Viagra shipping - cheap Viagra online
RobertKet
May 9, 2025
Viagra without prescription: buy generic Viagra online - Viagra without prescription
LorenzoBlize
May 9, 2025
Cialis without prescription [url=https://zipgenericmd.shop/#]secure checkout ED drugs[/url] reliable online pharmacy Cialis
ZackaryCaush
May 8, 2025
http://pinupaz.top/# pin up casino
ZackaryCaush
May 8, 2025
https://vavadavhod.tech/# vavada casino
Richardmat
May 8, 2025
пин ап вход [url=http://pinuprus.pro/#]пинап казино[/url] пин ап зеркало
Richardmat
May 7, 2025
vavada вход [url=http://vavadavhod.tech/#]vavada вход[/url] вавада
ZackaryCaush
May 7, 2025
http://vavadavhod.tech/# vavada
Richardmat
May 6, 2025
pin up вход [url=http://pinuprus.pro/#]пин ап казино официальный сайт[/url] пин ап зеркало
ZackaryCaush
May 6, 2025
https://pinupaz.top/# pinup az
ZackaryCaush
May 5, 2025
https://vavadavhod.tech/# vavada вход
Richardmat
May 5, 2025
pin up azerbaycan [url=https://pinupaz.top/#]pin up casino[/url] pin up
ZackaryCaush
May 5, 2025
http://pinupaz.top/# pin-up casino giris
Richardmat
May 5, 2025
пин ап вход [url=http://pinuprus.pro/#]пин ап казино[/url] пин ап казино официальный сайт
ZackaryCaush
May 5, 2025
http://pinuprus.pro/# pin up вход
ZackaryCaush
May 4, 2025
https://vavadavhod.tech/# вавада казино
Richardmat
May 4, 2025
pin up вход [url=http://pinuprus.pro/#]пин ап вход[/url] pin up вход
ZackaryCaush
May 4, 2025
http://pinupaz.top/# pin-up
ZackaryCaush
May 2, 2025
https://pinuprus.pro/# пин ап вход
ZackaryCaush
May 1, 2025
https://pinuprus.pro/# пин ап казино официальный сайт
ZackaryCaush
May 1, 2025
https://pinupaz.top/# pin-up
Richardmat
May 1, 2025
пин ап вход [url=http://pinuprus.pro/#]пин ап казино[/url] пин ап казино
Richardmat
May 1, 2025
vavada вход [url=https://vavadavhod.tech/#]вавада официальный сайт[/url] vavada
ZackaryCaush
April 30, 2025
http://pinuprus.pro/# pin up вход
Richardmat
April 30, 2025
пин ап вход [url=http://pinuprus.pro/#]пин ап зеркало[/url] пин ап казино официальный сайт
Kennethsheby
April 30, 2025
пин ап казино официальный сайт: пин ап казино - пин ап казино официальный сайт
ZackaryCaush
April 30, 2025
http://pinupaz.top/# pin up azerbaycan
ElmerSip
April 30, 2025
пинап казино: pin up вход - pin up вход
Richardmat
April 30, 2025
pin-up [url=http://pinupaz.top/#]pin up azerbaycan[/url] pin up az
Kennethsheby
April 30, 2025
пин ап вход: пин ап казино - пин ап зеркало
ZackaryCaush
April 30, 2025
https://pinupaz.top/# pin up casino
ElmerSip
April 30, 2025
пин ап казино: pin up вход - pin up вход
Richardmat
April 30, 2025
пинап казино [url=https://pinuprus.pro/#]пин ап вход[/url] пин ап зеркало
Kennethsheby
April 30, 2025
пинап казино: пин ап вход - пин ап вход
ZackaryCaush
April 30, 2025
https://vavadavhod.tech/# вавада казино
ElmerSip
April 30, 2025
pinup az: pinup az - pin-up
Kennethsheby
April 30, 2025
пинап казино: pin up вход - пин ап казино
Richardmat
April 30, 2025
pin-up [url=https://pinupaz.top/#]pin-up casino giris[/url] pin up
ZackaryCaush
April 30, 2025
https://vavadavhod.tech/# vavada
ElmerSip
April 30, 2025
pin-up: pin-up casino giris - pin-up casino giris
Stevendrype
April 30, 2025
canadian pharmacy scam: canadian pharmacy meds reviews - canadian family pharmacy
Michaeljouch
April 29, 2025
canadapharmacyonline [url=https://expressrxcanada.shop/#]Generic drugs from Canada[/url] canadian pharmacy meds reviews
Walterhap
April 29, 2025
http://medicinefromindia.com/# Medicine From India
Dannysit
April 29, 2025
trusted canadian pharmacy: canadapharmacyonline com - vipps approved canadian online pharmacy
MichaelFaulp
April 29, 2025
real canadian pharmacy: legit canadian pharmacy - canadian pharmacy uk delivery
Walterhap
April 29, 2025
https://expressrxcanada.shop/# northwest canadian pharmacy
Dannysit
April 29, 2025
safe canadian pharmacy: Express Rx Canada - canadian drug pharmacy
Michaeljouch
April 29, 2025
canadian pharmacy meds reviews [url=https://expressrxcanada.shop/#]ExpressRxCanada[/url] canadian online pharmacy
Stevendrype
April 29, 2025
mexico pharmacy order online: RxExpressMexico - mexico pharmacy order online
MichaelFaulp
April 29, 2025
canadian pharmacy 24: Buy medicine from Canada - canadian family pharmacy
Walterhap
April 29, 2025
http://expressrxcanada.com/# canadian pharmacy ltd
Dannysit
April 29, 2025
Rx Express Mexico: Rx Express Mexico - mexico drug stores pharmacies
Stevendrype
April 29, 2025
Rx Express Mexico: mexico pharmacies prescription drugs - RxExpressMexico
Michaeljouch
April 29, 2025
Rx Express Mexico [url=https://rxexpressmexico.shop/#]mexico drug stores pharmacies[/url] mexico drug stores pharmacies
Walterhap
April 29, 2025
https://rxexpressmexico.com/# mexican online pharmacy
Dannysit
April 29, 2025
online canadian pharmacy: Express Rx Canada - canadian pharmacies
MichaelFaulp
April 29, 2025
reputable canadian online pharmacies: Express Rx Canada - reliable canadian pharmacy
Michaeljouch
April 29, 2025
indian pharmacy [url=https://medicinefromindia.shop/#]reputable indian pharmacies[/url] Medicine From India
Walterhap
April 29, 2025
https://rxexpressmexico.com/# pharmacies in mexico that ship to usa
Stevendrype
April 29, 2025
Rx Express Mexico: mexican online pharmacy - RxExpressMexico
Dannysit
April 29, 2025
legal to buy prescription drugs from canada: drugs from canada - canadian pharmacy price checker
MichaelFaulp
April 29, 2025
canada ed drugs: Canadian pharmacy shipping to USA - canadian pharmacies online
Michaeljouch
April 28, 2025
canadian drugstore online [url=http://expressrxcanada.com/#]ExpressRxCanada[/url] best canadian pharmacy to buy from
Stevendrype
April 28, 2025
mexico pharmacy order online: mexican online pharmacy - Rx Express Mexico
Walterhap
April 28, 2025
https://expressrxcanada.shop/# safe online pharmacies in canada
Dannysit
April 28, 2025
indian pharmacy: Medicine From India - medicine courier from India to USA
Michaeljouch
April 28, 2025
canadian drug pharmacy [url=https://expressrxcanada.com/#]Express Rx Canada[/url] canada drugstore pharmacy rx
Stevendrype
April 28, 2025
indian pharmacy online: medicine courier from India to USA - Medicine From India
Walterhap
April 28, 2025
https://expressrxcanada.shop/# maple leaf pharmacy in canada
Dannysit
April 28, 2025
medicine courier from India to USA: MedicineFromIndia - indian pharmacy
MichaelFaulp
April 28, 2025
medicine courier from India to USA: MedicineFromIndia - Medicine From India
Stevendrype
April 28, 2025
indianpharmacy com: mail order pharmacy india - indian pharmacy online shopping
Walterhap
April 28, 2025
https://medicinefromindia.com/# MedicineFromIndia
Dannysit
April 28, 2025
mexico pharmacy order online: Rx Express Mexico - mexican rx online
Michaeljouch
April 28, 2025
precription drugs from canada [url=https://expressrxcanada.shop/#]Express Rx Canada[/url] canada drugs online
MichaelFaulp
April 28, 2025
reliable canadian online pharmacy: Generic drugs from Canada - recommended canadian pharmacies
Stevendrype
April 28, 2025
mexico pharmacy order online: RxExpressMexico - RxExpressMexico
Dannysit
April 28, 2025
indian pharmacy online shopping: indian pharmacy - indian pharmacy online
BilliesniCt
April 28, 2025
pharmacie en ligne france pas cher: Pharmacie en ligne France - Pharmacie Internationale en ligne pharmafst.com
Bradleyfup
April 28, 2025
Kamagra pharmacie en ligne: Achetez vos kamagra medicaments - achat kamagra
BernardVeida
April 28, 2025
Cialis sans ordonnance 24h: Cialis generique prix - Tadalafil 20 mg prix sans ordonnance tadalmed.shop
Robertmut
April 27, 2025
https://tadalmed.shop/# Achat Cialis en ligne fiable
BernardVeida
April 27, 2025
Pharmacie sans ordonnance: pharmacie en ligne - pharmacie en ligne france livraison belgique pharmafst.com
BernardVeida
April 27, 2025
Cialis sans ordonnance pas cher: Acheter Cialis 20 mg pas cher - Tadalafil sans ordonnance en ligne tadalmed.shop
Robertmut
April 26, 2025
https://pharmafst.shop/# pharmacie en ligne france livraison internationale
BilliesniCt
April 26, 2025
Acheter Viagra Cialis sans ordonnance: Acheter Viagra Cialis sans ordonnance - Tadalafil sans ordonnance en ligne tadalmed.shop
PeterUnomb
April 26, 2025
pharmacie en ligne fiable [url=http://pharmafst.com/#]Pharmacie en ligne France[/url] Pharmacie sans ordonnance pharmafst.shop
Bradleyfup
April 26, 2025
Kamagra pharmacie en ligne: Kamagra Commander maintenant - kamagra pas cher
BernardVeida
April 26, 2025
Cialis generique prix: Cialis sans ordonnance pas cher - Acheter Cialis 20 mg pas cher tadalmed.shop
BilliesniCt
April 26, 2025
Pharmacie en ligne Cialis sans ordonnance: Acheter Viagra Cialis sans ordonnance - cialis sans ordonnance tadalmed.shop
Robertmut
April 26, 2025
https://tadalmed.com/# cialis prix
Bradleyfup
April 26, 2025
п»їpharmacie en ligne france: Meilleure pharmacie en ligne - п»їpharmacie en ligne france pharmafst.com
BilliesniCt
April 26, 2025
Kamagra pharmacie en ligne: Kamagra Commander maintenant - achat kamagra
Robertmut
April 26, 2025
https://pharmafst.com/# pharmacie en ligne france fiable
Robertmut
April 26, 2025
https://kamagraprix.shop/# acheter kamagra site fiable
BilliesniCt
April 26, 2025
Achetez vos kamagra medicaments: Acheter Kamagra site fiable - kamagra oral jelly
PeterUnomb
April 25, 2025
kamagra gel [url=http://kamagraprix.com/#]Acheter Kamagra site fiable[/url] Achetez vos kamagra medicaments
Robertmut
April 25, 2025
http://kamagraprix.com/# kamagra 100mg prix
BilliesniCt
April 25, 2025
pharmacie en ligne france pas cher: pharmacie en ligne - trouver un mГ©dicament en pharmacie pharmafst.com
Robertmut
April 25, 2025
https://pharmafst.com/# Pharmacie en ligne livraison Europe
BernardVeida
April 25, 2025
Kamagra Commander maintenant: Achetez vos kamagra medicaments - Kamagra Oral Jelly pas cher
Bradleyfup
April 25, 2025
Achetez vos kamagra medicaments: kamagra oral jelly - kamagra gel
PeterUnomb
April 25, 2025
trouver un mГ©dicament en pharmacie [url=https://pharmafst.com/#]pharmacie en ligne[/url] pharmacie en ligne france livraison internationale pharmafst.shop
Robertmut
April 25, 2025
https://pharmafst.com/# pharmacie en ligne sans ordonnance
BernardVeida
April 25, 2025
Pharmacie Internationale en ligne: pharmacie en ligne pas cher - pharmacies en ligne certifiГ©es pharmafst.com
BilliesniCt
April 25, 2025
achat kamagra: kamagra en ligne - kamagra pas cher
Bradleyfup
April 25, 2025
Acheter Viagra Cialis sans ordonnance: Achat Cialis en ligne fiable - Cialis sans ordonnance pas cher tadalmed.shop
BernardVeida
April 25, 2025
trouver un mГ©dicament en pharmacie: Pharmacies en ligne certifiees - pharmacie en ligne fiable pharmafst.com
PeterUnomb
April 25, 2025
acheter mГ©dicament en ligne sans ordonnance [url=https://pharmafst.com/#]Meilleure pharmacie en ligne[/url] pharmacie en ligne livraison europe pharmafst.shop
DavidSaisp
April 24, 2025
kamagra en ligne: achat kamagra - Kamagra Commander maintenant
Edwardtoupe
April 23, 2025
olympe casino cresus: olympe casino avis - olympe casino cresus
Anthonykek
March 7, 2025
Best crypto news sources
RandyZorie
February 22, 2025
These girls aren't just centered on the physical; a number of them are eager to take part in sensual stripping, pleasuring their orgasmic selves, and also indulging in the pleasures of others. All of the actions shown in these galleries will captivate, as these black beauties pour their all into every efficiency. http://nakedafricawomen.com/ extensive collection of images offers ample materials to fulfill all your desires - especially if you've got a penchant for ebony goddesses. As the motion unfolds, witness stiff people erupting with enthusiasm and smiling faces adorned with the aftermath. Featuring a plethora of dark porn stars, hundreds of top-notch images, and a variety of hardcore scenes, this collection of galleries is sure to please even the most discerning of tastes.
Paola
October 17, 2014
Thank you so much for this post! It was a life saver for me right now.
Regards.
inward
June 19, 2014
Hello! Do you know if they make any plugins to protect
against hackers? I'm kinda paranoid about losing everything I've worked hard on. Any suggestions?
Ben Stevinson
June 23, 2014
Hey there!
Security should definitely be a concern for every WordPress maintainer, and I definitely understand your worries!
Two awesome services we'd recommend for WordPress security are VaultPress and iThemes Security Pro. VaultPress is actually a service of Automattic, the company responsible for WordPress, and iThemes Security Pro is developed by some very well respected WordPress leaders. Both are great options.
Of course, if you're a Flywheel user, we proactively handle security for you and make daily backups, both of which we offer at no extra cost. On the off chance that your site is hacked, we will restore and fix it for free.
Tony
June 12, 2014
I don't think a conversation about custom fields in WordPress can be complete without mentioning the Advanced Custom Fields plugin. The functionality of ACF makes developing sites (and sites which are almost apps) a breeze. For simple things, the built-in custom fields are good, but for anything beyond strictly string based key/value data, definitely check out ACF. http://www.advancedcustomfields.com/