Point Network Solutions DNS to Flywheel
Flywheel provides each site with an IP address to which domains can be pointed. This is useful if you own, for example, thisfinedomain.com, and would like it to resolve to a Flywheel site.
Note
This article is for customers who have purchased domains that are managed by Network Solutions. We have a general help tutorial as well as instructions for other domain providers here.If you’re brand new to the world of domain names, some of the terminology may seem a little confusing. If you ever feel stuck, feel free to reference our Glossary of DNS terms.
Warning
For security best practices, we recommend not pointing a wildcard entry directly to a Flywheel IP address, but instead to point any subdomain independently. The use of wildcard records may open your domain up to additional subdomains being created without your permission.Table of Contents:
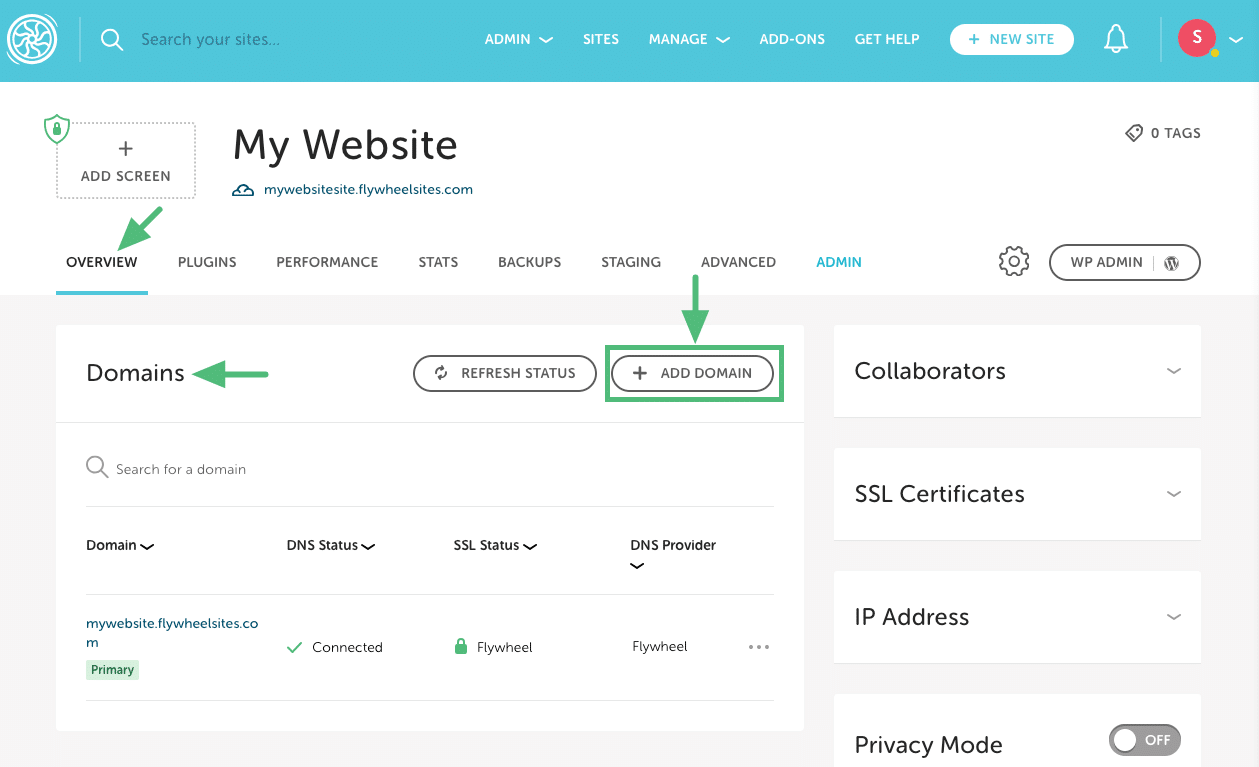
Step 1: Add the domain to your Flywheel site
- From the site’s Overview tab, go to the Domains section and click the + Add Domain button to add the domain you’d like to point to Flywheel.
- Next, fill out the domain information as described below.
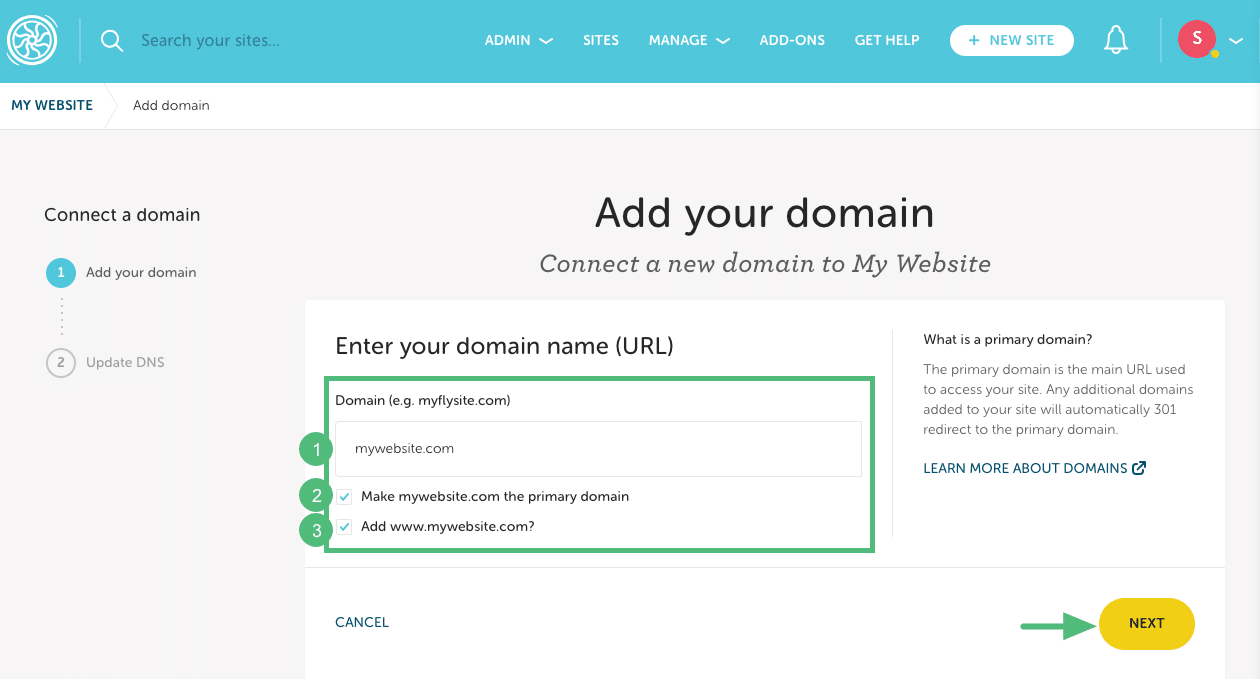
1. Domain: Enter the URL (without a prefix). Example: mywebsite.com
2. Primary domain: Check the box if you want this to be your primary domain (if this will be your site’s main URL).
3. www: By default, the www version of the domain will be added, but you can uncheck the box to skip this step if needed. Example: www.mywebsite.com.Then click Next.
Note
In the background, our system will automatically update all appropriate URL references in the database to this new primary domain. - Click to copy your new DNS records to your clipboard. We recommend keeping this tab open so you can easily copy them from here and paste them into Network Solution’s DNS editor.
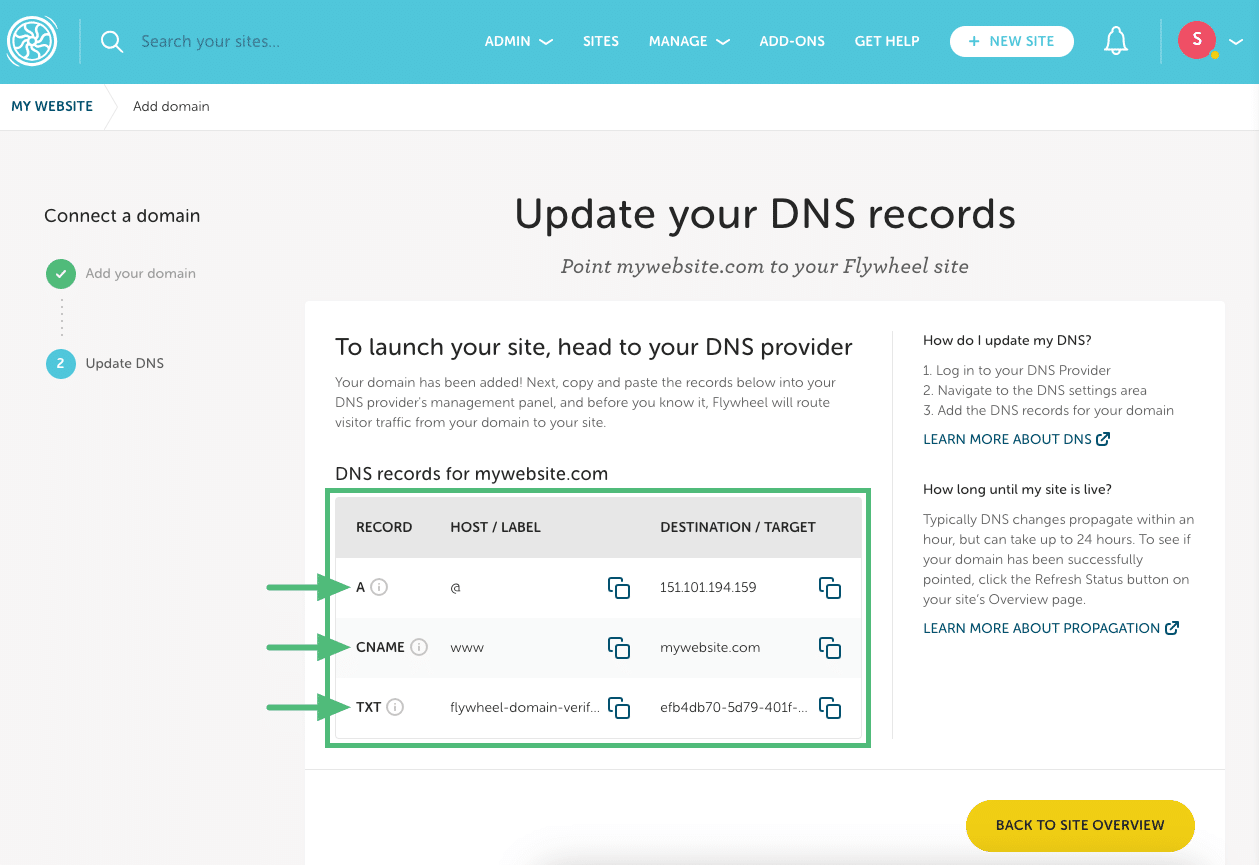
You will need to copy all the records you see in the table. For example:
• A record (This is your Flywheel site’s IP address)
• CNAME record (The CNAME record is only required if you’re adding the “www” version of your domain. If you’re not, the CNAME isn’t required and won’t be displayed in the list.)
• TXT record
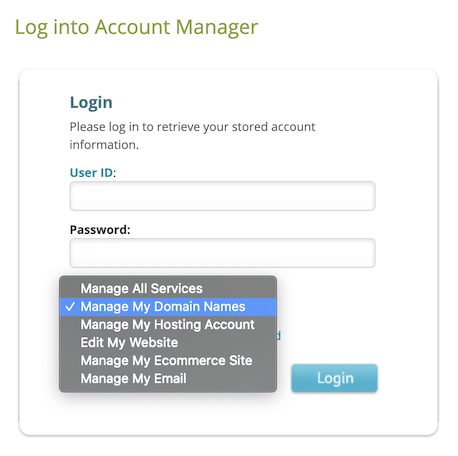
Step 2: Log in to Network Solutions
- In a separate tab, log in to your account at Network Solutions. Make sure to select Manage My Domain Names for the Log In To dropdown.
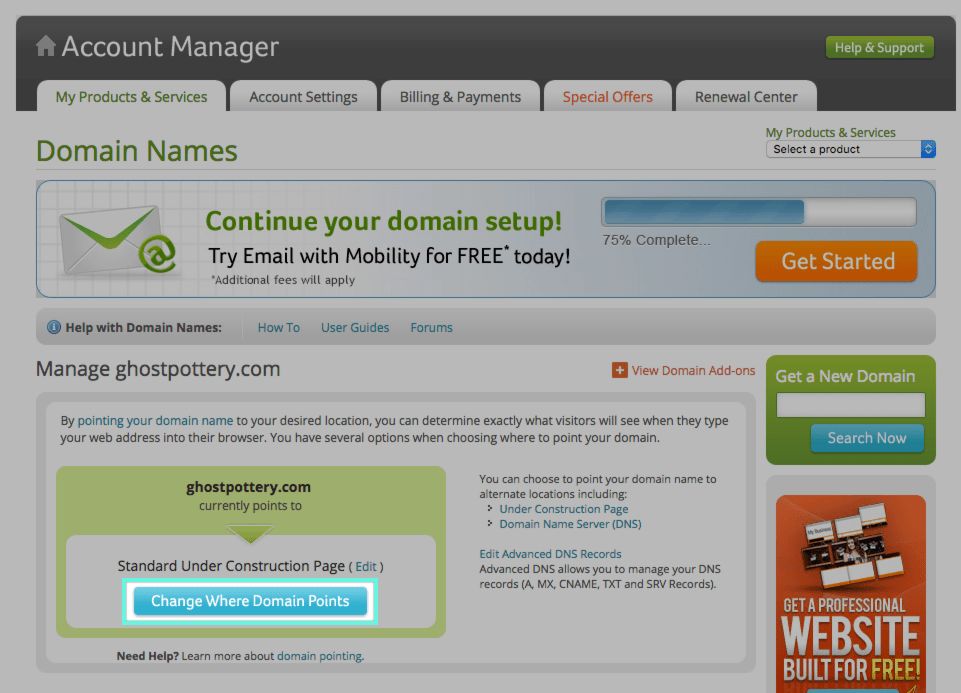
- You should see a list of all the domains you’ve purchased through Network Solutions. Under the domain you wish to edit, click the Change Where Domain Points button.
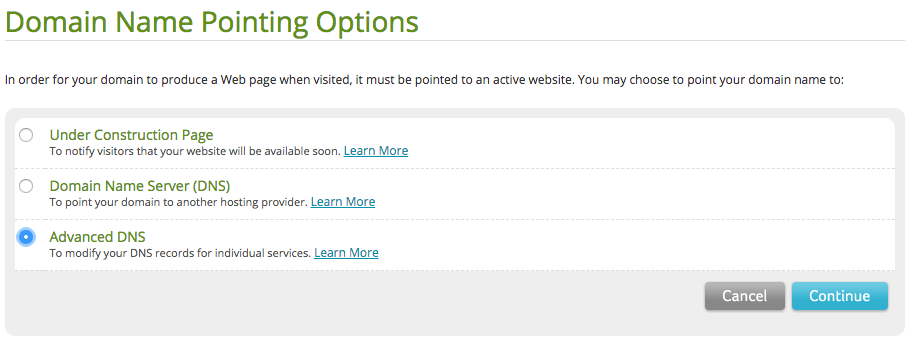
- On the next page, choose the Advanced DNS option, then click Continue.
Step 3: Configure the A records
You may see additional records in this section, especially if your domain was pointed to a different host previously. For now, we’re just going to be concerned with the A records, since they are the records responsible for pointing your domain to your website.
Be careful about modifying or deleting any other records – especially MX records, which are responsible for email. Also, it never hurts to take a screenshot before you start making changes.
- Click the Edit A Records button.

- In the Numeric IP fields, enter your Flywheel site’s IP address for each of the A records. In this example, the IP is 208.91.197.27.
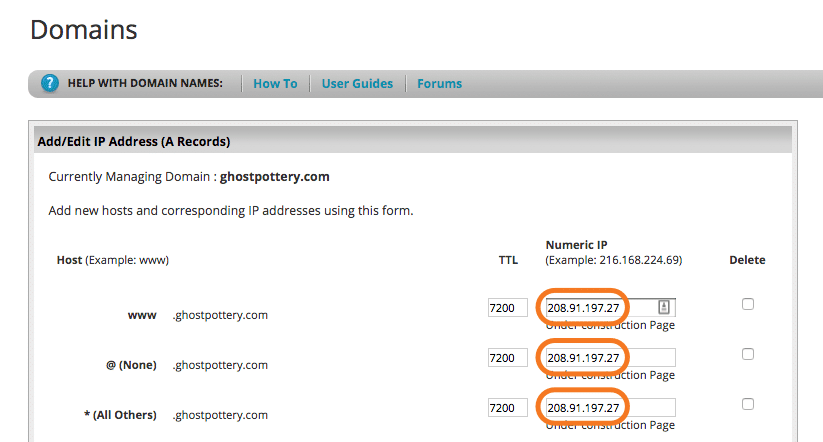
Note: The default setup on Network Solutions is to set up @ (the root version of your domain), www, and * (any other subdomain that somebody puts before the domain) as individual A records. If any of these records are missing, you can click Add More A Records to add them. - Click the Continue button to review your changes.
- Click the Save Changes button to apply your changes.
Unless you have a subdomain setup, for example shop.thisfinedomain.com, you should only need one A record value. At the very least, make sure that you have one A record with @ set as the host which is pointing to your Flywheel IP address.
Step 4: Add a TXT record
The TXT (or Text) record is used to verify that you own and control your domain, and prevents unauthorized use of your domain.
Click + Add Record and then configure the following information:
- Type: TXT
- Refers to: Select Other Host and then paste the host/label text string from your Flywheel DNS details.
- TXT Value: Paste the destination/target text string from your Flywheel DNS details.
- TTL: Leave this on the default setting.
Note
For more information, visit Network Solution’s help article on TXT records. (Scroll down to the Text (TXT) Records section.)Step 5: Confirm your changes using Flywheel’s DNS checker
After a short propagation window, your site should be connected to Flywheel! You can use our built-in DNS checker to confirm your settings.
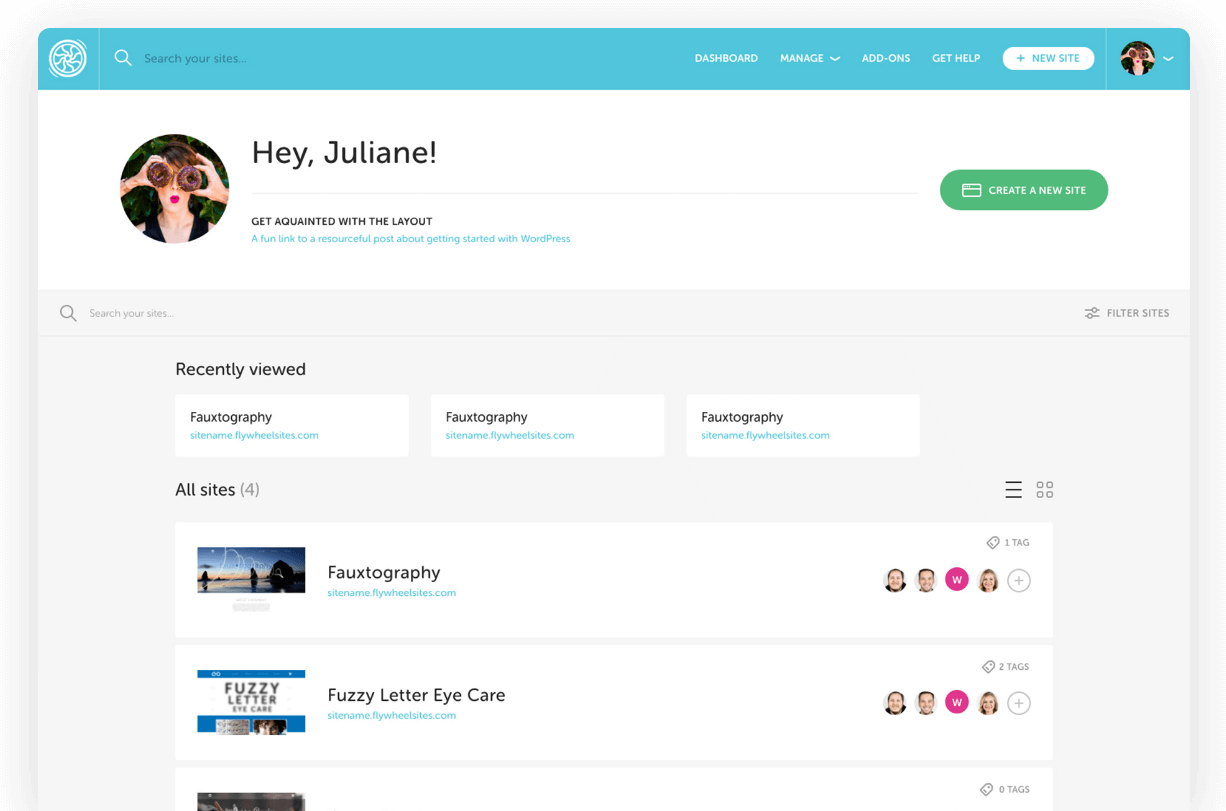
1. Go to your site’s Overview tab on the Flywheel dashboard.
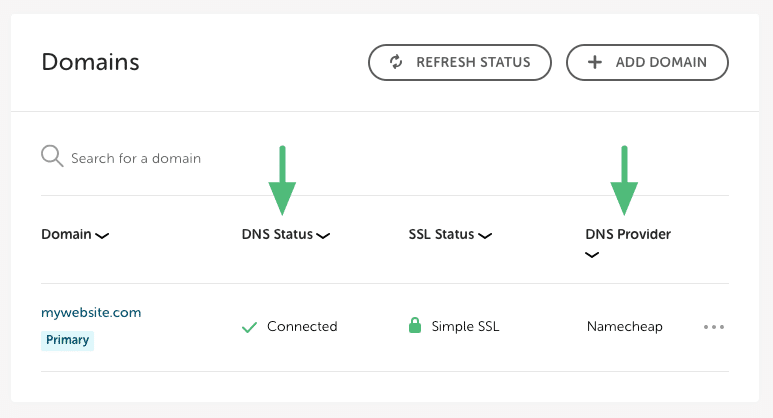
2. Click Refresh Status in the Domains section.
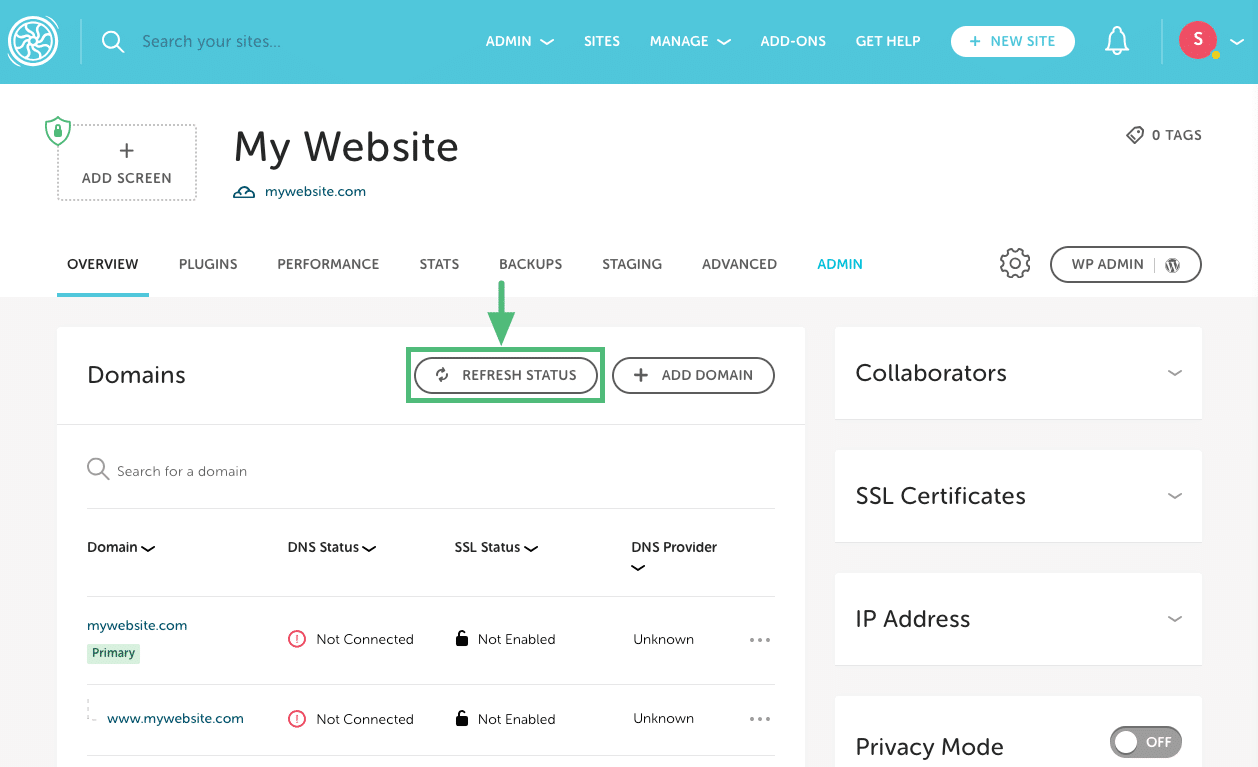
Once your site is pointed to Flywheel, the status will switch to ✅ Connected and the domain registrar will be displayed as well.
Note
DNS propagation times: DNS by nature can take 24-48 hours to fully propagate across the entire internet, though we generally see much quicker propagation. By default, Network Solutions sets the Time to Live setting for each record set to 2 hours. Depending on when that last check was, you should see your changes go live within that timeframe.Note
Custom name servers: If you’ve made changes to your DNS records but nothing seems to be happening, your domain may be using custom names servers instead of Network Solutions’ defaults. This means that Network Solutions’ DNS settings will not have any effect. In this case, you will need to adjust your DNS settings at the name server’s admin panel instead. This situation is most likely when a proxy like Cloudflare or Sucuri is being used.Need help?
If you have any questions our Happiness Engineers are here to help!
Getting Started
New to Flywheel? Start here, we've got all the information you'll need to get started and launch your first site!
View allAccount Management
Learn all about managing your Flywheel user account, Teams and integrations.
View allFeatures
Flywheel hosting plans include a ton of great features. Learn about how to get a free SSL certificate, set up a staging site, and more!
View allPlatform Info
All the server and setting info you'll need to help you get the most out of your Flywheel hosting plan!
View allSite Management
Tips and tricks for managing your sites on Flywheel, including going live, troubleshooting issues and migrating or cloning sites.
View allGrowth Suite
Learn more about Growth Suite, our all-in-one solution for freelancers and agencies to grow more quickly and predictably.
Getting started with Growth Suite
Growth Suite: What are invoice statuses?
Growth Suite: What do client emails look like?
Managed Plugin Updates
Learn more about Managed Plugin Updates, and how you can keep your sites up to date, and extra safe.
-
Restoring Plugin and Theme Management on Flywheel
-
Managed Plugin Updates: Database upgrades
-
Managed Plugin Updates: Pause plugin updates
Local
View the Local help docs
Looking for a logo?
We can help! Check out our Brand Resources page for links to all of our brand assets.
Brand Resources