Go live on Flywheel
When you’re ready to present your spiffy new site to the world, there are a few steps to take on Flywheel to ensure the launch goes smoothly. Keep scrolling to learn how to take your site live!
Note
- If you’re working with a Multisite for WordPress® installation, follow the guide here instead.1
- If your site is live on another host and is frequently updated, you will want to complete a content refresh first.
- If your site is an e-commerce site live on another host, you’ll want to suspend ordering and complete a content refresh first.
Table of Contents:
Add or update your site’s primary domain
Sites on Flywheel require setting a single primary domain that additional domains will redirect to. If you have multiple domains, set this one up first.
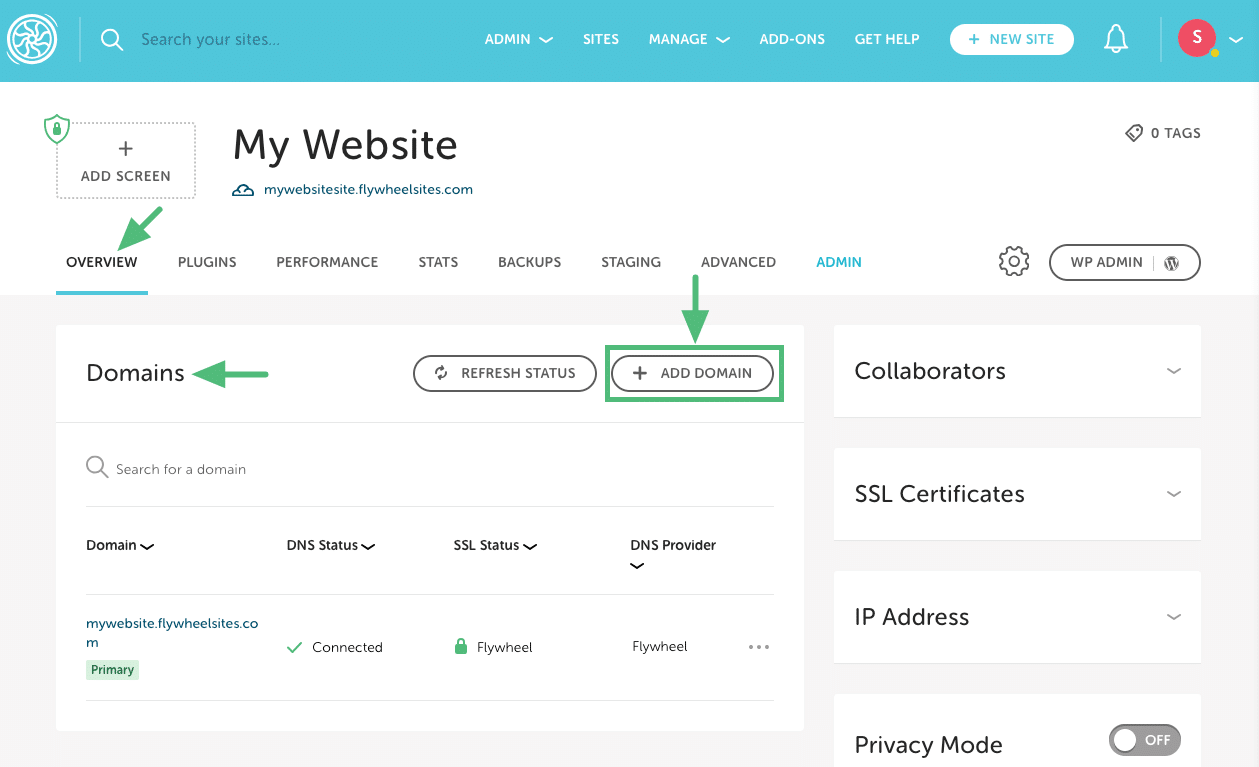
- If you haven’t added your domain yet, head over to the Domains card in the Flywheel site’s Overview tab and click the + Add Domain button to add the domain you’d like to point to Flywheel.
- Fill out the domain information:
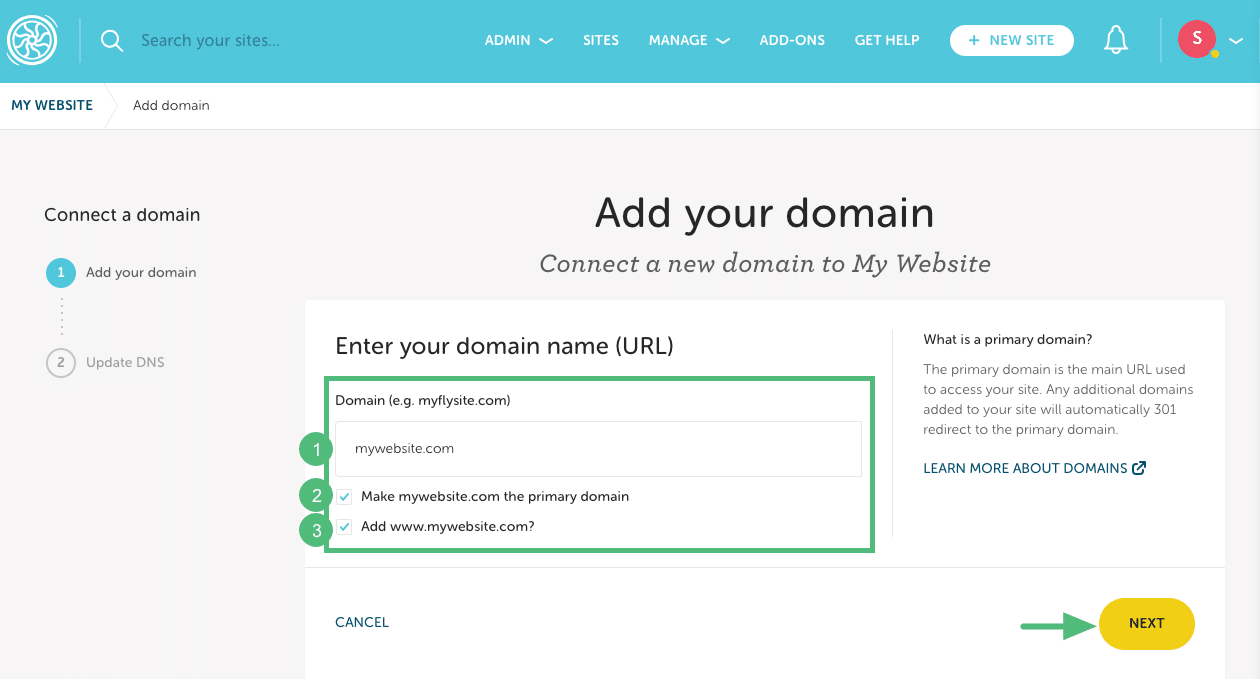
1. Domain: Enter the URL (without a prefix). Example: mywebsite.com
2. Primary domain: Check the box if you want this to be your primary domain (if this will be your site’s main URL).
3. www: By default, the www version of the domain will be added, but you can uncheck the box to skip this step if needed. Example: www.mywebsite.com.Then click Next.
Note
In the background, our system will automatically update all appropriate URL references in the database to this new primary domain. - If your domain supports Domain Connect, you’ll be prompted to enter your DNS provider credentials so Flywheel can configure your DNS records. If your domain doesn’t support domain connect, you’ll need to point DNS manually.
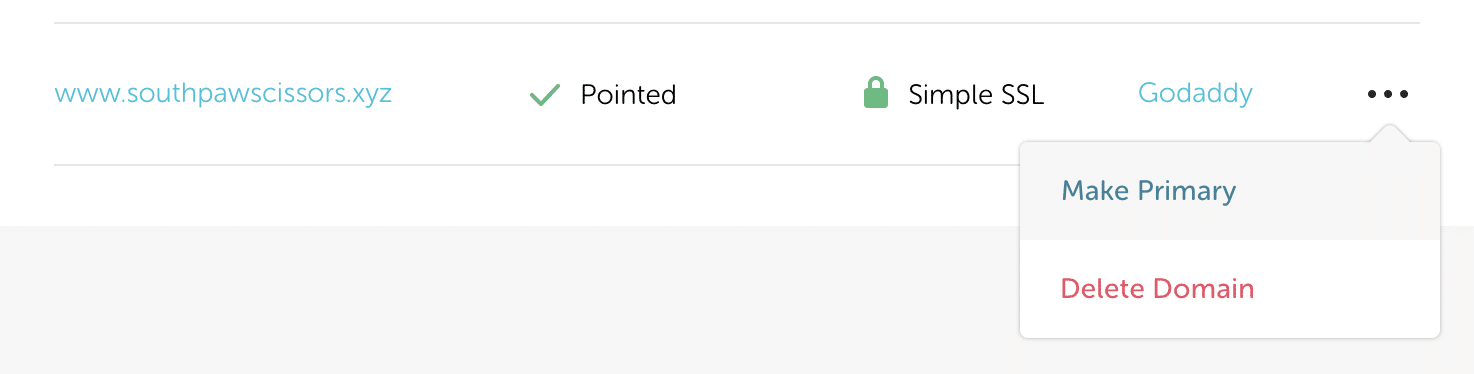
- Alternatively, if you’ve already added your domain to the list, but haven’t set it to primary yet, now’s the time! On the intended domain, click the 3-dot menu and select Make Primary.
Warning
Flywheel does not support adding the same domain or subdomain to two different sites. For example, if you’re cloning a site that’s already live on Flywheel, you’ll want to remove the domain from the original site before adding it to the new one.Add any secondary domains
At this point, go ahead and add any additional domains by following the method above (don’t set these domains to primary, of course). All secondary domains will automatically be configured with a 301 redirect to the primary domain.
Point DNS for your domain(s)
Now that you’ve configured your site on the Flywheel side, it’s time to log in to your domain’s DNS editor so you can point your domain(s) to the site’s IP address and add a TXT record to verify ownership of your domain name.
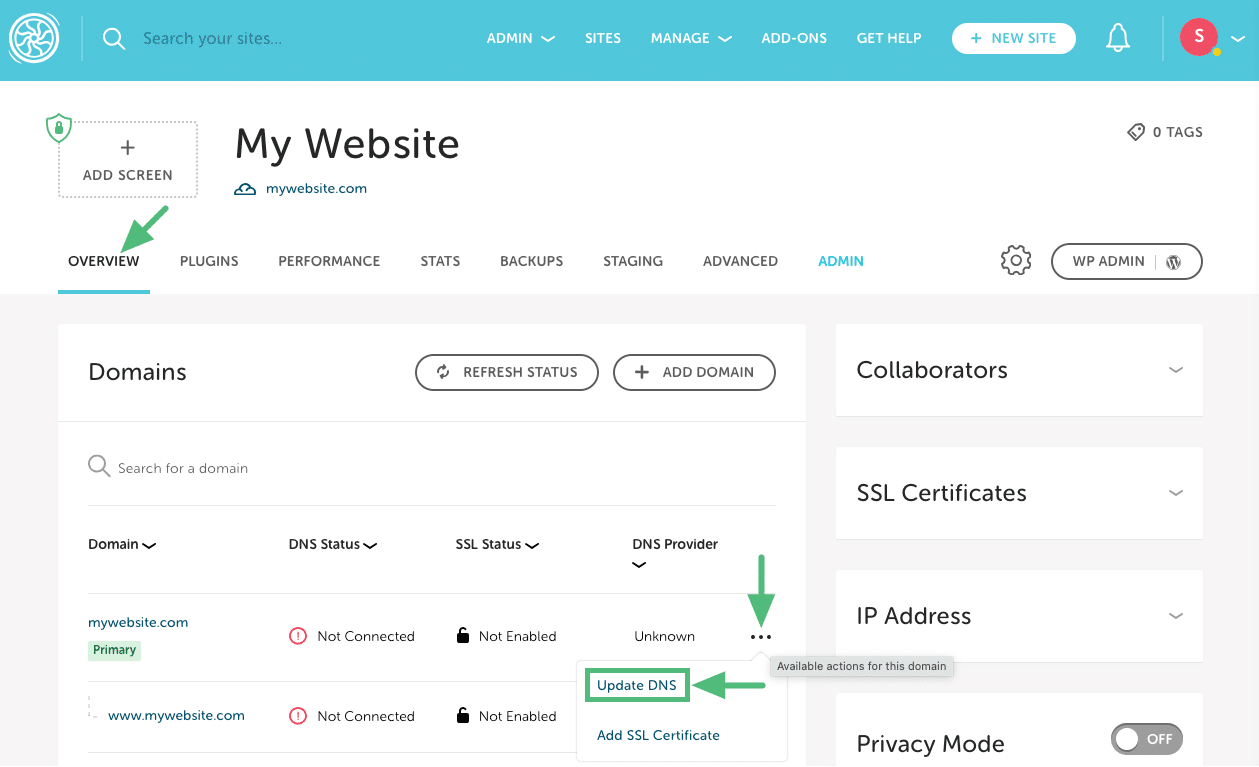
Your website’s IP address and TXT record will be displayed during the add domain process. You can also find these records on the Overview tab. Click the three-dot icon and then select Update DNS to find them.
Warning
For security best practices, we recommend not pointing a wildcard entry directly to a Flywheel IP address, but instead to point any subdomain independently. The use of wildcard records may open your domain up to additional subdomains being created without your permission.Remember, if your domain supports Domain Connect, you don’t need to point your DNS manually because Flywheel can do it for you!
Note
DNS guides: For more information on how to point DNS, please check out these fine help articles:Note
DNS propagation times: DNS by nature can take 24-48 hours to fully propagate across the entire internet, though it’s generally much quicker. This depends on the record’s TTL (Time To Live) value. If your DNS host allows you to adjust TTL, it’s best to set it to the minimum value at least 24 hours before you plan to go live to ensure the fastest propagation. For more information, check out this help article: What is TTL?Disable Privacy Mode
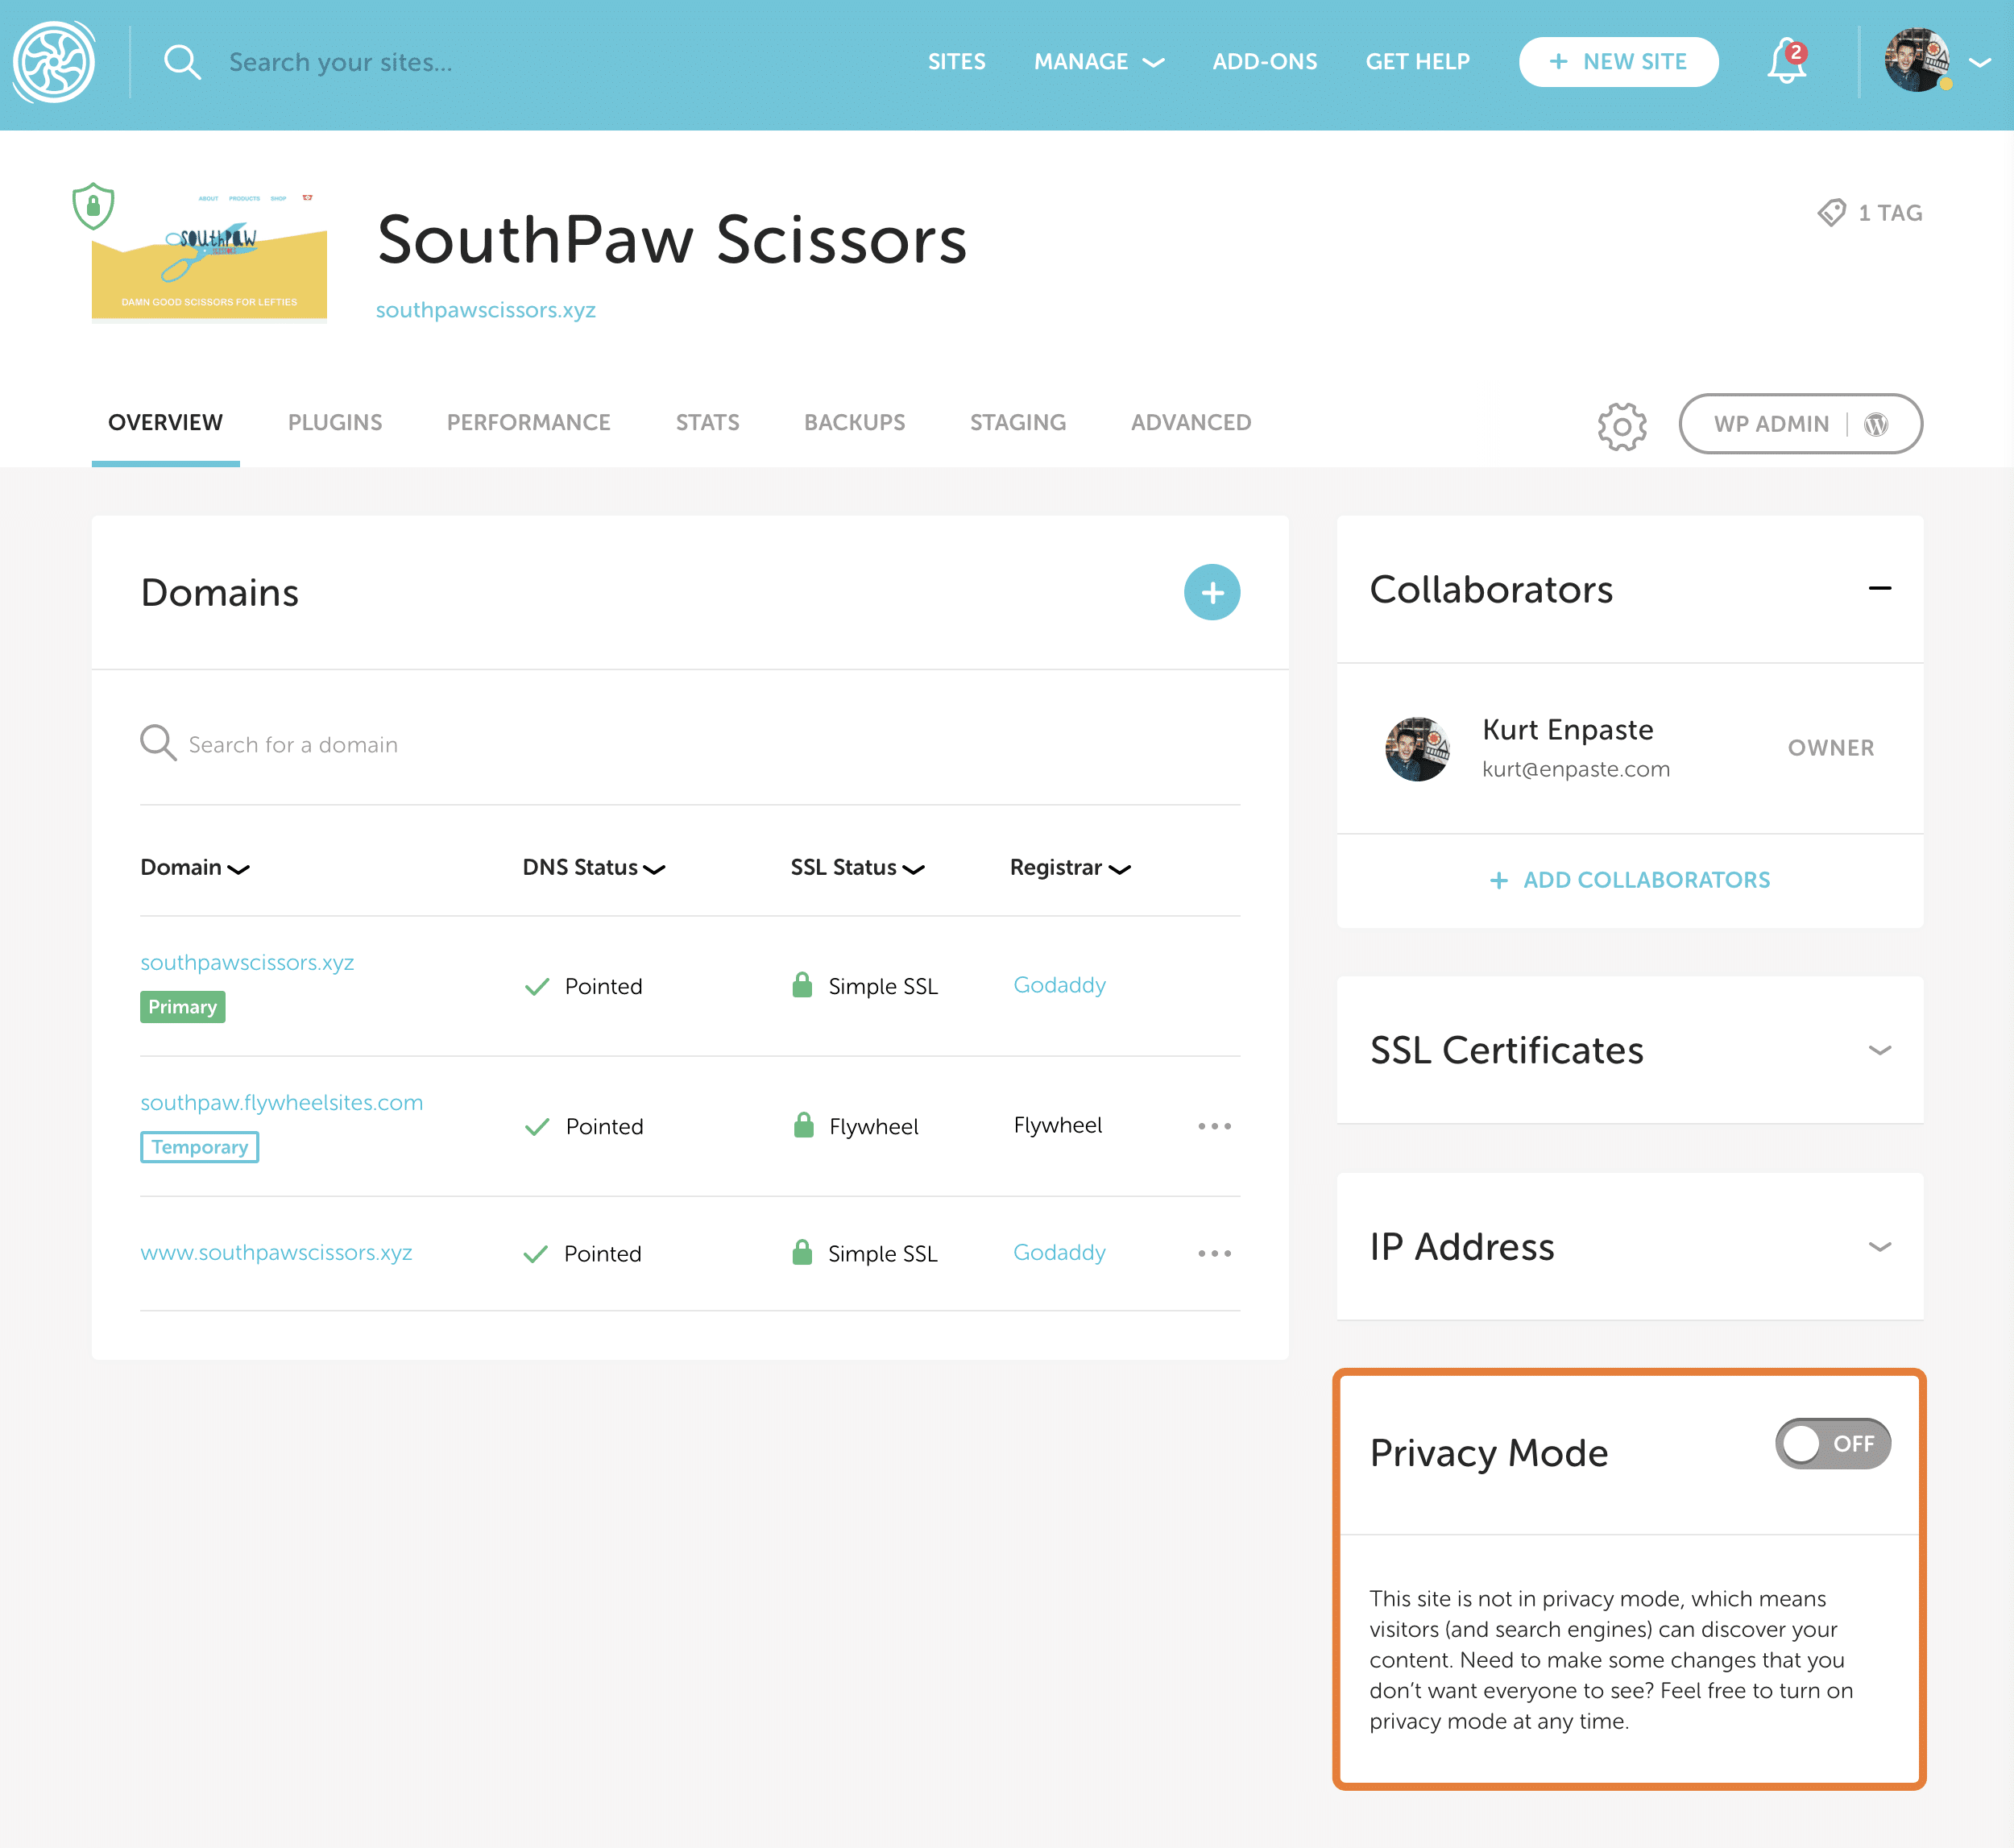
Remove the password protection for your site so visitors won’t be prompted to enter credentials to view it. This also allows search engines, like Google, to crawl your site.
- On the site’s Flywheel dashboard, navigate to the Overview tab.
- On the Privacy Mode card, toggle the switch to Off.
Optional: Enable Simple SSL
Once your domains have propagated, you can add free SSL certificates via Flywheel’s Simple SSL for added security and an SEO boost! For instructions, check out this help article: How do I add Simple SSL to my site?
Need help?
If you have any questions our Happiness Engineers are here to help!
Getting Started
New to Flywheel? Start here, we've got all the information you'll need to get started and launch your first site!
View allAccount Management
Learn all about managing your Flywheel user account, Teams and integrations.
View allFeatures
Flywheel hosting plans include a ton of great features. Learn about how to get a free SSL certificate, set up a staging site, and more!
View allPlatform Info
All the server and setting info you'll need to help you get the most out of your Flywheel hosting plan!
View allSite Management
Tips and tricks for managing your sites on Flywheel, including going live, troubleshooting issues and migrating or cloning sites.
View allGrowth Suite
Learn more about Growth Suite, our all-in-one solution for freelancers and agencies to grow more quickly and predictably.
Getting started with Growth Suite
Growth Suite: What are invoice statuses?
Growth Suite: What do client emails look like?
Managed Plugin Updates
Learn more about Managed Plugin Updates, and how you can keep your sites up to date, and extra safe.
-
Restoring Plugin and Theme Management on Flywheel
-
Managed Plugin Updates: Database upgrades
-
Managed Plugin Updates: Pause plugin updates
Local
View the Local help docs
Looking for a logo?
We can help! Check out our Brand Resources page for links to all of our brand assets.
Brand Resources