Publish my site on Flywheel with Git and DeployHQ
Git is a great way to track changes to files within a codebase, but it can be confusing to know how to deploy those changes to a remote site.
Using a tool like Local, you can deploy to Flywheel servers using Local Connect. Git uses several files within its .git folder to work its magic. Because these supporting files aren’t needed in a production environment, Local ignores them when pushing a site up to our servers. This results in less data being moved and faster Pushes.
But maybe you already have a development environment created or for some reason can’t use Local? The rest of this article will walk through another option for deploying code using DeployHQ (HINT: this is how we deploy the getflywheel.com site).
DeployHQ allows you to set up all types of manual and automatic deployment for your sites. It supports Git, Mercurial, and Subversion code repositories, and can deploy to many types of destinations including FTP/SFTP, Amazon S3, and more.
For the purposes of deploying to Flywheel, we are going to focus on using DeployHQ to deploy a Git repository to your Flywheel site via SFTP.
In order to utilize DeployHQ to publish your Git repo to Flywheel, you will need the following prerequisites:
A DeployHQ account
The free account is good for 1 project, 10 deploys/day, and 30 build minutes/month
The steps for connecting DeployHQ and Flywheel are simple, and take just a few minutes to set up. Once you’re set up, you can choose from two types of deployments:
| Manual deployment | To deploy your code, you log into the DeployHQ dashboard and initiate the deployment manually |
| Automatic deployment | Your code will be deployed to Flywheel automatically on each commit |
The method used is up to you, and you can switch at any time.
To get started, log in to your DeployHQ account and create a new project:
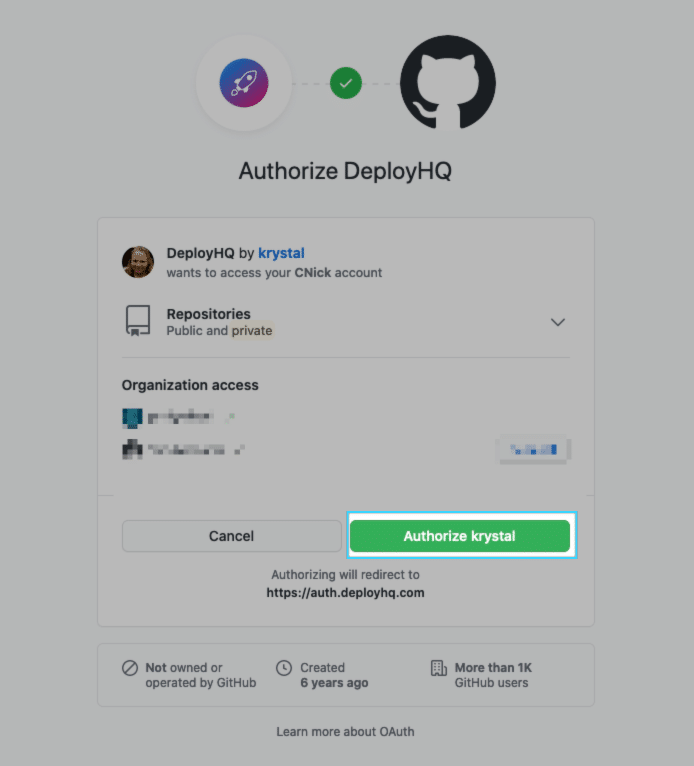
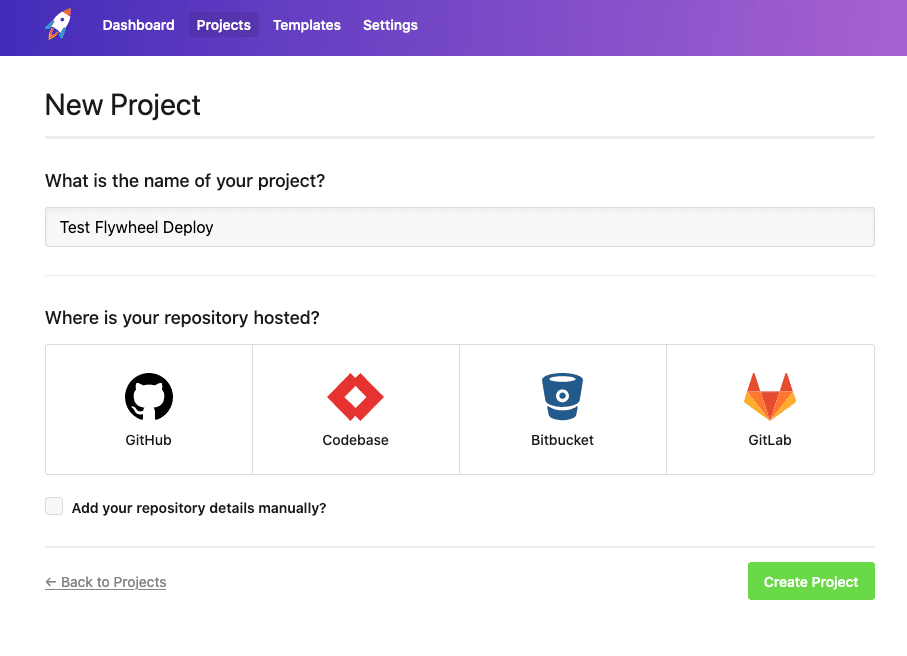 From there, add the details of your Git repository. You can either specify the full URL of the repository, or for any supported SCM (Software Configuration Management) system shown, you can authorize DeployHQ to access your account and automatically pull a list of your repos:
Once you’ve selected or set up your repository and it’s been imported, you’ll need to add and configure the server you’ll be deploying to. Click on SSH/SFTP to reveal the configuration and options sections.

These are the settings for your Flywheel site that will be the destination for the files that are deployed from your Git repo.
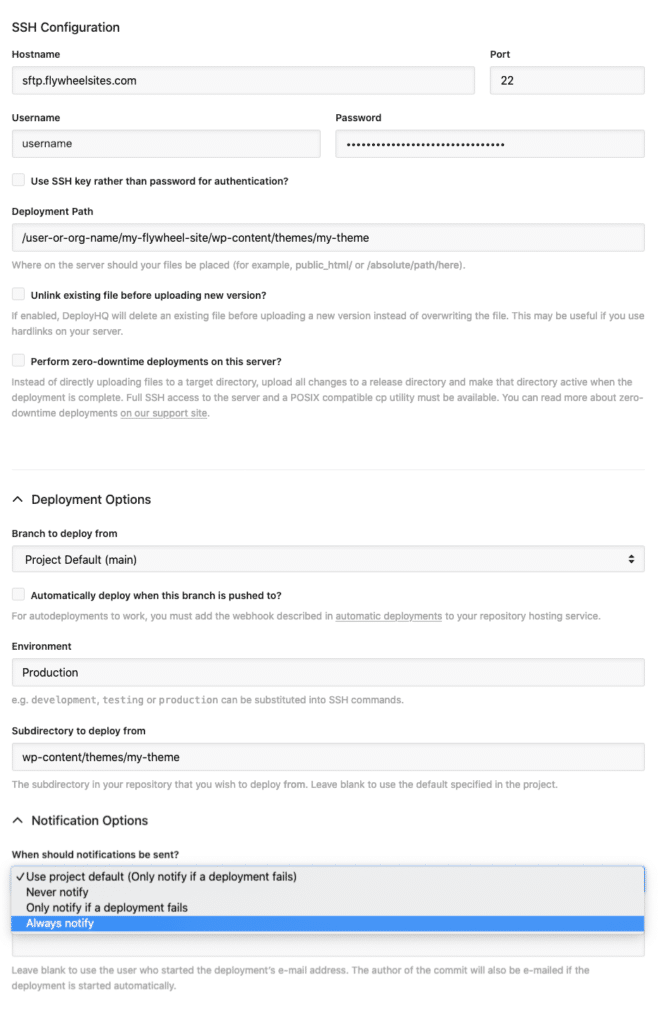
SSH Configuration
| Name | The name of the destination server Example: Flywheel Site |
| Protocol | SSH/SFTP |
| Hostname | sftp.flywheelsites.com |
| Port | 22 |
| Username | Your Flywheel username. Note: This is NOT your email address |
| Password | Your Flywheel password |
| Use SSH Keys for authentication? | Unchecked |
| Deployment Path | The full path on the Flywheel SFTP server where you’d like to deploy to. Example: /username/my-flywheel-site/wp-content/themes/my-theme |
| Unlink existing file before uploading new version? | Unchecked |
| Perform zero-downtime deployments on this server? | Unchecked |
Deployment Options
| Notification Email Address | Your email address |
| Branch to deploy from | The branch you’d like to deploy from. (Example: main) |
| Environment | The name you’d like to give this environment. (Example: Production) |
| Subdirectory to deploy from | The subdirectory in your repo that corresponds to the destination path on the server. (Example: wp-content/themes/my-theme) |
Note
It’s important that the settings for the Path on server and Subdirectory to deploy from are correct. These two must match up, or else you risk deploying the wrong files.Flywheel recommends deploying only your theme or custom plugin. You cannot deploy your entire WordPress® installation, as Flywheel write-protects the core WordPress files.1
Notification Options
From the dropdown menu, choose your preferred notification option. Note: The project default can be updated in the project Settings.
The final step to configuring DeployHQ to deploy to your Flywheel account is to create a deployment. To do so, select the server you just created, and select your Start and End Revisions to deploy. You can click on the list icon beside each to choose a different commit for Start or End.
Note
If this is your first deployment, we recommend deploying all changes. To do so, leave the Start Revision field blank (The very first commit…) and in the End Revision field make sure it’s the latest commit. This will bring over all changes in the repo.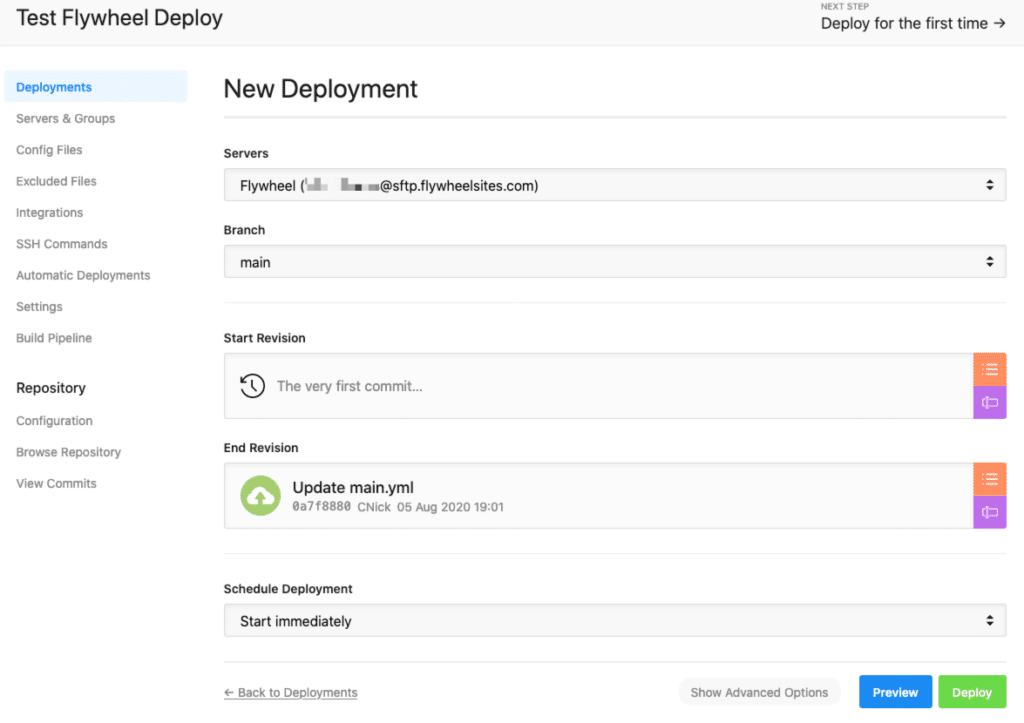
Clicking “Deploy” will take your code from the Git repository, and will deploy it to your Flywheel site via SFTP. Once the deployment is complete, you will be notified by email (if you selected always notify in the Notification Options for the server) and your changes will be live on Flywheel!
Warning
Configuring a deployment with Git + DeployHQ will overwrite any files uploaded normally via SFTP. If you choose to do this, you should stop updating themes via SFTP, and only do so via Git.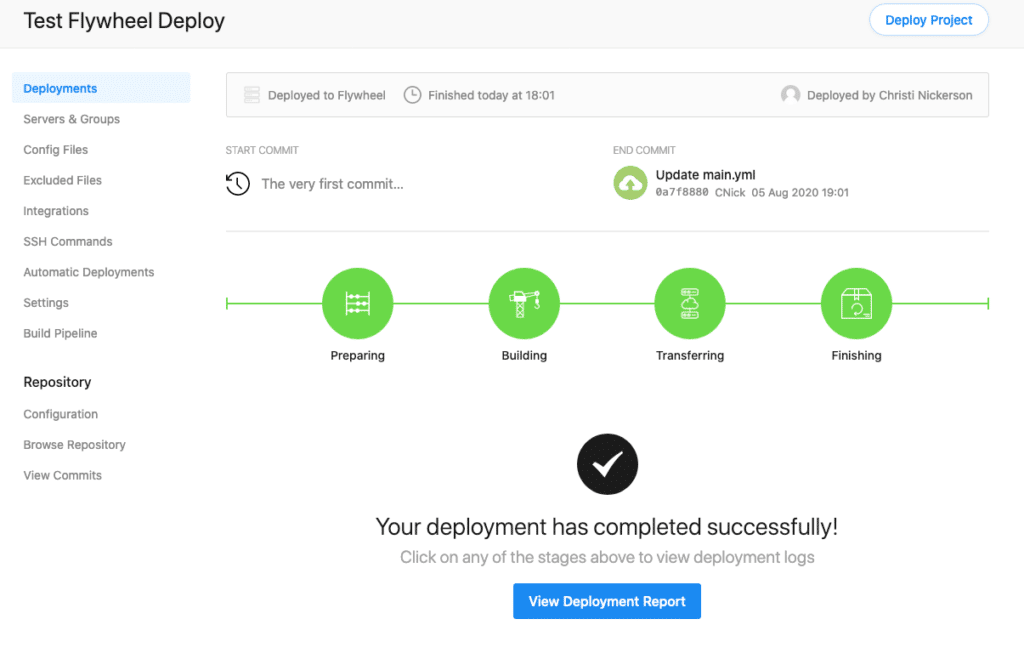
To run this deployment in the future, log into your DeployHQ account, and click the “Deploy” button for your project, and all the latest committed changes will be pulled from your Git repo and deployed to your Flywheel account.

Need help?
If you have any questions our Happiness Engineers are here to help!
Getting Started
New to Flywheel? Start here, we've got all the information you'll need to get started and launch your first site!
View allAccount Management
Learn all about managing your Flywheel user account, Teams and integrations.
View allFeatures
Flywheel hosting plans include a ton of great features. Learn about how to get a free SSL certificate, set up a staging site, and more!
View allPlatform Info
All the server and setting info you'll need to help you get the most out of your Flywheel hosting plan!
View allSite Management
Tips and tricks for managing your sites on Flywheel, including going live, troubleshooting issues and migrating or cloning sites.
View allGrowth Suite
Learn more about Growth Suite, our all-in-one solution for freelancers and agencies to grow more quickly and predictably.
Getting started with Growth Suite
Growth Suite: What are invoice statuses?
Growth Suite: What do client emails look like?
Managed Plugin Updates
Learn more about Managed Plugin Updates, and how you can keep your sites up to date, and extra safe.
-
Restoring Plugin and Theme Management on Flywheel
-
Managed Plugin Updates: Database upgrades
-
Managed Plugin Updates: Pause plugin updates
Local
View the Local help docs
Looking for a logo?
We can help! Check out our Brand Resources page for links to all of our brand assets.
Brand Resources