Manage Plugins and Themes Manually
With WordPress®, it’s easy to add functionality, new features, and beautiful designs to your website through plugins and themes.1 And even though you can install and update them through the wp-admin dashboard, you can also easily install and update them manually through the dashboard or by using SFTP. You can also use LocalWP to update plugins and themes.
This guide will walk you through how to manually install and update plugins and themes on your WordPress website.
Table of Contents:
Install a Plugin
The first step is to locate the plugin on the Plugin Repository OR directly from the developer of the plugin, and download the package to your computer.
Note
If you need to download the latest version of a free WP Engine owned plugin, you will need to use the download links in this article: Install and Update WP Engine Owned Plugins and Themes.Be sure to save this file on your computer where you can easily find it later!
Install a Plugin in WP-Admin
If you’d like to install a new plugin or update an existing plugin manually through the wp-admin dashboard, follow these steps:
- Log in to your website’s wp-admin dashboard
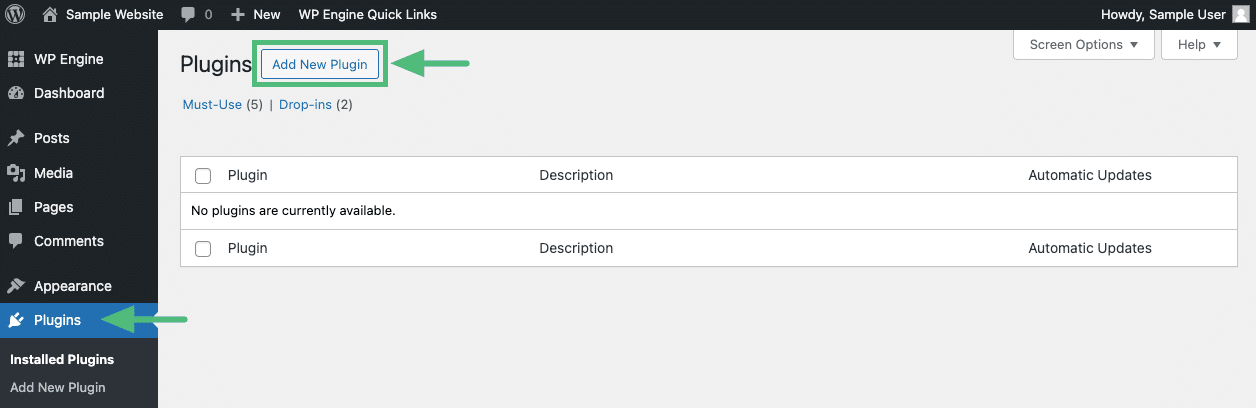
- Visit the Plugins tab
- Click Add New Plugin at the top of the page (/wp-admin/plugin-install.php)
- Click Upload Plugin at the top of the page

- Locate and select the plugin ZIP
- Click Install Now
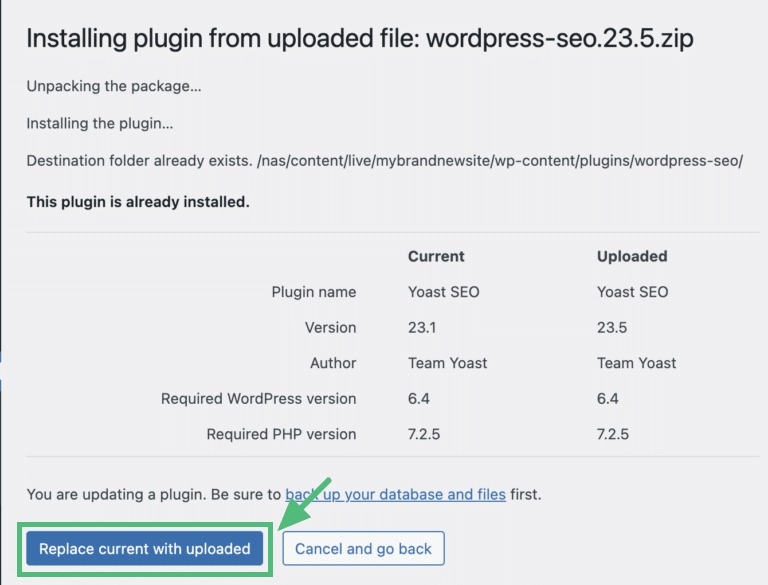
- If you’re updating a plugin instead of installing a new one, click Replace current with uploaded
- Click Activate Plugin
That’s it! Your plugin is now installed, active, and ready to use on your website.
Install a Plugin with SFTP
If you prefer not to use the wp-admin dashboard, or you can’t access it, you can use SFTP to install a new plugin or update an existing one. Follow these steps:
- If the plugin package you have downloaded is zipped, you will need to unzip the package locally before it can be uploaded.
- Connect to your website using SFTP
- Navigate to wp-content
- Navigate into plugins
- Drag and drop the plugin file into the plugins directory. Or to update a plugin, overwrite the contents of the existing plugin directory with the new files
To activate the plugin, visit the Plugins page of the wp-admin dashboard and click Activate. Or use the WP-CLI command wp plugin activate [plugin-name] over SSH Gateway.
Install a Theme
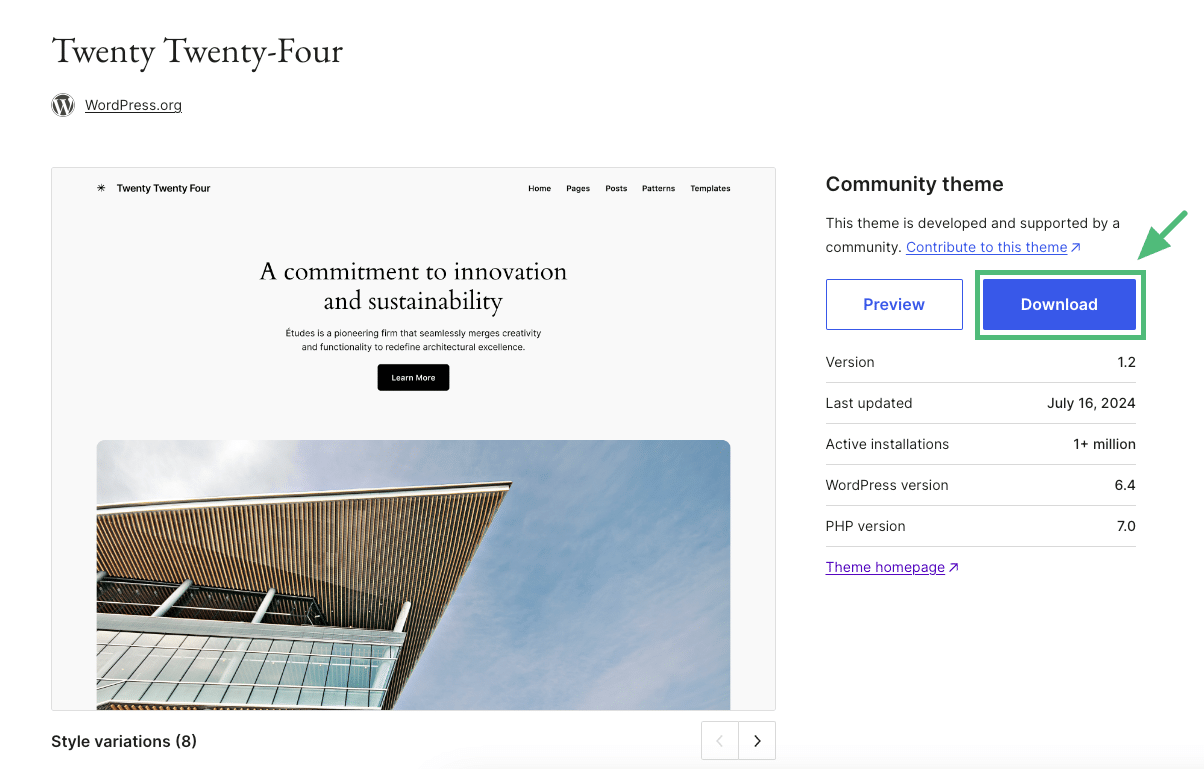
The first step of installing or updating a theme is to locate the theme on the Theme Repository, or get it directly from the developer, and download the package to your computer.
Be sure to save this file on your computer where you can easily find it later!
Now you can decide whether you’d like to install the theme through the wp-admin dashboard or by using SFTP.
Install a Theme in WP-Admin
If you’d like to install a new theme or update an existing theme manually through the wp-admin dashboard, follow these steps:
- Log in to your website’s wp-admin dashboard
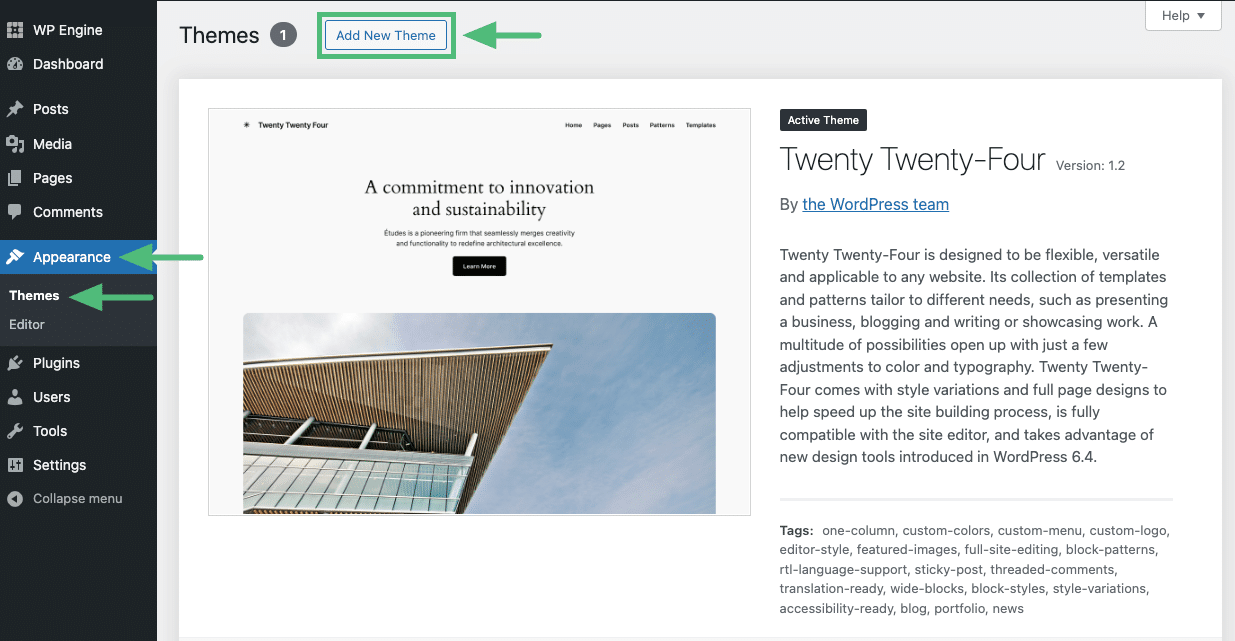
- Click the Appearance tab
- Select Themes
- Click Add New Theme at the top of the page (/wp-admin/theme-install.php)
- Click Upload Theme

- Locate and select the theme ZIP
- Click Install Now
- Click Activate Theme
That’s it! Your theme is now installed, active, and ready to use on your website.
Install a Theme with SFTP
If you prefer not to use the wp-admin dashboard, or you can’t access it, you can use SFTP to install a new theme or update an existing one. Follow these steps:
- If the theme package you have downloaded is zipped, you will need to unzip the package locally before you can upload it.
- Connect to your website using SFTP
- Navigate to wp-content
- Navigate into themes
- Drag and drop the theme file into the theme directory. Or to update a theme, overwrite the contents of the existing theme directory with the new files
To activate the theme, visit the Appearance > Theme page of the wp-admin dashboard and click Activate. Or use the WP-CLI command wp theme activate [theme-name] over SSH Gateway.
Update with Local
Updating your website has never been easier than with Local. With Local you can update WordPress plugins and themes, then push the changes to Flywheel.
Here’s how to update WordPress plugins or themes using Local:
- Download and install Local (for free!) to your computer. If you’ve already downloaded Local, ensure you’re updated to the latest release.
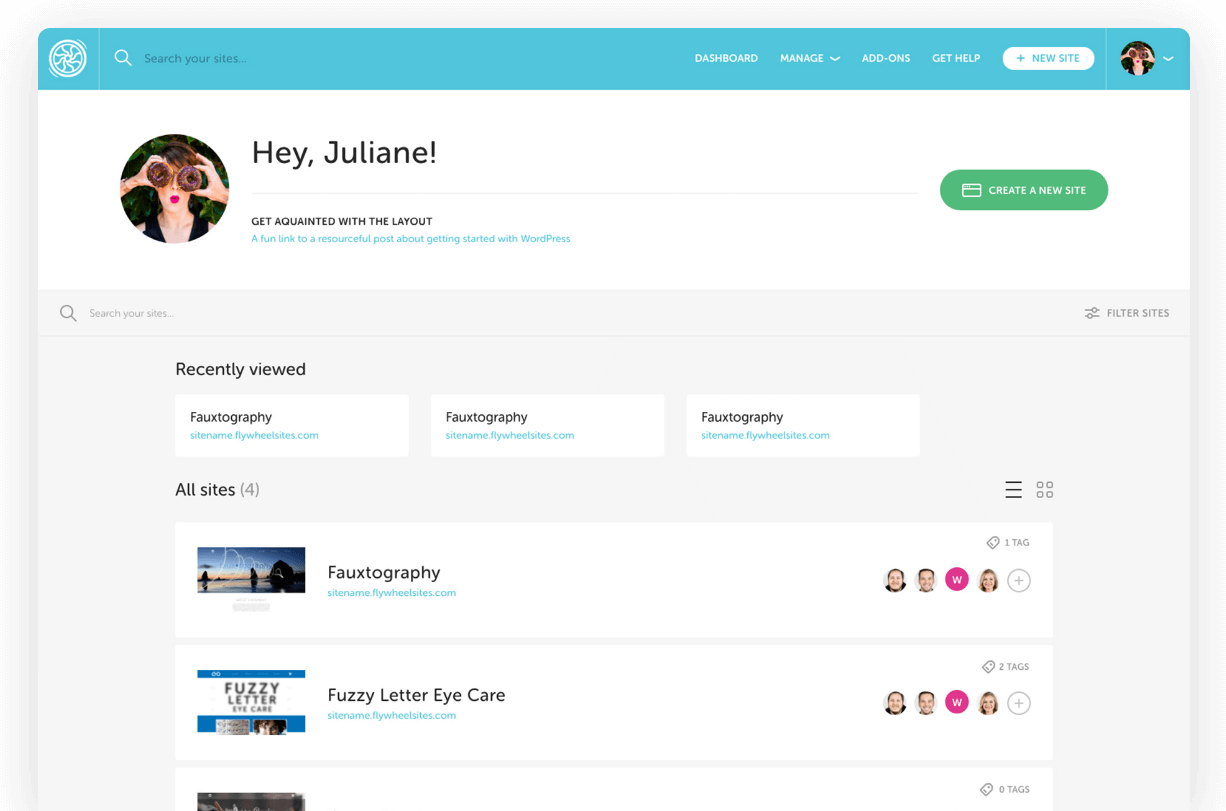
- Connect to Flywheel.
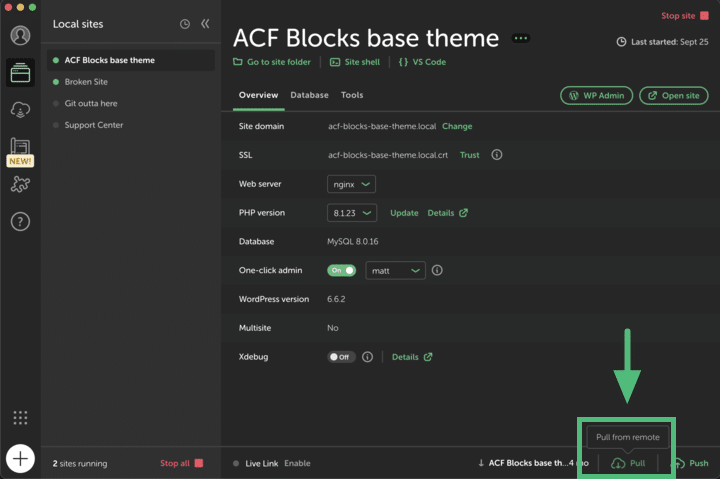
- Pull your website to Local. To do that, create a new site (use the plus + icon in the bottom left-hand corner) OR select an existing Local site to pull to. Then pull your site down to Local using the Pull button in the bottom right-hand corner.
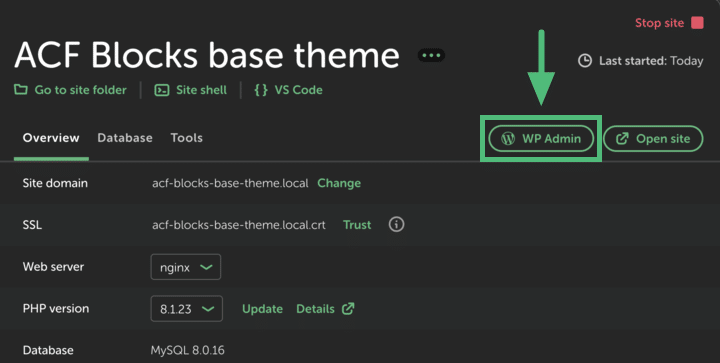
- Launch the wp-admin dashboard using the “WP Admin” button at the top of your site on the Local App (Pro-tip: Turn on one-click admin and be automatically logged in!)
- Update and manage your WordPress plugin and theme versions as you normally would from your Local website’s WP Admin Dashboard.
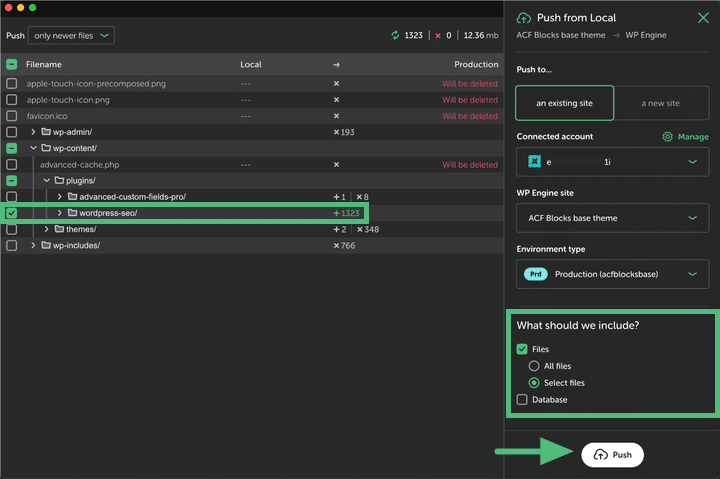
- Finally, push your updates back to WP Engine easily using Local Connect. To do that, click Push in the bottom right-hand corner and choose your destination environment. We recommend excluding the database and selecting only the plugins or themes folder using the Select Files option, when relevant.
Need help?
If you have any questions, our Happiness Engineers are here to help!
Getting Started
New to Flywheel? Start here, we've got all the information you'll need to get started and launch your first site!
View allAccount Management
Learn all about managing your Flywheel user account, Teams and integrations.
View allFeatures
Flywheel hosting plans include a ton of great features. Learn about how to get a free SSL certificate, set up a staging site, and more!
View allPlatform Info
All the server and setting info you'll need to help you get the most out of your Flywheel hosting plan!
View allSite Management
Tips and tricks for managing your sites on Flywheel, including going live, troubleshooting issues and migrating or cloning sites.
View allGrowth Suite
Learn more about Growth Suite, our all-in-one solution for freelancers and agencies to grow more quickly and predictably.
Getting started with Growth Suite
Growth Suite: What are invoice statuses?
Growth Suite: What do client emails look like?
Managed Plugin Updates
Learn more about Managed Plugin Updates, and how you can keep your sites up to date, and extra safe.
-
Restoring Plugin and Theme Management on Flywheel
-
Managed Plugin Updates: Database upgrades
-
Managed Plugin Updates: Pause plugin updates
Local
View the Local help docs
Looking for a logo?
We can help! Check out our Brand Resources page for links to all of our brand assets.
Brand Resources