Go live on Flywheel – Multisite
Note
If your site is currently live with another host and uses eCommerce, or is otherwise frequently updated, you will want to complete a content refresh prior to going live. This helps ensure any recent orders and changes made to your original site are moved over to Flywheel.When you’re ready to take your Multisite live on Flywheel, complete the following steps:
Table of Contents:
Create a backup
Since the database will be edited as part of this process, it’s a good idea to back up your site in case you need to revert.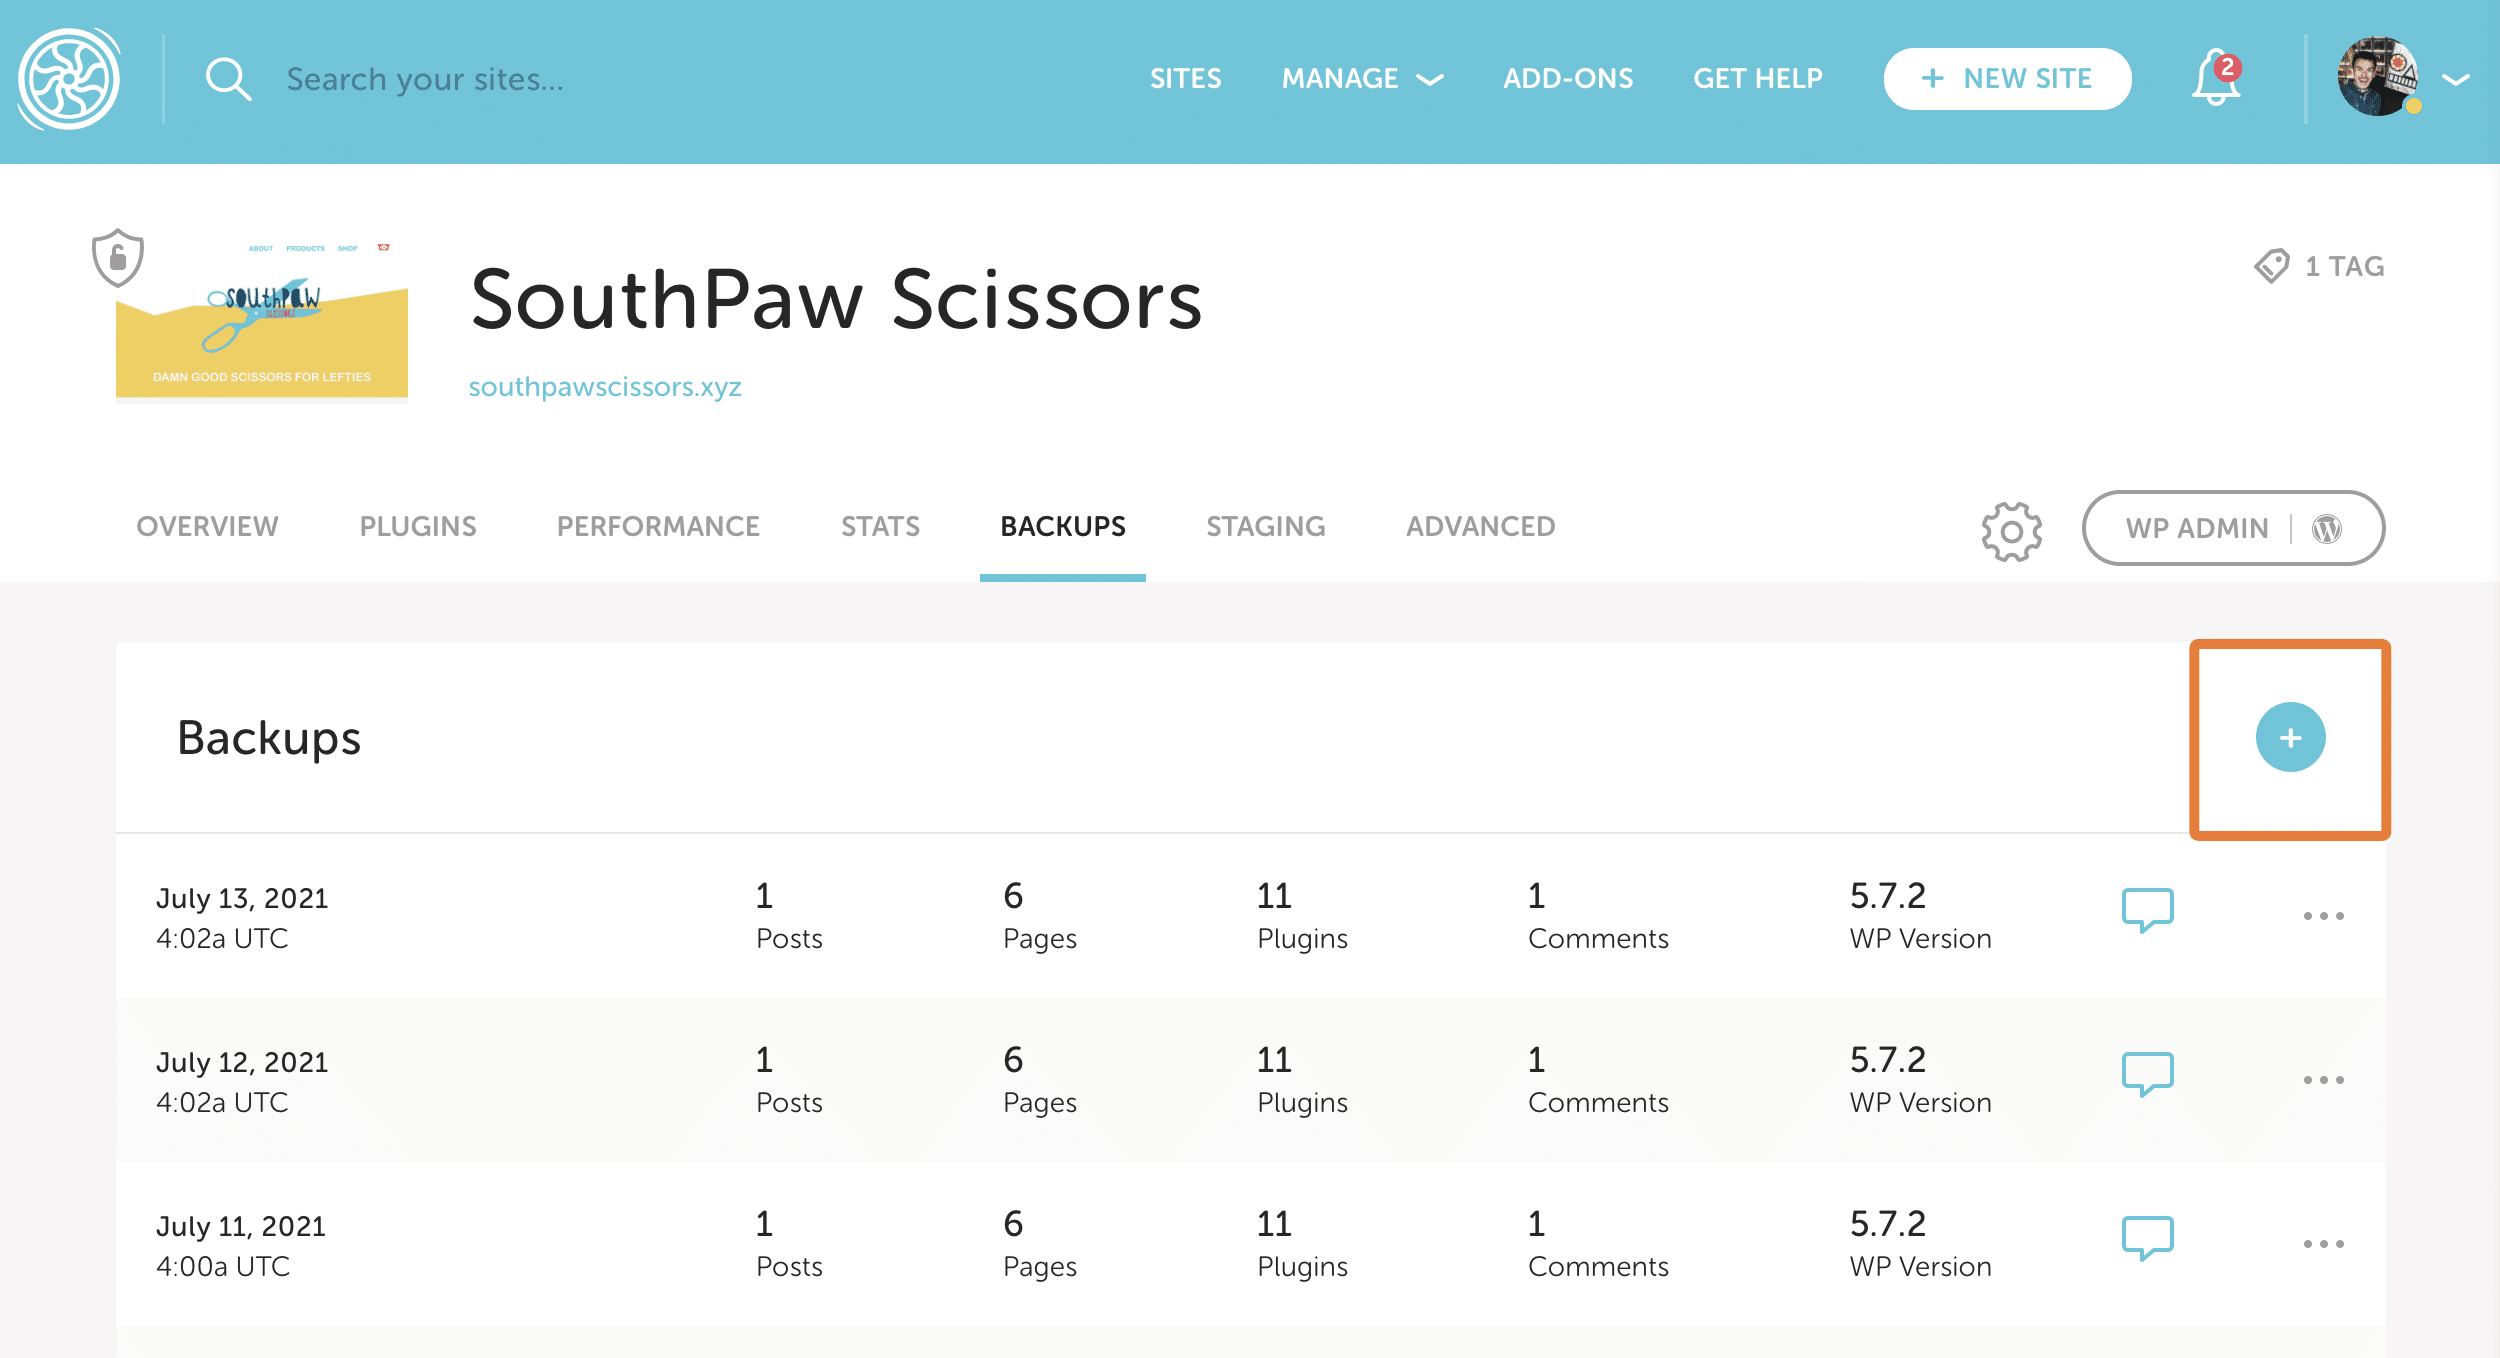
Turn Privacy Mode off
Disable Privacy Mode for your site on Flywheel, so that it’s visible to visitors and search engines. You can turn Privacy Mode off from the site’s Overview tab on the right sidebar.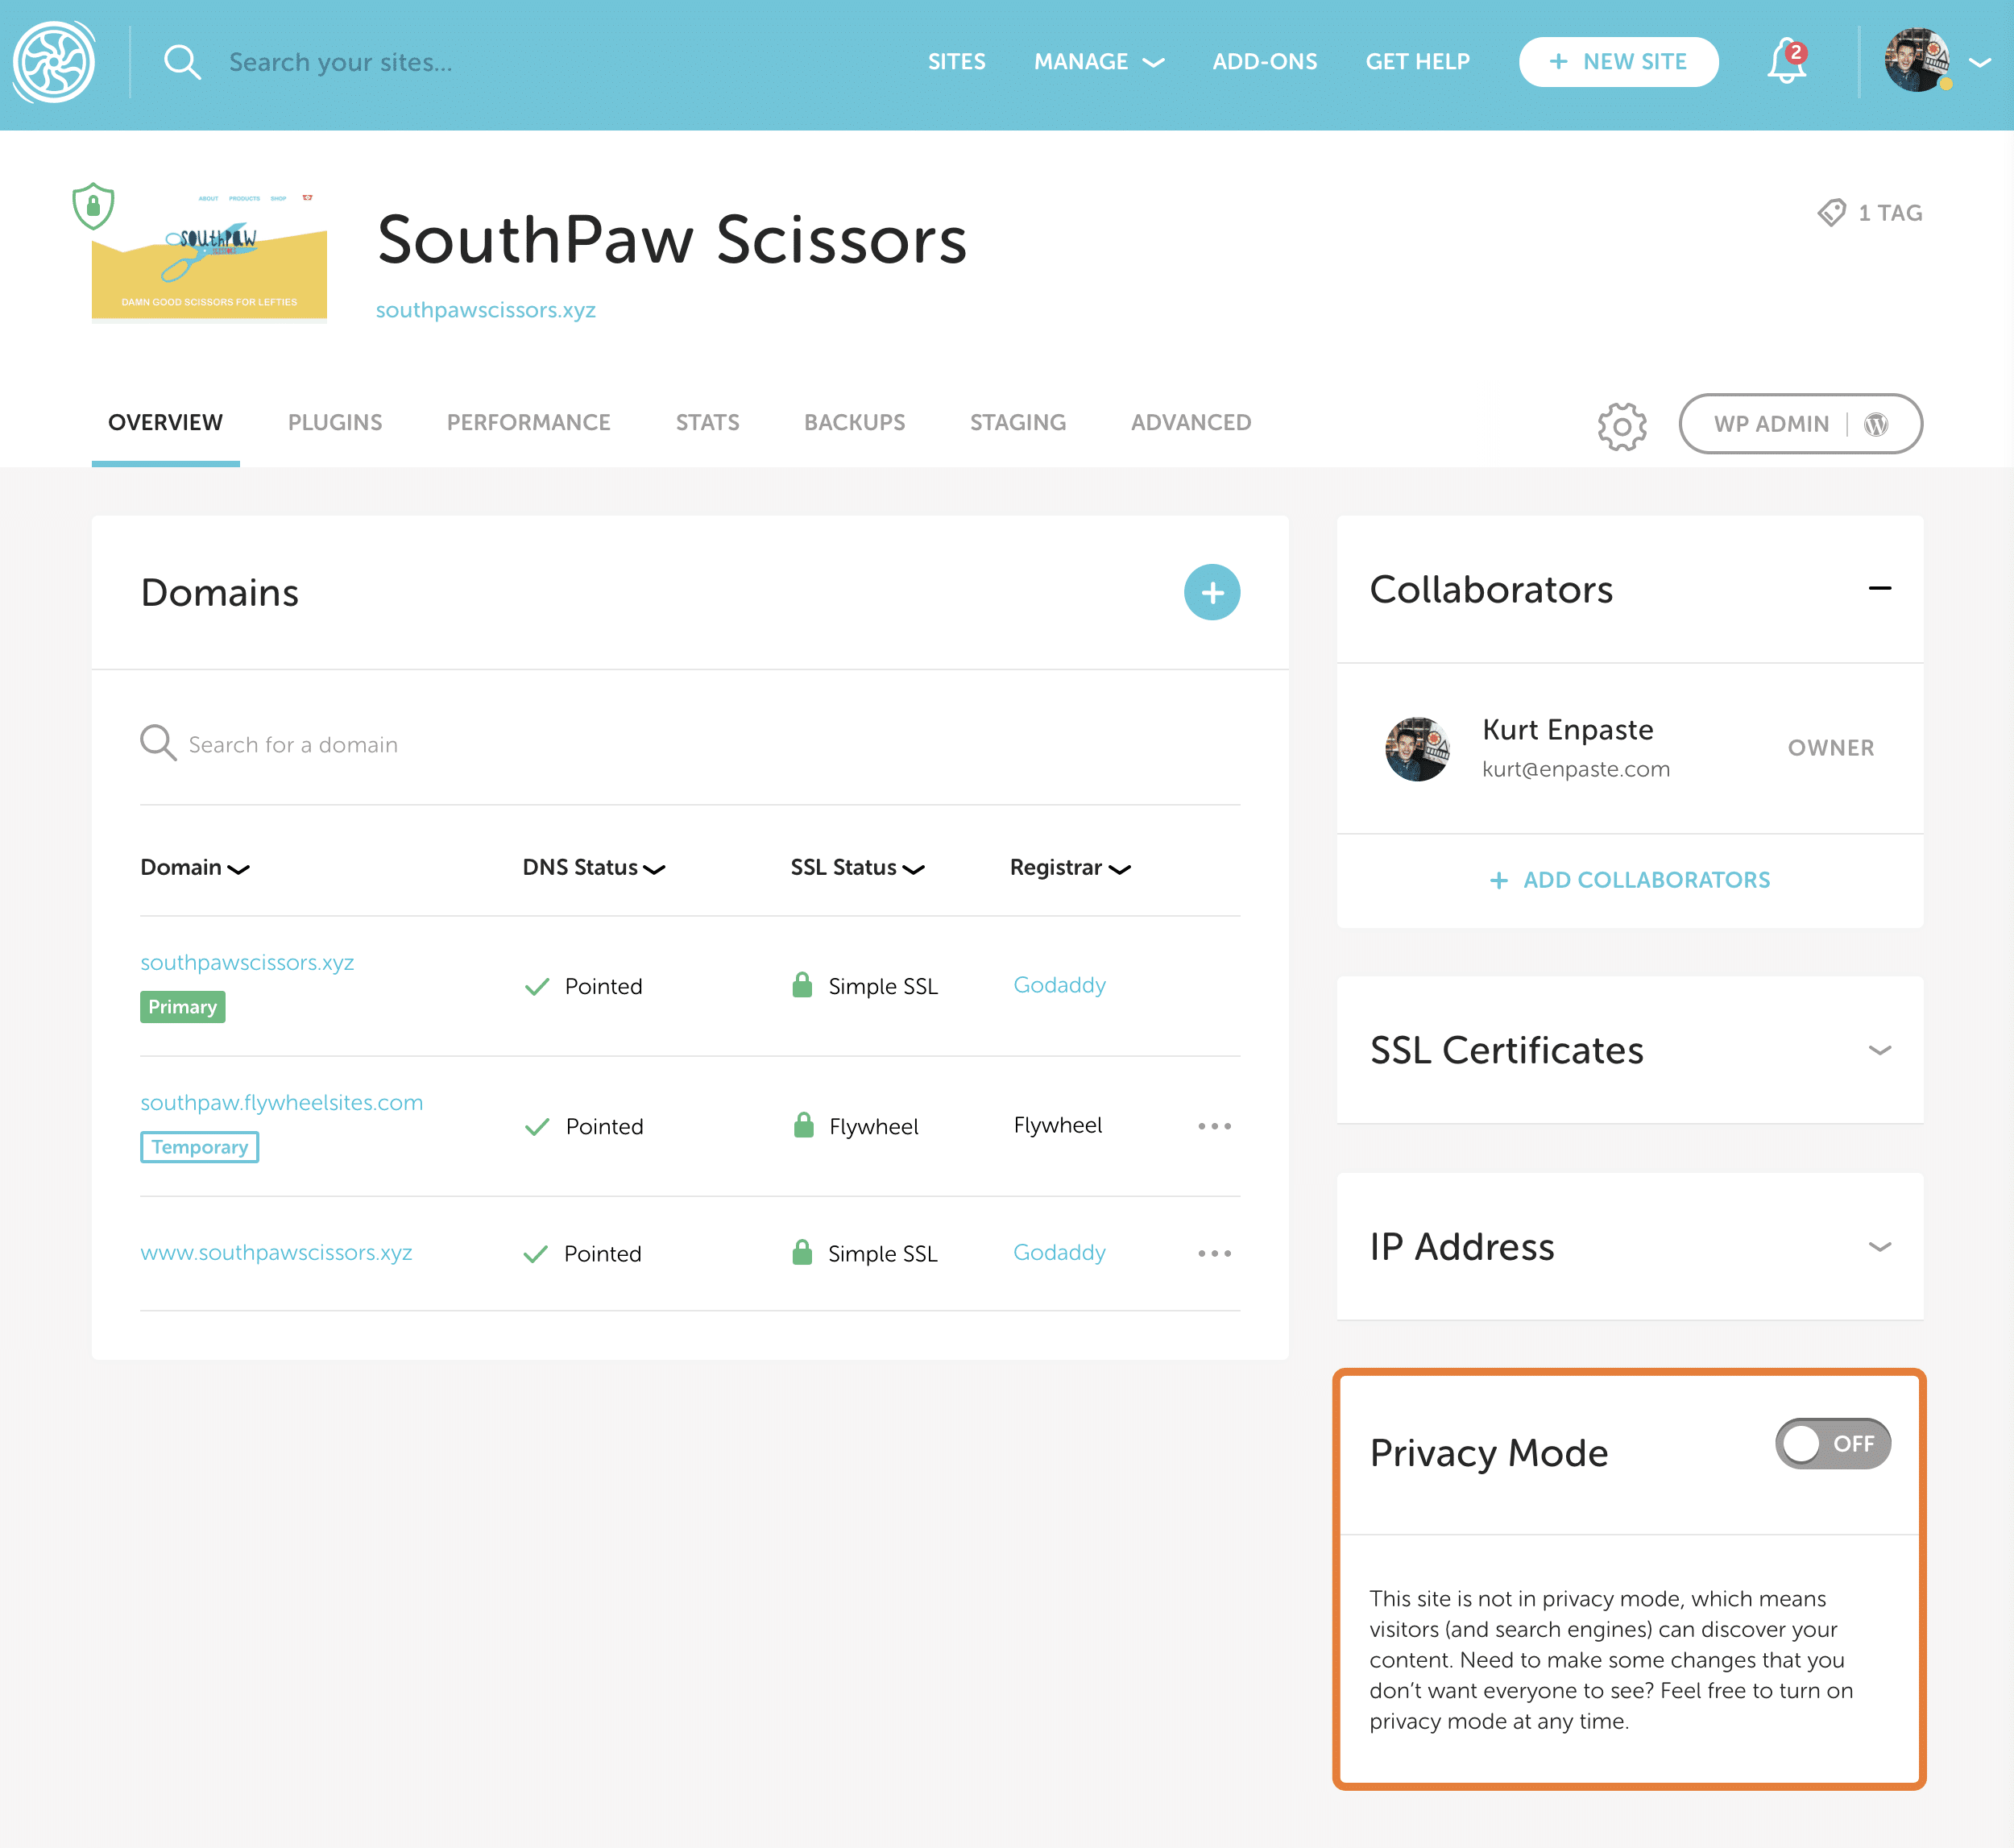
Add domains
Add any domains (and subdomains) you will be pointing at your site to the Domains card.
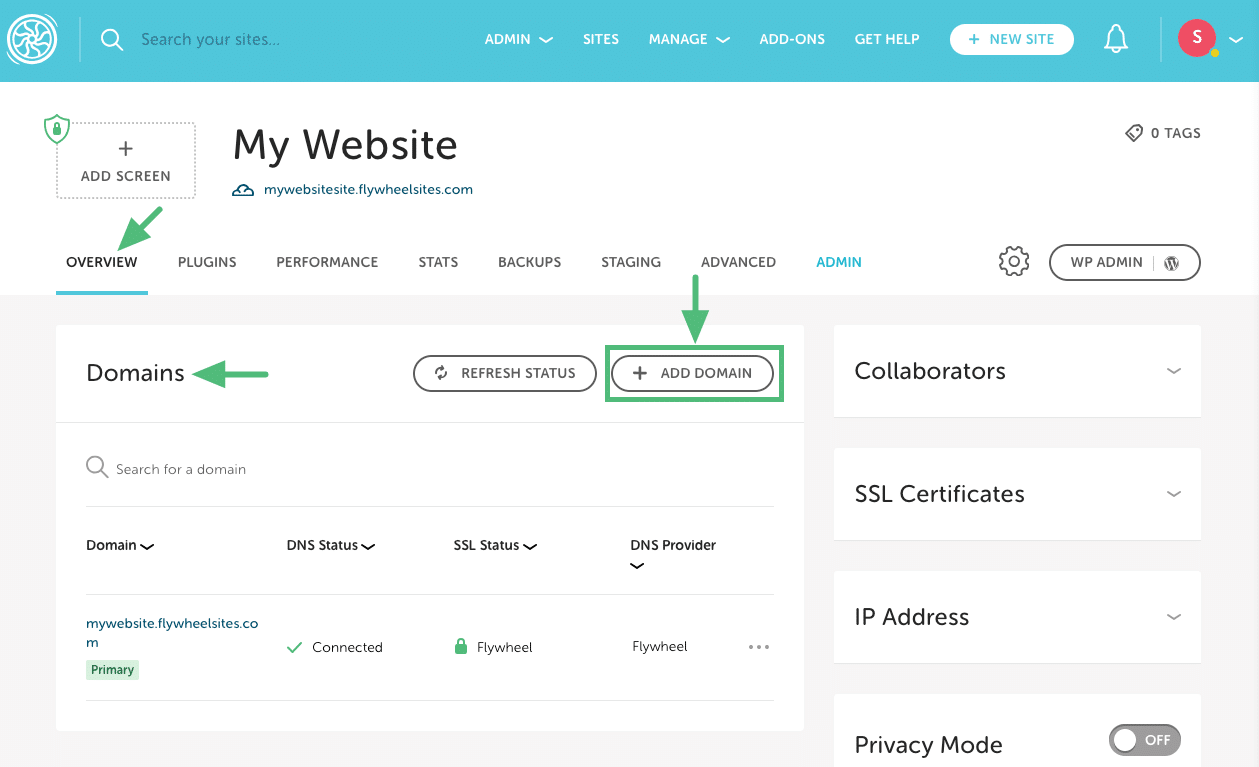
- If you haven’t added your domain yet, head over to the Domains card in the Flywheel site’s Overview tab and click the + Add Domain button to add the domain you’d like to point to Flywheel.
- Fill out the domain information:
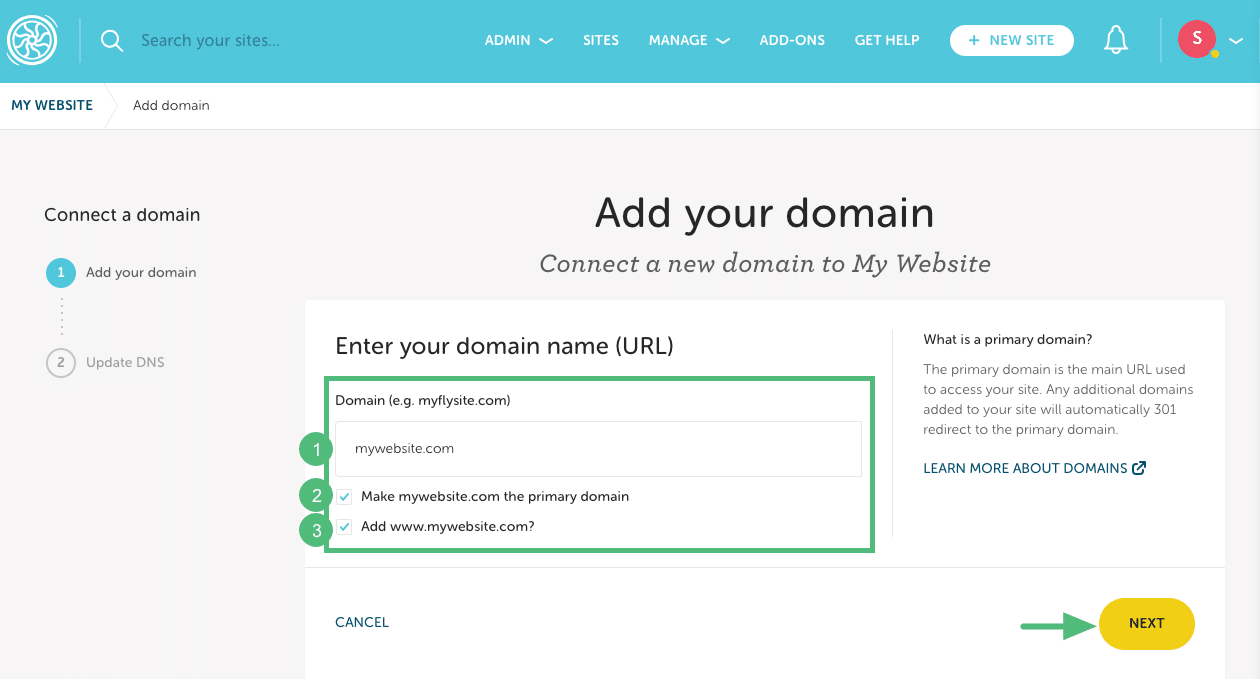
1. Domain: Enter the URL (without a prefix). Example: mywebsite.com
2. Primary domain: Check the box if you want this to be your primary domain (if this will be your site’s main URL).
3. www: By default, the www version of the domain will be added, but you can uncheck the box to skip this step if needed. Example: www.mywebsite.com.Then click Next.
Note
In the background, our system will automatically update all appropriate URL references in the database to this new primary domain. - If your domain supports Domain Connect, you’ll be prompted to enter your DNS provider credentials so Flywheel can configure your DNS records. If your domain doesn’t support Domain Connect, you’ll need to point DNS manually.
- Complete these steps for as many domains and subdomains as you’d like, keeping in mind there can only be one domain set to Primary.
Set the primary domain
If you haven’t yet, set the appropriate domain to primary by clicking the 3-dot menu and choosing Make Primary. This will update your site’s database to use the correct domain.

Update Multisite database
Note
For this step, we’re assuming your SQL table prefix is “wp_”. If you’re using a different table prefix, replace “wp_” in the following table names with your prefix).Quick Method
The easiest way to update the database is to head to the Multisite Domain Replacement Tool and enter the proper information about your site (old and new domain, database prefix, number of subsites).
That will give you an SQL statement, which you can copy and then run on your site’s database to make all the necessary replacements automatically.
As with any modifications to the database, it’s strongly recommended to create a backup before proceeding any further.
To perform the database update, copy the SQL statement you received, then head to your site’s Flywheel dashboard.
Click “Manage Database” under the Advanced tab to access the database manager, then click the “SQL” tab, and paste the SQL into the SQL query box.
Finally, click the “Run SQL” button just below it.
You should see several success messages, and possibly some errors. That’s normal. As long as you’re seeing at least some success messages, you’re good. If not, double-check the info you entered just to make sure everything’s correct.
If that worked, you can skip to the next step! If not, or if you’d prefer to make the updates manually, follow the instructions below.
Manual method
Login to your database manager from your Flywheel Dashboard and then edit the following tables from your Flywheel Temporary Domain to your new Primary Domain:
wp_options:rows named “siteurl” and “home”wp_sitewp_sitemeta: the row named “siteurl”wp_blogs: any entries in the “domains” column that have the
Flywheel Temporary domain namewp_#_options: update “siteurl” and “home” corresponding to blog id
Note
You’ll notice the ‘#‘ in the step above when referencing wp_#_options. Each sub-site will have sets of tables that correspond to the blog_id in the wp_blogs table. You’ll need to go to the wp_#_options table, where ‘#‘ corresponds to the blog_id, and update the “siteurl” and “home” rows in that table.Edit your domain’s DNS records to point to Flywheel
Point your domains to the site’s IP address (found under the domain list in Flywheel). For more information on how to point DNS at your site, visit our help article on setting up DNS. We also have registrar-specific articles for setting DNS on GoDaddy, MediaTemple, Hover, Namecheap, Bluehost, and more.
Need help?
If you have any questions our Happiness Engineers are here to help!
Getting Started
New to Flywheel? Start here, we've got all the information you'll need to get started and launch your first site!
View all
Account Management
Learn all about managing your Flywheel user account, Teams and integrations.
View all
Features
Flywheel hosting plans include a ton of great features. Learn about how to get a free SSL certificate, set up a staging site, and more!
View all
Platform Info
All the server and setting info you'll need to help you get the most out of your Flywheel hosting plan!
View all
Site Management
Tips and tricks for managing your sites on Flywheel, including going live, troubleshooting issues and migrating or cloning sites.
View all
Growth Suite
Learn more about Growth Suite, our all-in-one solution for freelancers and agencies to grow more quickly and predictably.
Getting started with Growth Suite
Growth Suite: What are invoice statuses?
Growth Suite: What do client emails look like?

Managed Plugin Updates
Learn more about Managed Plugin Updates, and how you can keep your sites up to date, and extra safe.
-
Restoring Plugin and Theme Management on Flywheel
-
Managed Plugin Updates: Database upgrades
-
Managed Plugin Updates: Pause plugin updates

Local
View the Local help docs
Looking for a logo?
We can help! Check out our Brand Resources page for links to all of our brand assets.
Brand Resources All help articles