SFTP Access and Uploads
One of the great things about Flywheel is that there is no need to share SFTP usernames and passwords with your clients or other people that collaborate on sites with you.
Everyone on Flywheel logs into the SFTP server using their own personal username and password, and from there they have access to all of the sites that they own or collaborate on.
Note
Before you can connect via SSH or SFTP you’ll need to make sure your Flywheel account is verified. You can do this by heading to your profile page.Table of Contents:
Configure your FTP client
To access your site’s files via SFTP, configure your FTP client using the following settings:
| Mode | SFTP (not regular FTP) |
| Host | sftp.flywheelsites.com |
| Port | 22 |
| Username | Your Flywheel username (not your email address). Find your Flywheel username here. |
| Password | Your Flywheel password |
Note
To generate a password for your SFTP account, head to your Profile > Account and click “Set an SFTP password”.Supported FTP clients
Flywheel supports all major FTP clients, including but not limited to:
For a nice comparison of SFTP clients, check out Wikipedia’s article: Comparison of FTP client software.
Connect to SFTP with Filezilla
FileZilla is an open-source FTP client available for Mac, Windows, and Linux. You can download it for free here.
Note
Please be aware that FileZilla has been known to have malware and potentially unwanted programs included with its installation. If this is your chosen FTP please use caution.
- Open FileZilla.
- Enter sftp.flywheelsites.com in the Host field.
- Your Username is the same as your Flywheel username (not your email address).
- Your Password is typically the same as your Flywheel password. To set a new password visit Profile > Account, then click Set an SFTP password.
- Enter 22 for the Port.
- Click the Quickconnect button or press Enter to connect to the server.
- Click Ok if you get a warning about an unknown host key.
Connect to SFTP with Transmit
Transmit is a popular FTP client for Mac. You can learn more about Transmit here.
![]()
- Open Transmit.
- Click on the Quick Connect tab.
- Set the Protocol to SFTP.
- Enter sftp.flywheelsites.com in the Address field.
- Port should display 22 by default, if not, you can set the value manually.
- Your User Name is the same as your Flywheel username (not your email address).
- Your Password is typically the same as your Flywheel password. To set a new password visit Profile > Account, then click Set an SFTP password.
- You can leave Remote Path blank.
- Click on Connect or press Enter to connect to the server.
- Click Ok if you get a warning about an unknown host key.
Note
To save these settings for future use, click the Add to Servers button. Once saved, you can access these settings via the Servers tab (next to the Quick Connect tab).Connect to SFTP with Cyberduck
Cyberduck is an FTP client available for Mac and Windows. You can download it for free here.
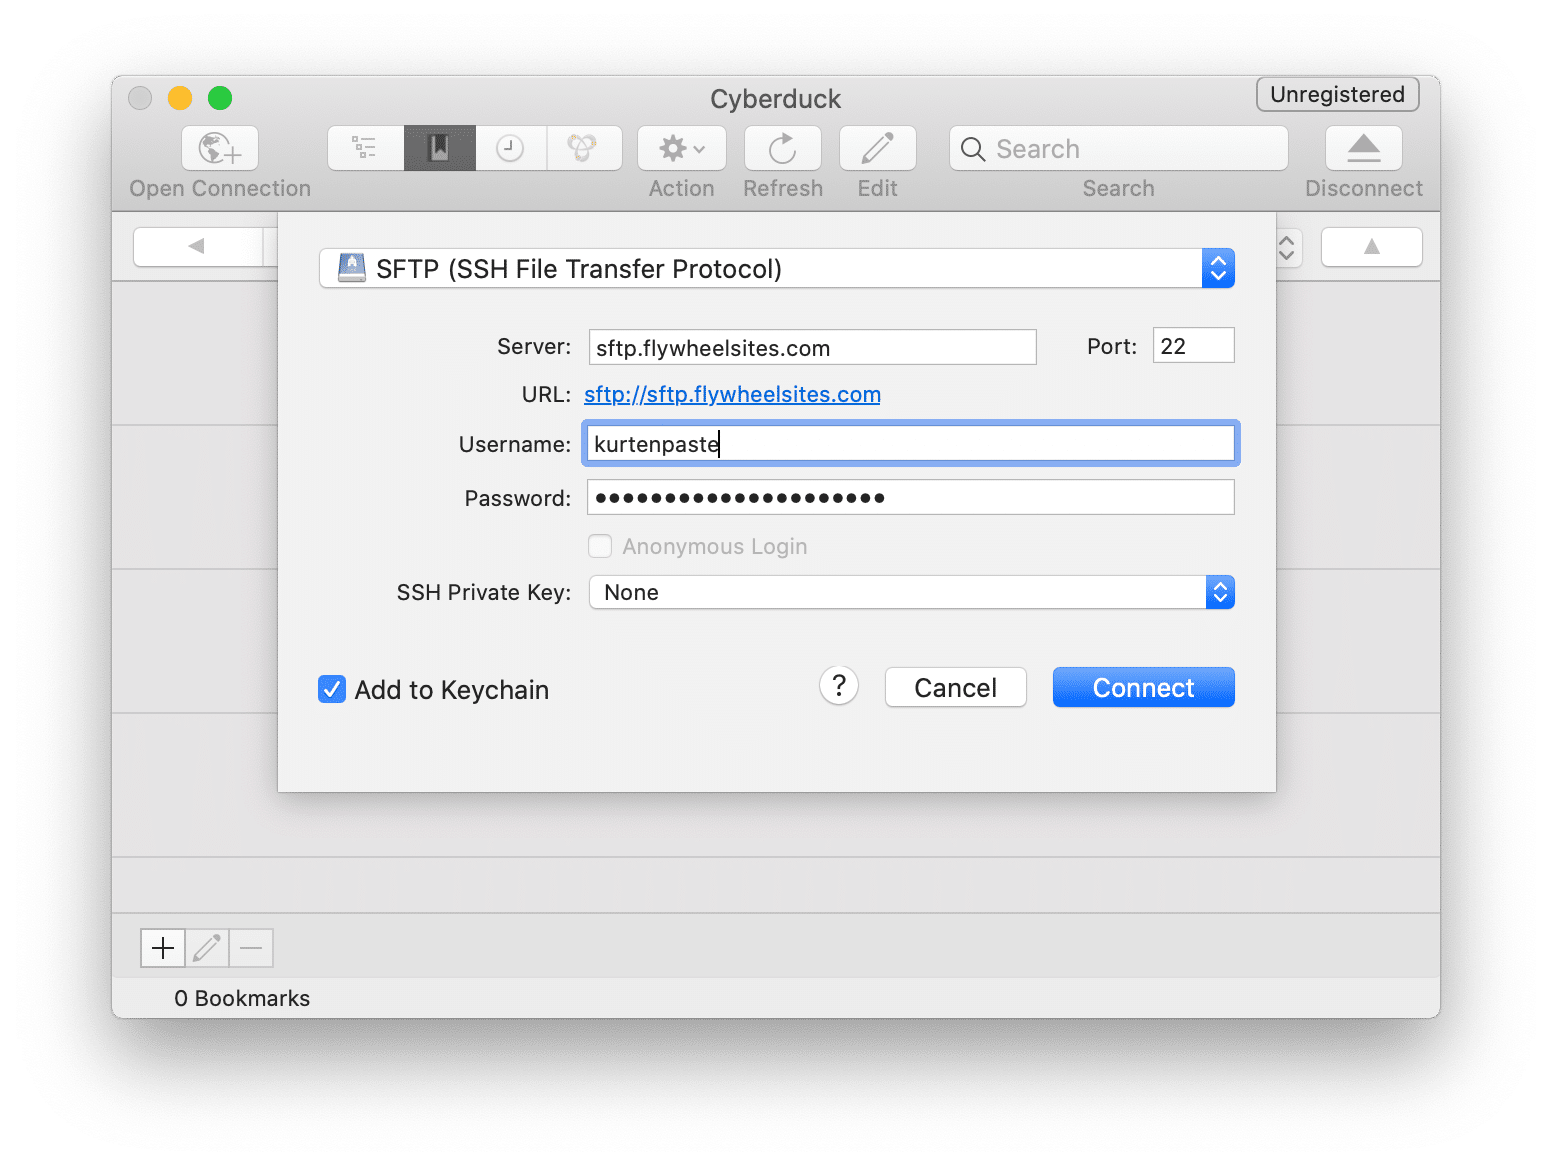
- Open Cyberduck.
- Click on the Open Connection button.
- Choose SFTP from the dropdown.
- Enter sftp.flywheelsites.com in the Server field.
- Port should be set to 22 by default, if not, you can enter the value manually.
- Your Username is the same as your Flywheel username (not your email address).
- Your Password is typically the same as your Flywheel password. To set a new password visit Profile > Account, then click Set an SFTP password.
- You can leave SSH Private Key set to None.
- Click on Connect or press Enter to connect to the server.
- Click Ok if you get a warning about an unknown host key.
Connect to SFTP with Dreamweaver
Dreamweaver is a popular web design software from Adobe. It has an FTP client built right in – here’s how to connect a Dreamweaver site to your Flywheel site.
- Open Dreamweaver.
- In the main menu, select Site > Manage Sites.
- Create a new site, or select an existing site and click the edit (pencil) icon.
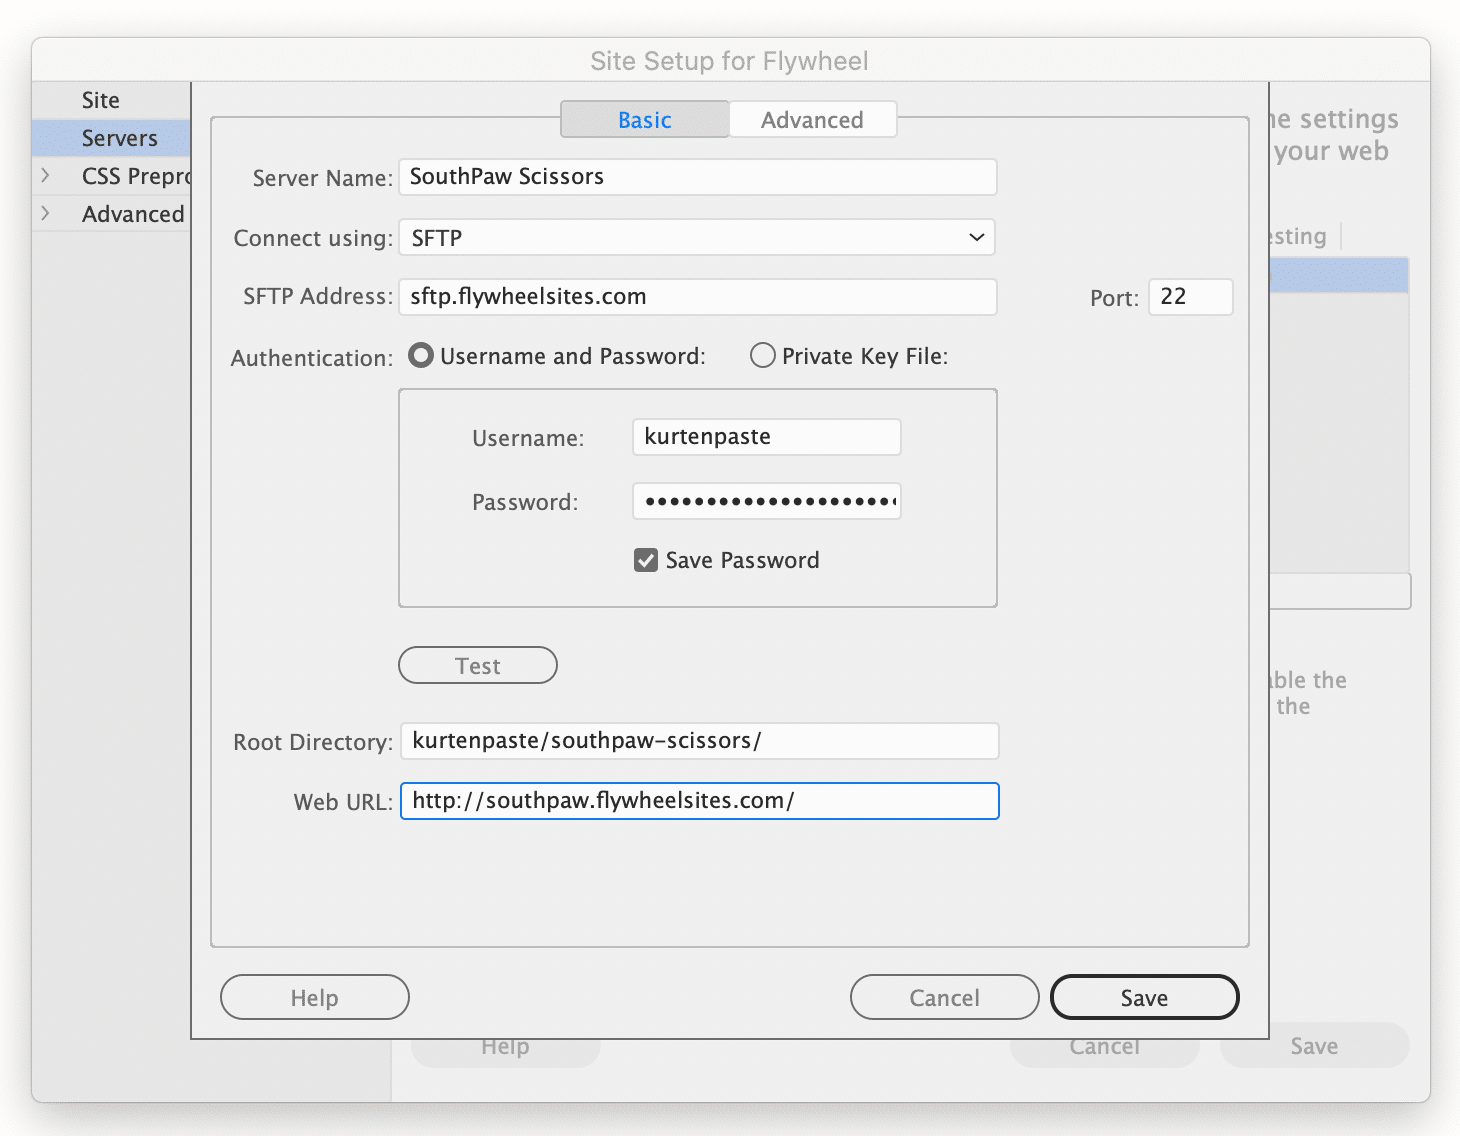
- In the Site Setup area, select Servers and add a new server or edit an existing server.
- For Server Name, choose anything you like, usually the name of your site.
- Connect using SFTP.
- Enter sftp.flywheelsites.com for the SFTP address.
- Port should autofill with 22.
- Choose Username and Password for Authentication.
- Your Username is the same as your Flywheel username (not your email address).
- Your Password is typically the same as your Flywheel password. To set a new password visit Profile > Account, then click Set an SFTP password.
- Clicking the Test button will test your connection to the Flywheel SFTP server.
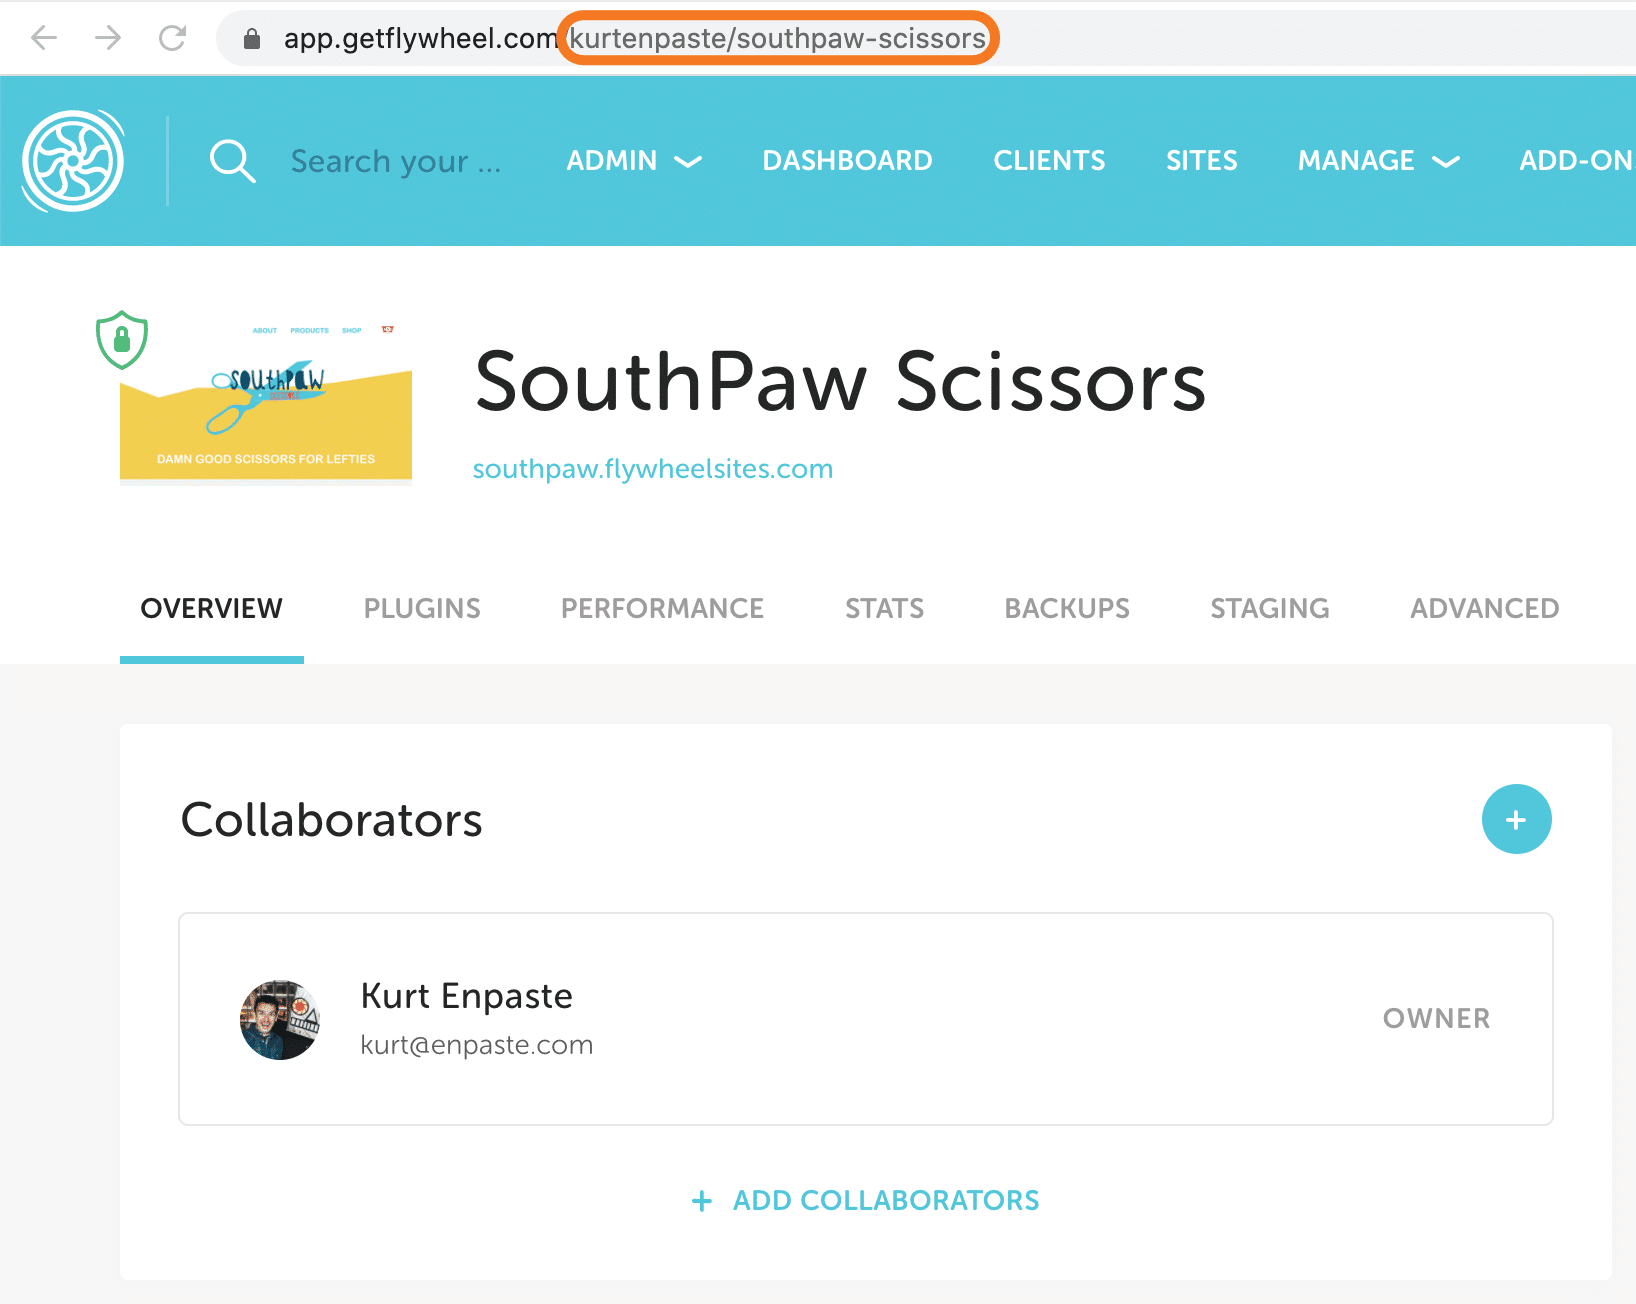
- For Root Directory, enter your Flywheel username, then a forward slash, followed by the site slug. You can also copy the path from your browser when on the site’s Flywheel dashboard, as shown:
Note
Organizations and Staging Sites:- If the site is owned by an organization, the path is a little different. You’ll use “org-“, followed by the organization name, a forward slash, then the site slug. For example:
/org-kurt-enpaste-agency/southpaw-scissors - If you are using a staging site the path will end with staging_site, for example:
/kurt-enpaste-agency/southpaw-scissors/staging_site
- If the site is owned by an organization, the path is a little different. You’ll use “org-“, followed by the organization name, a forward slash, then the site slug. For example:
- For Web URL, choose the domain that matches the primary domain on Flywheel, which may be a temporary domain. Keep in mind if you have SSL turned on, you should use the
https://protocol. - Click Save.
Password issues
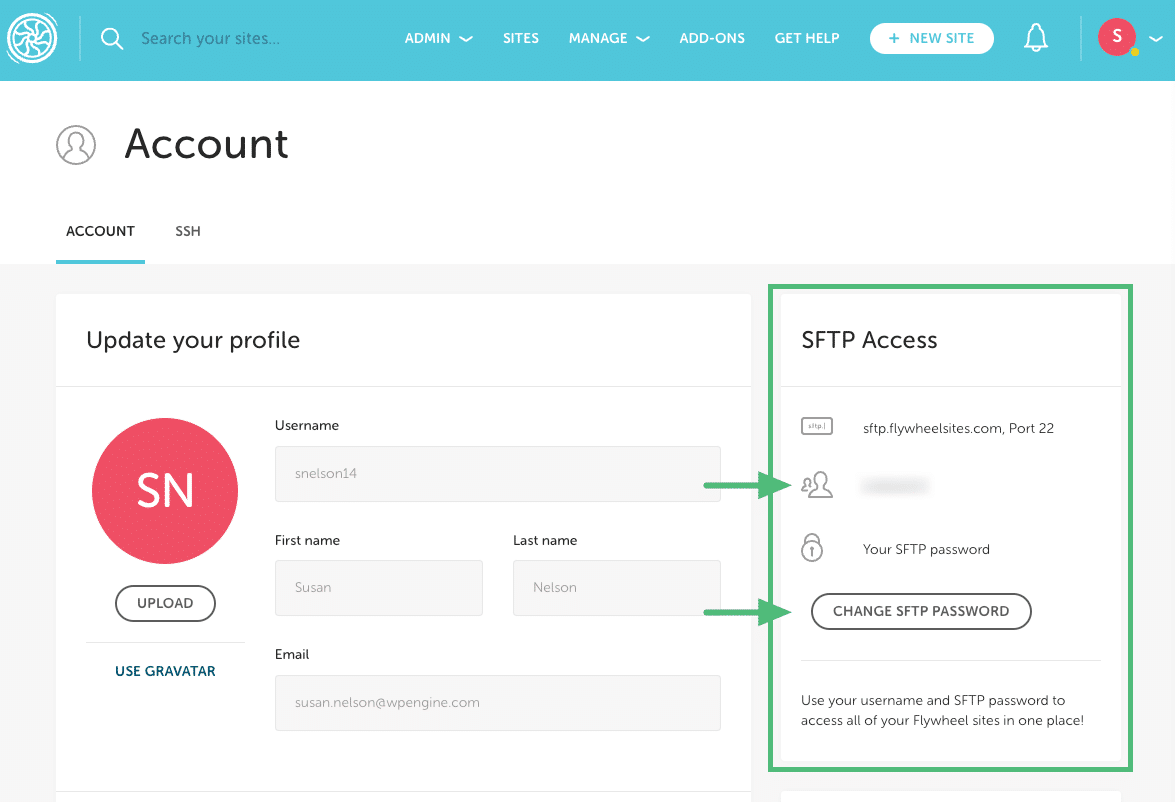
You can view your username on your profile page in Flywheel.
To set a new SFTP password, you can go directly to the Change your SFTP Password page to make the change.
Or if you’re using the Okta login experience, you can click the Change SFTP Password button on your profile page (shown in the image below) to be taken to the Change your SFTP Password page.
Add SFTP files to the media library
Sometimes it’s helpful to upload media to your site via SFTP rather than via the WordPress® Media Library.1 This is particularly helpful if you have:
- A large number of files to add
- A file with a large file size
If you want to store the files on your server, you can just upload them via SFTP and you’re all set! Just keep track of where you uploaded the file and this path will allow you to link directly to the file.
However, WordPress cannot “see” those files in the WordPress Media Library automatically. To allow those files to be available inside your Media Library, there are a few extra steps required.
Upload your files via SFTP
- Using the SFTP client of your choice, upload the file from your computer to your Flywheel server.
- Make sure the files are uploaded to the
/wp-content/uploadsfolder.
Install the Media Sync plugin
Since the Media Library is driven by media IDs created when files are added via the WP-Admin area, uploading files into the wp-content/uploads via SFTP won’t automatically add them to the Media Library.
Unlike WordPress, SFTP only interacts with the filesystem and not the database. However, we can add the files to the Media Library by using a plugin. We suggest Media Sync.
- Log into your WP-Admin area.
- In the sidebar, navigate to Plugins > Add New.
- In the search box, enter “media sync”.
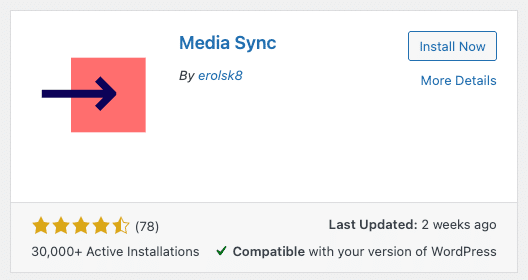
- Install and activate the plugin.
Note
There are alternatives to the plugin mentioned above to import images from your server, such as the premium plugin WP All Import.Select files to add to the Media Library
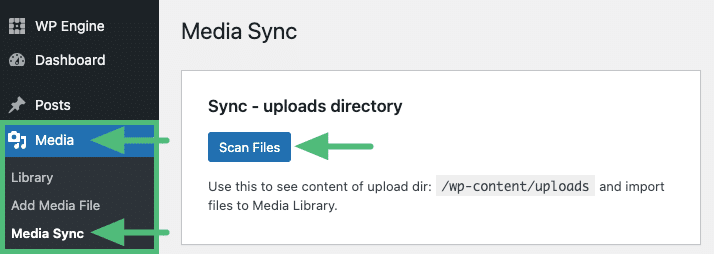
- In the sidebar, navigate to Media > Media Sync and then click Scan Files.
- Scroll down to the list of folders and files and select the files you wish to add to your Media Library. Then scroll back up and click Import Selected.
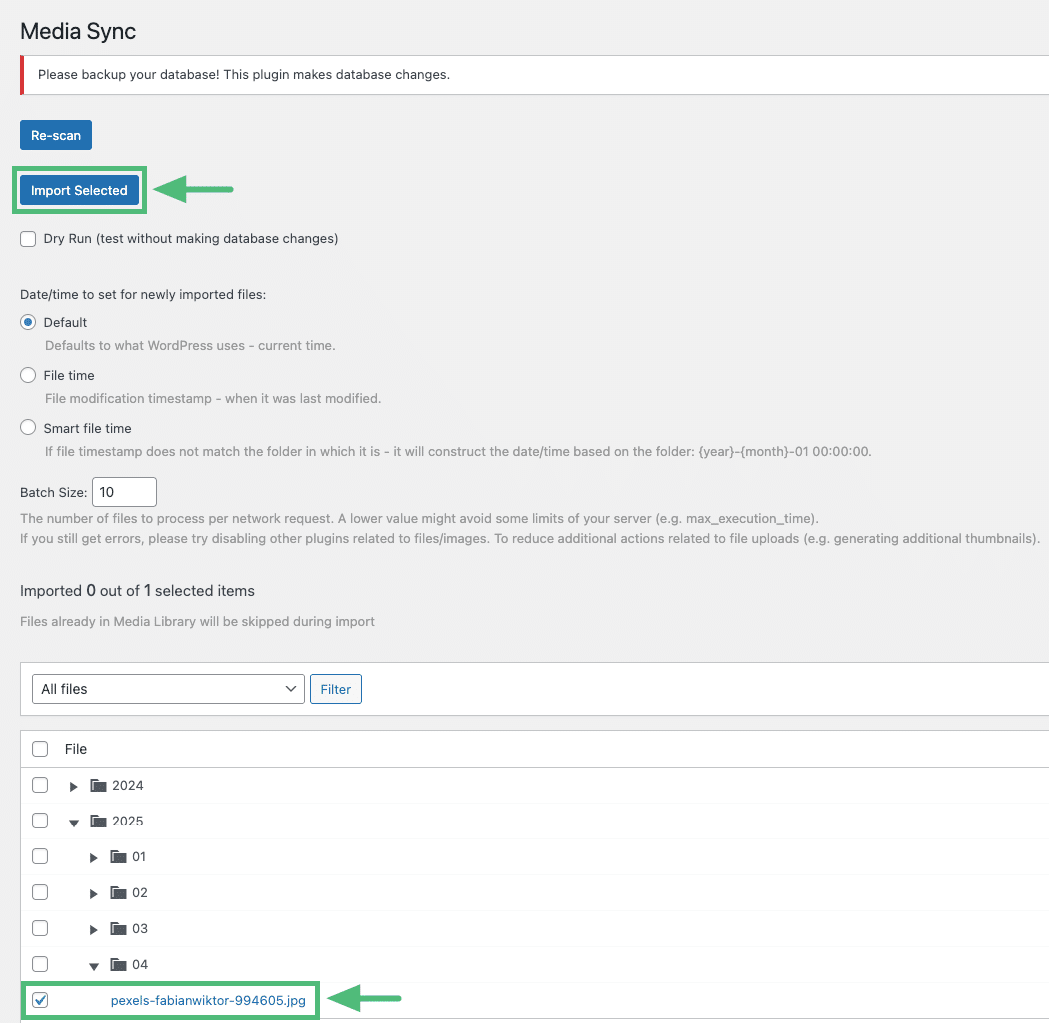
- Depending on the amount and size of your files, it may take a few minutes for them to be imported.
View your files in the Media Library
Head back to your Media Library. The files that you uploaded via SFTP will now be there!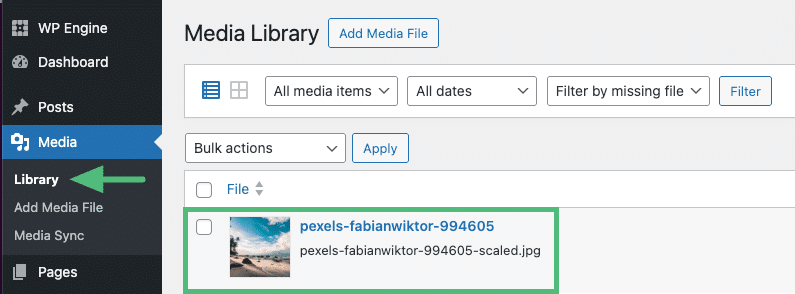
Need help?
If you’re still having issues, you can always contact Flywheel support and we’d be happy to help you reset your password or configure your SFTP client for access.
Getting Started
New to Flywheel? Start here, we've got all the information you'll need to get started and launch your first site!
View allAccount Management
Learn all about managing your Flywheel user account, Teams and integrations.
View allFeatures
Flywheel hosting plans include a ton of great features. Learn about how to get a free SSL certificate, set up a staging site, and more!
View allPlatform Info
All the server and setting info you'll need to help you get the most out of your Flywheel hosting plan!
View allSite Management
Tips and tricks for managing your sites on Flywheel, including going live, troubleshooting issues and migrating or cloning sites.
View allGrowth Suite
Learn more about Growth Suite, our all-in-one solution for freelancers and agencies to grow more quickly and predictably.
Getting started with Growth Suite
Growth Suite: What are invoice statuses?
Growth Suite: What do client emails look like?
Managed Plugin Updates
Learn more about Managed Plugin Updates, and how you can keep your sites up to date, and extra safe.
-
Restoring Plugin and Theme Management on Flywheel
-
Managed Plugin Updates: Database upgrades
-
Managed Plugin Updates: Pause plugin updates
Local
View the Local help docs
Looking for a logo?
We can help! Check out our Brand Resources page for links to all of our brand assets.
Brand Resources