Migrate your site to Flywheel using the WP Engine Site Migration Plugin
One question we get a lot is, “Can I migrate my site to Flywheel myself?” and the answer is yes! We’d love to move your site over to Flywheel for free, but if you are the do-it-yourself type, this article is for you.
Note
This guide covers migrating a site to Flywheel from another host or any live server using our WP Engine Site Migration plugin.Another option is to use the plugin WP Migrate Pro to push and pull from Flywheel using this guide. You can also use WP Migrate Lite and Local following this guide (this option is free).
If you’d prefer not to use a plugin, or you have your site files ready to go and just need to import them to Flywheel, we recommend migrating your site to Flywheel manually.
The WP Engine Site Migration plugin simplifies the process of moving any WordPress® website to Flywheel or WP Engine.1 Allowing site migrations from just about any WordPress host or local hosting environment, WP Engine Site Migration is easy, fast, and secure.
The WP Engine Site Migration plugin was developed by the Delicious Brains team specifically to help migrate WordPress sites from almost any host (including locally hosted!) to the Flywheel or WP Engine platforms.
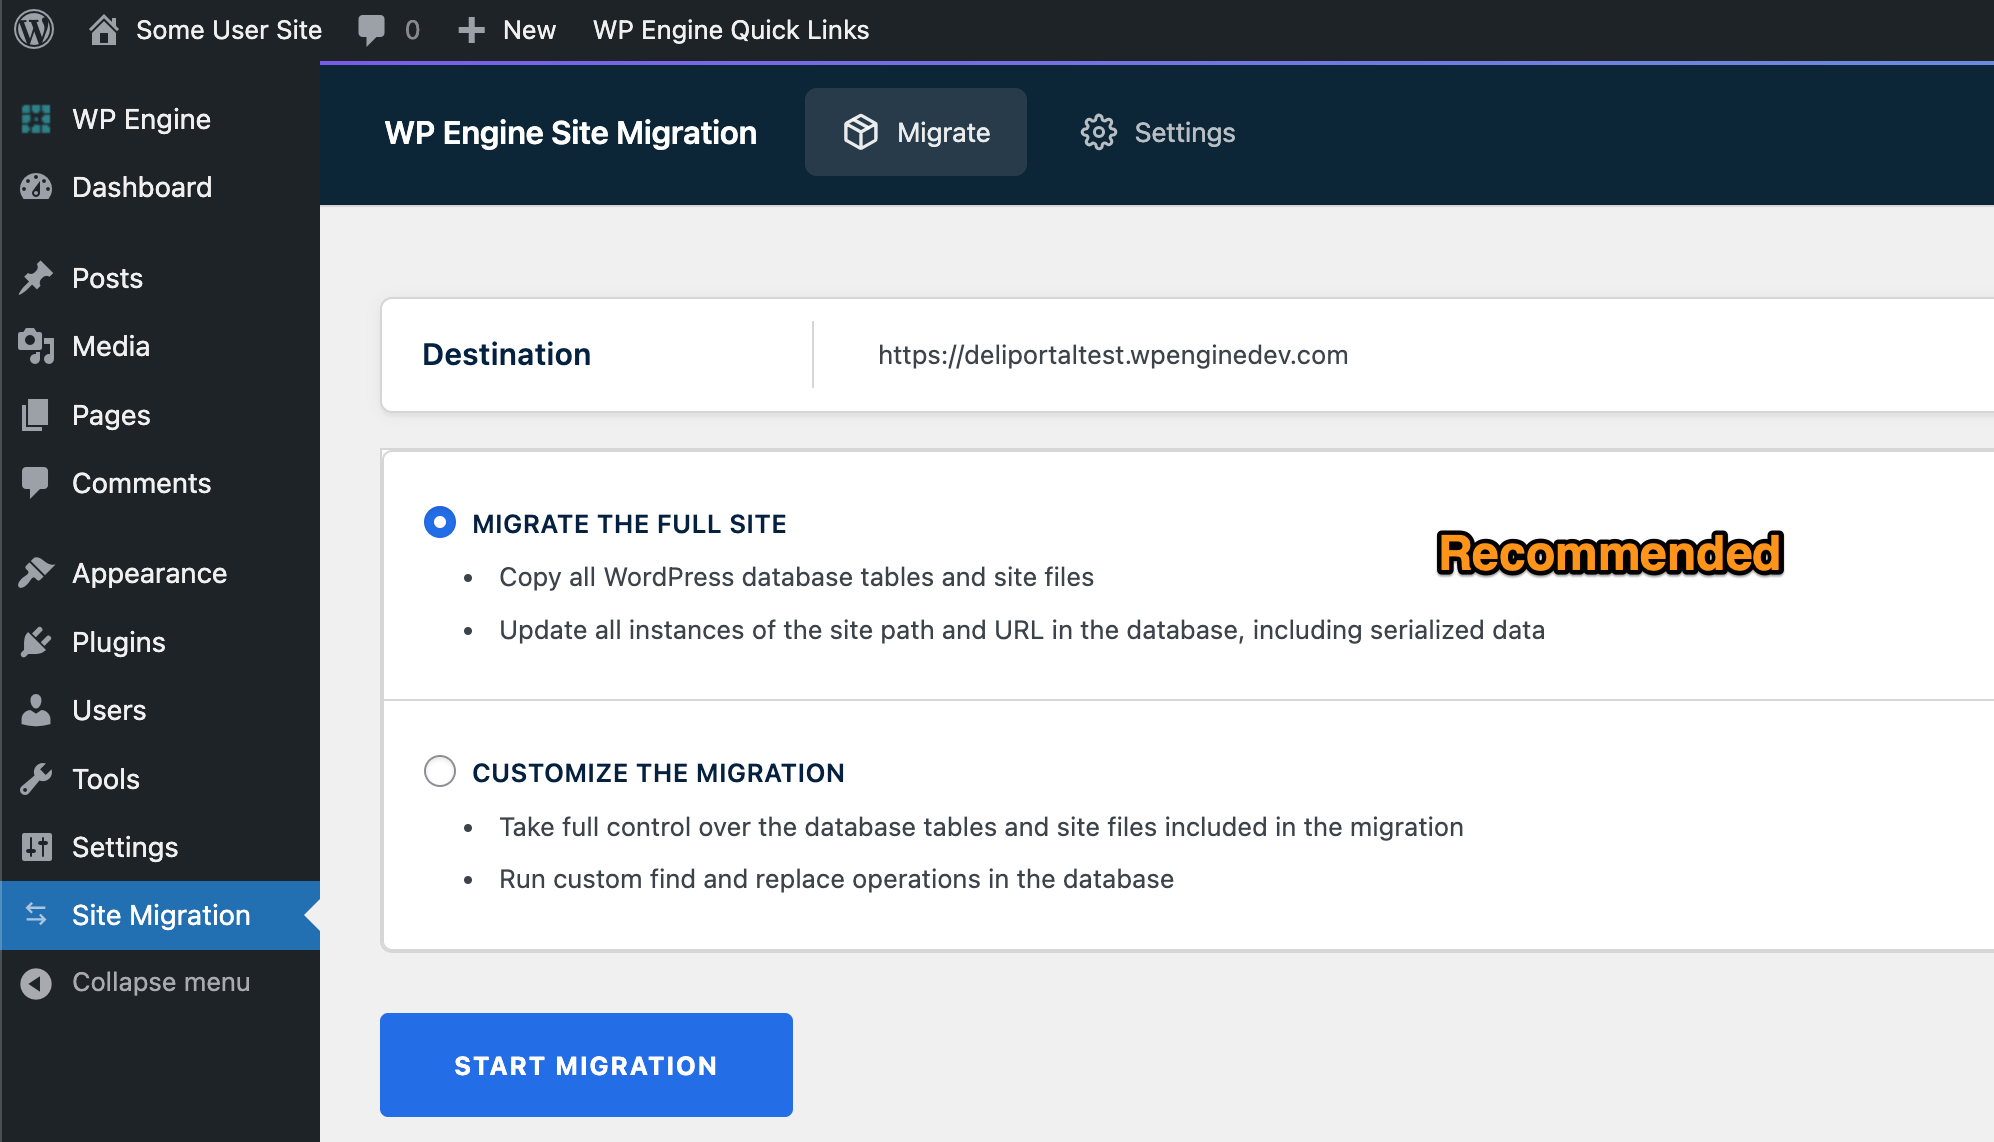
This plugin includes two options for migrating content: Migrate the full site or Customize the Migration.
Note
Before you begin, download the WP Engine Site Migration plugin so you can install it on your Flywheel site as described below.Table of Contents:
Migrate the Full Site
This option is recommended for most sites. A Full Site migration copies the necessary assets to help ensure the migration succeeds, the new site performs as expected, and excludes any items that may conflict with the Flywheel platform.
When running a full site migration, the plugin will perform the following actions.
- Copy all WordPress database tables and site files, including:
- Database tables
- Media uploads
- Themes
- Plugins
- Must-use Plugins
- Other files in the wp-content directory
- Update all instances of the site path and URL in the database, including serialized data
A full site migration will exclude certain plugins that are not recommended and other files such as logs, backups, and caches that are known to slow down migrations or otherwise cause issues on our platform.
Customize the Migration
The custom option gives more flexibility when migrating and is the only option that allows you to include files and directories in the root of the WordPress. Specific files or database tables can be excluded which you may not want to migrate or that might cause a migration to fail.
A custom migration can be configured to include or exclude:
- Database tables
- Media uploads
- Themes
- Plugins
- Must-use Plugins
- Other files in the wp-content directory
- Root files
Additionally, migration options can be adjusted for the database search and replace, replacing GUIDs, excluding transients, and more.
Minimum Requirements
To perform a successful migration, the source and destination environments should meet the following minimum requirements.
- WordPress 5.0
- PHP 5.6
- MySQL 5.0
- WP REST API enabled
- A modern browser such as Chrome, Firefox, Safari, Edge
- Internet Explorer not supported
Migrate a Site
Migrating a site requires the WP Engine Site Migration to be installed on both the source and destination sites. Connection information retrieved from the Flywheel destination site will be used to initiate the migration on the source site.
Begin a Migration in the Flywheel App
- Log in to the Flywheel App
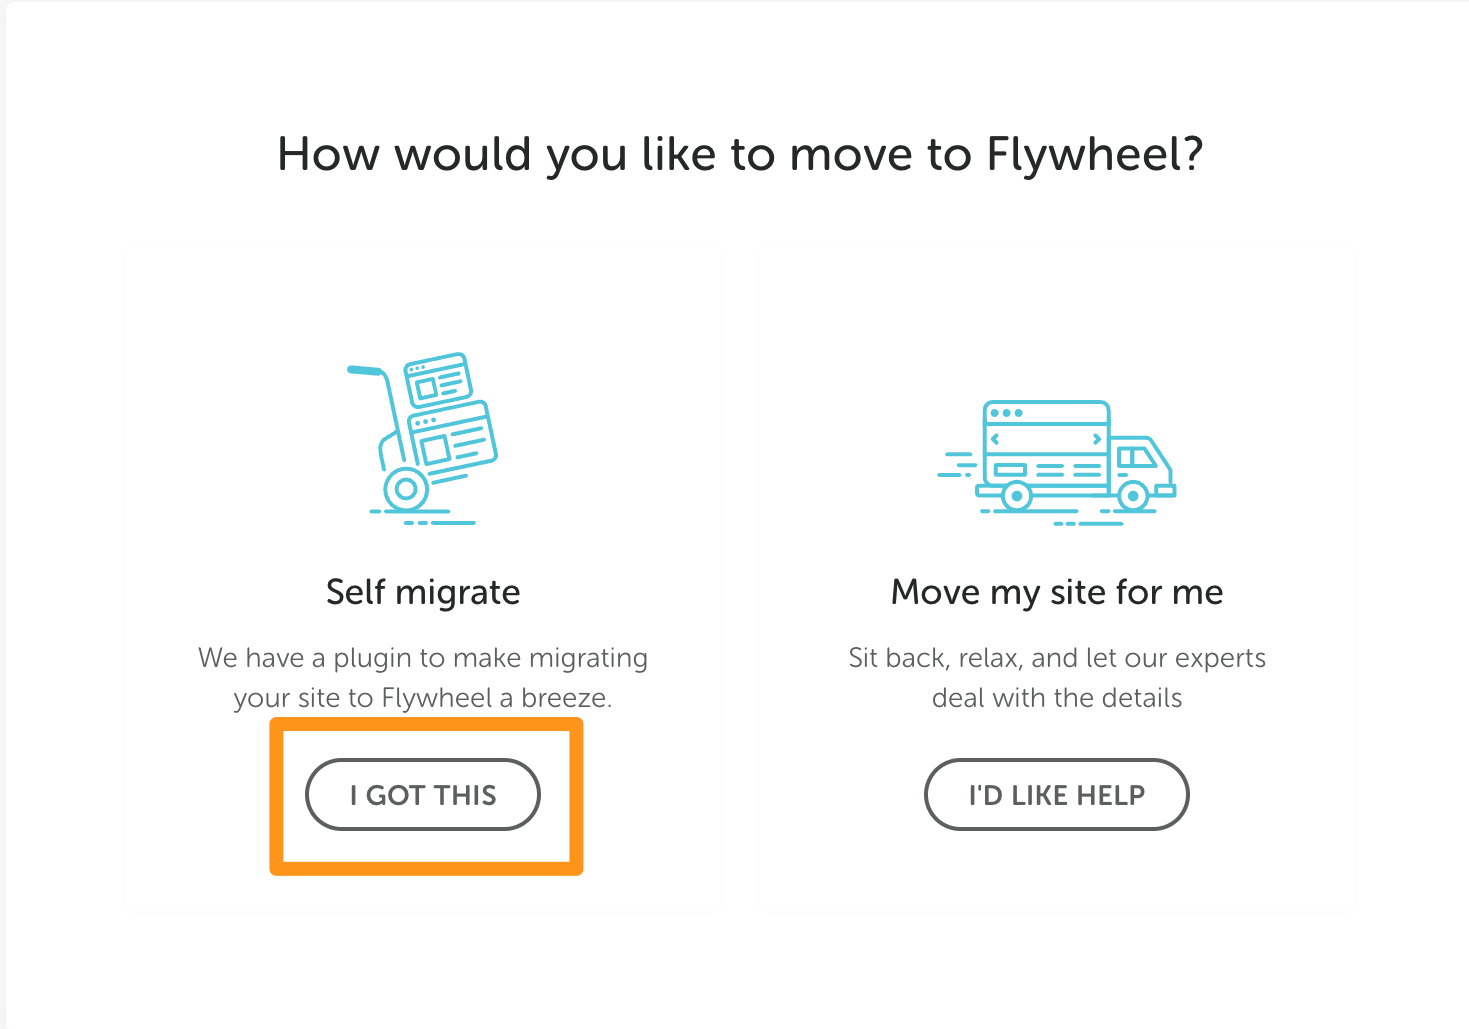
- Click Begin a migration (Direct Link: https://app.getflywheel.com/migration)
- Under Self migrate, click I got this
- Follow the step-by-step guide to get started with the WP Engine Site Migration plugin
Prepare the Flywheel Site
The Flywheel site (where you are migrating to) needs to have the WP Engine Site Migration plugin installed.
First, install and activate the WP Engine Site Migration plugin on your Flywheel site.
- Download the WP Engine Site Migration plugin. Be sure to take note of where the file is saved so it can be found easily in the next step!
- Open the wp-admin dashboard of the Flywheel site. This is the site on Flywheel, not your previous host.
- From the menu, select Plugins
- Select Add New (
/wp-admin/plugin-install.php)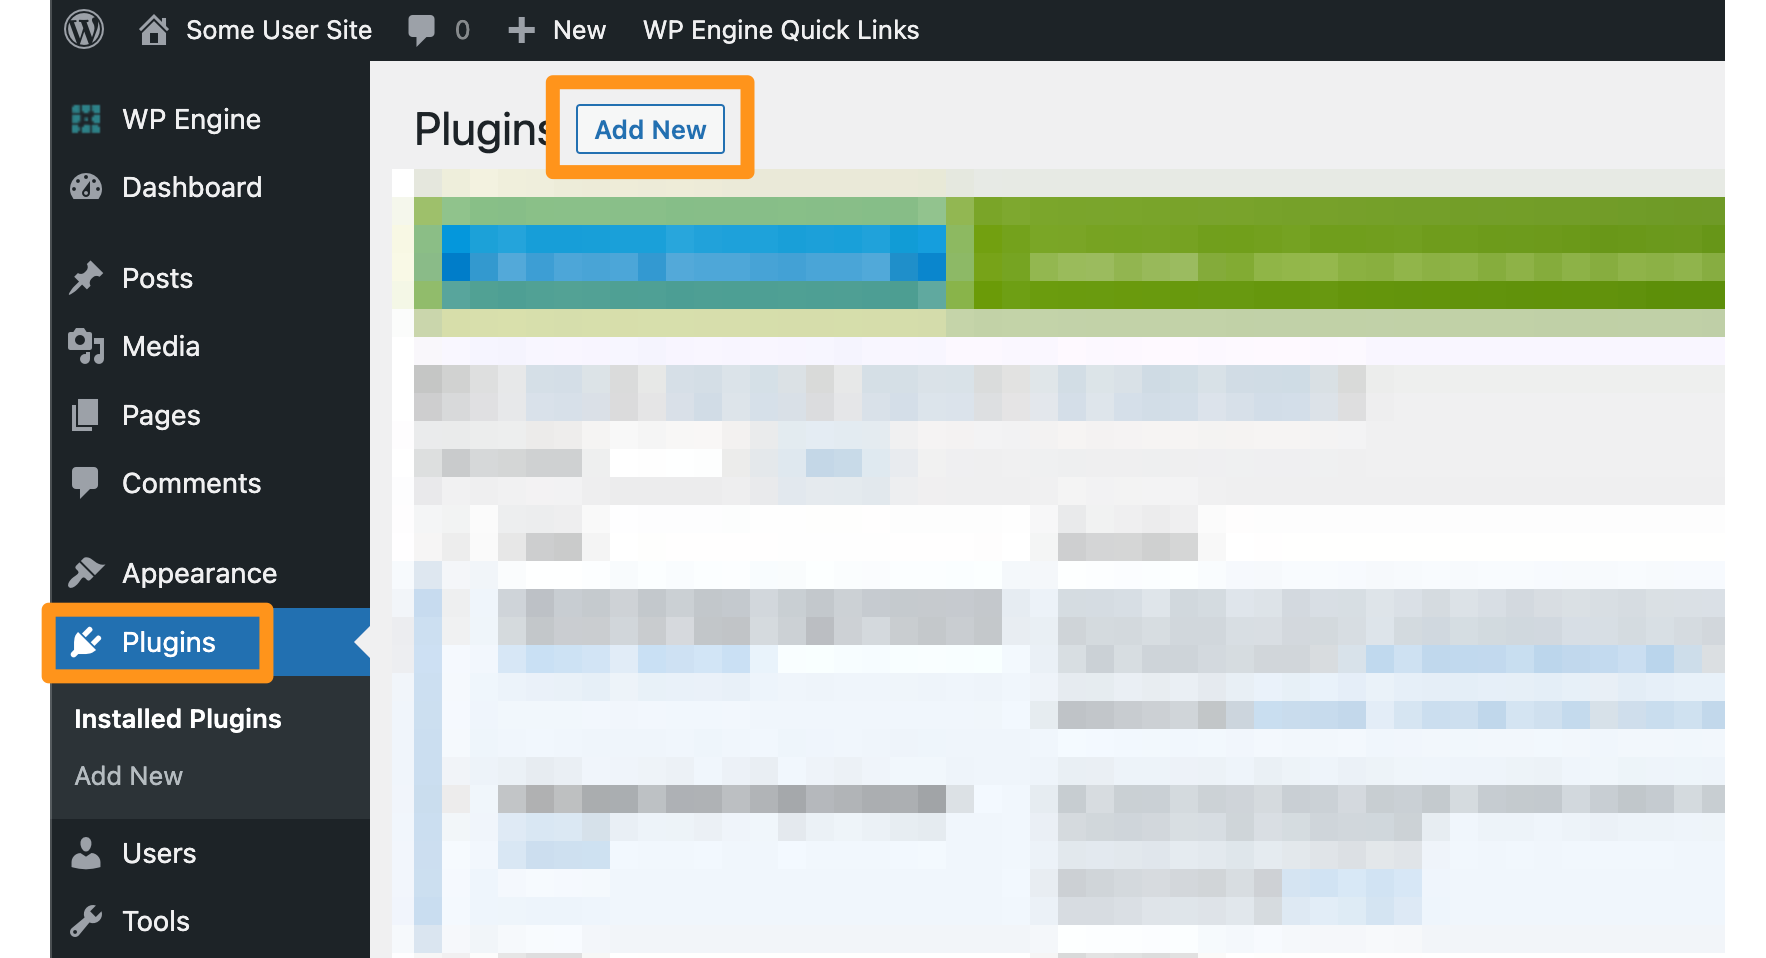
- Click Upload Plugin
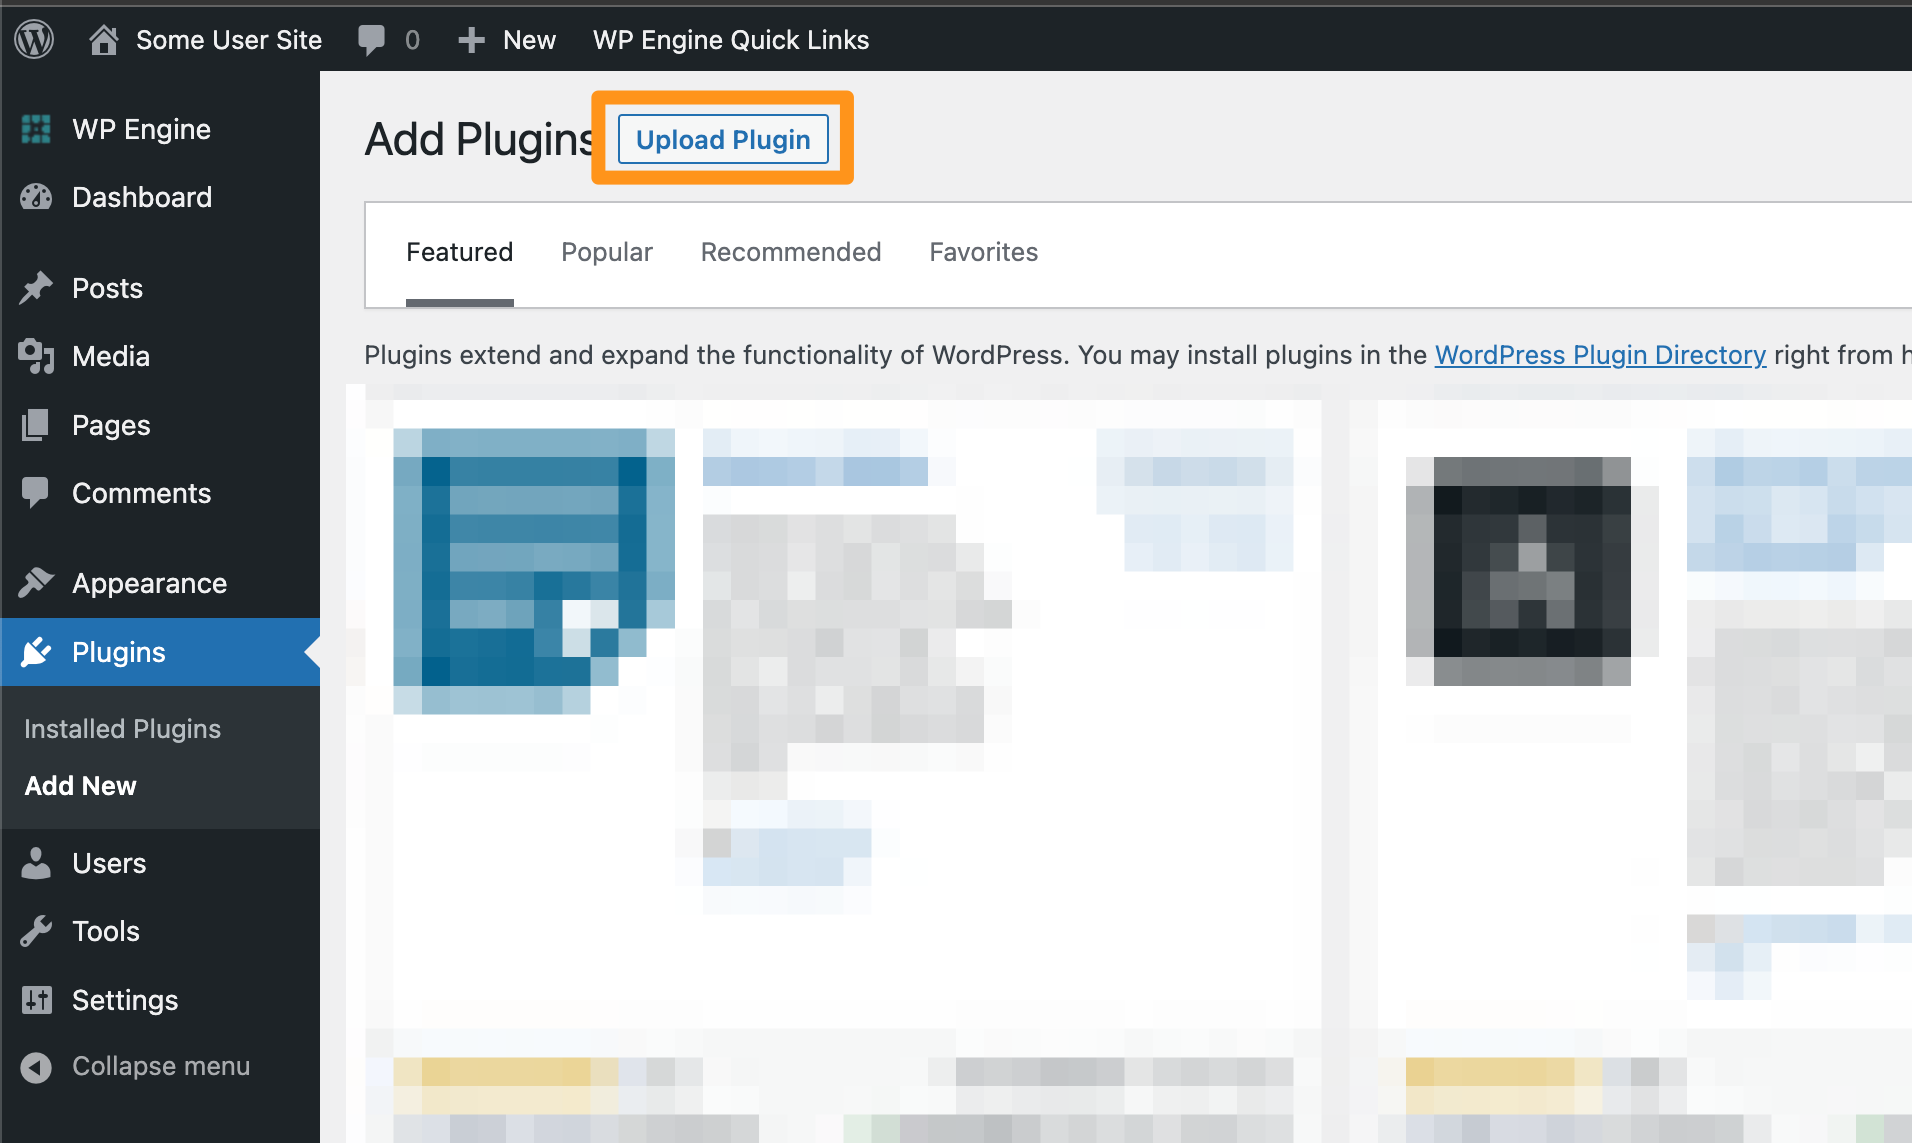
- Locate and select the plugin ZIP file
- Click Install Now
- Click Activate Plugin
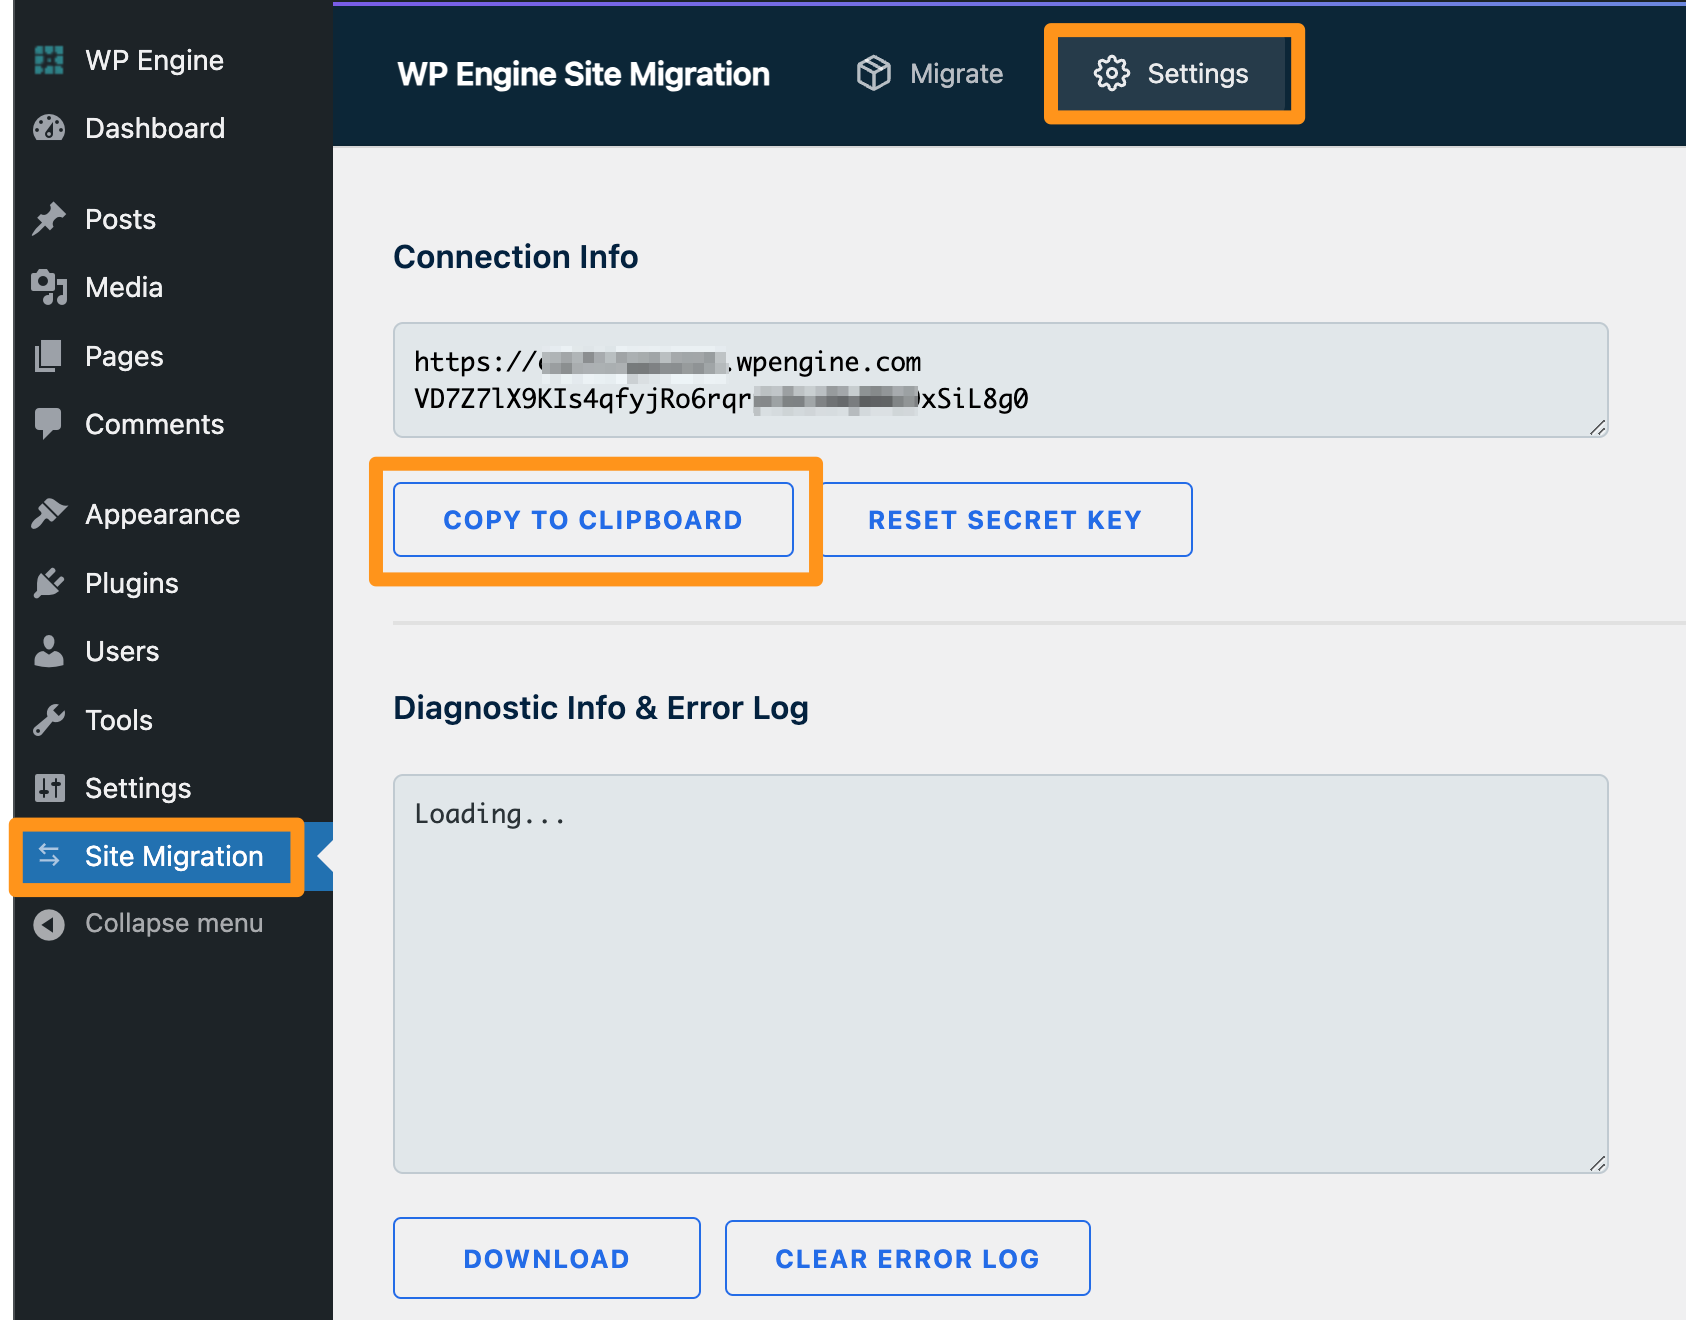
Next, you’ll need to generate and copy the connection information.
- From the wp-admin main menu, select Site Migration
- Click the Settings tab (
/wp-admin/admin.php?page=wpe-site-migration#settings) - Copy Connection Info – Copy this or leave the page open! You’ll need this info in the next step.
Connect and Migrate the Site
The source site (where you are migrating from) also needs to have the WP Engine Site Migration plugin installed.
First, install the WP Engine Site Migration plugin on the source site.
- Open the wp-admin dashboard of the remote site. This is the site on your previous host, not your Flywheel site.
- From the menu, select Plugins
- Select Add New (
/wp-admin/plugin-install.php) - Click Upload Plugin
- Locate and select the plugin ZIP
- Click Install Now
- Click Activate Plugin
Finally, connect the sites and start the migration.
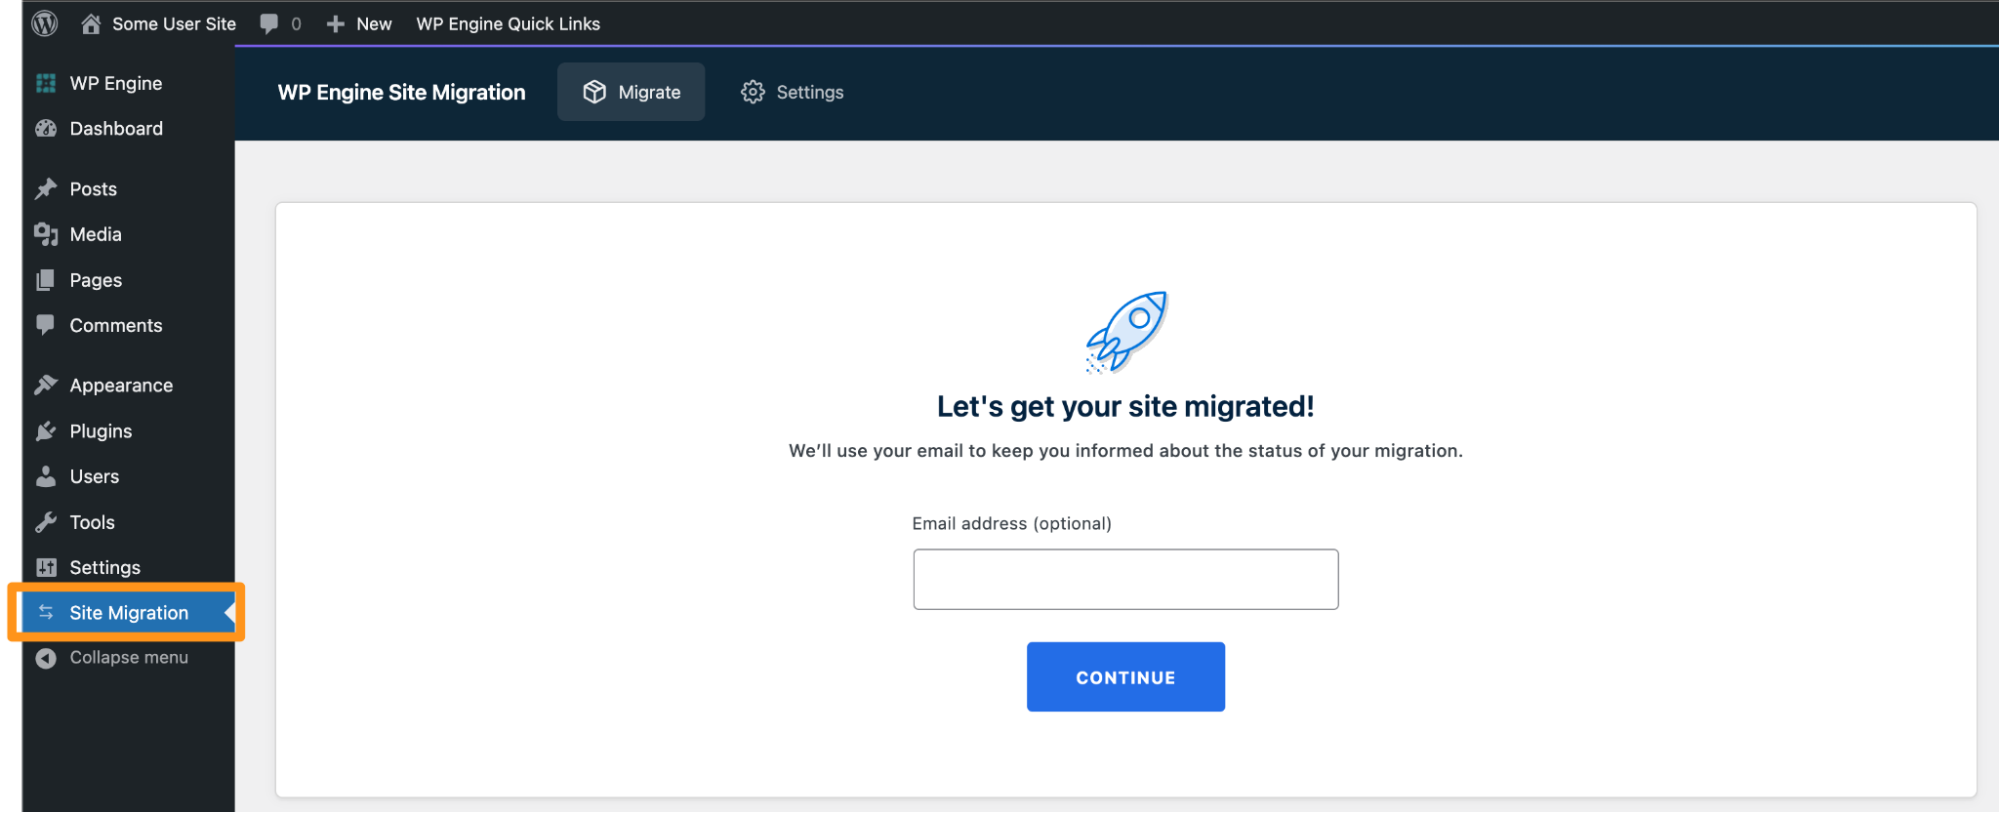
- From the wp-admin main menu, select Site Migration (
/wp-admin/admin.php?page=wpe-site-migration) - Optional – Enter an email address for migration status notifications
- Click Continue
- Paste the connection information that was copied when preparing the Flywheel site.
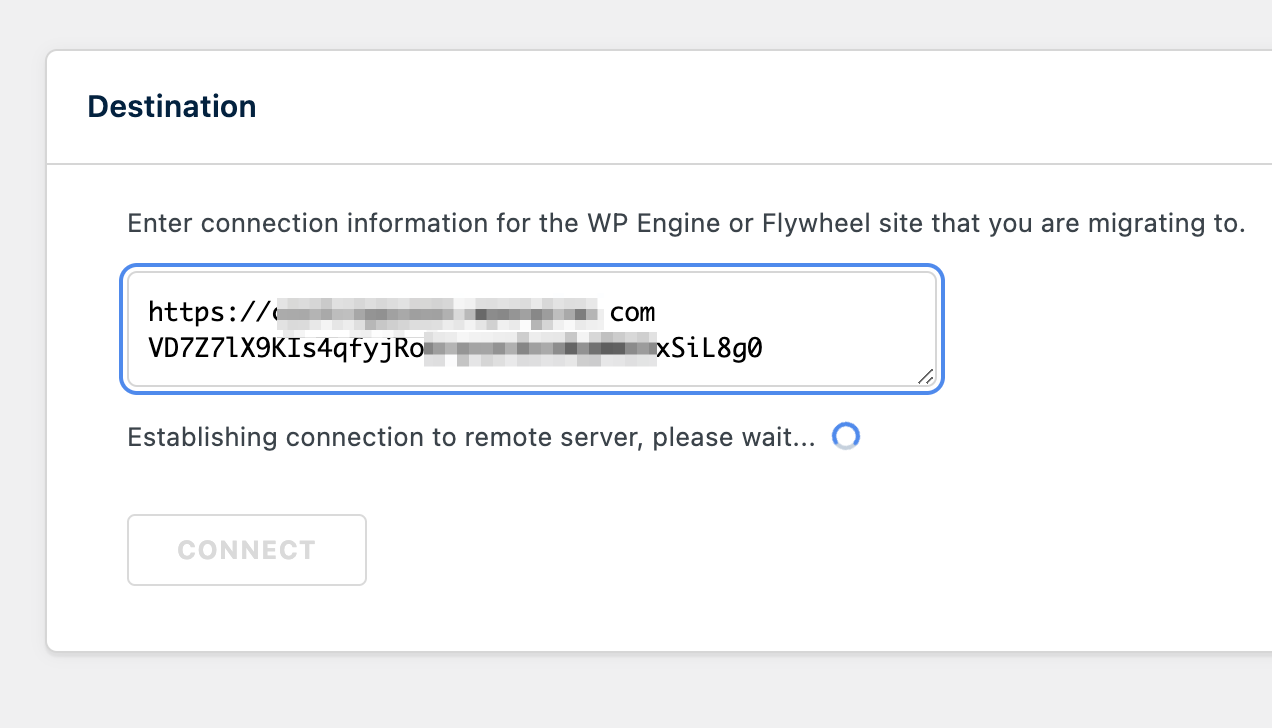
- Optional – If Privacy Mode is enabled, you will be prompted to enter the username and password of the destination site.
- Click Connect
- Option 1: Migrate the full site – WordPress database and site files. Runs a search and replace for the domain in the database. (See above for more.)
- Option 2: Customize the migration – Customize the migration by including/excluding database tables, files, and the search and replace. (See above for more.)
- Click Start Migration
A status page will be displayed detailing the migration progress. If an email address was provided, you will also receive migration a completion or failure notification once the process has finished.
Second Migration
A second migration is not always necessary, but it may be helpful in situations where the source site has changed since the previous migration. For example, changes to the database such as new posts, pages, or user-generated content may lead you to run a second migration just prior to pointing your DNS to Flywheel.
Second migrations can be completed much faster if you customize the migration and use the following techniques to include only what has changed.
- In the Database panel, expand the Tables sub-panel and select only the tables that you know have changed.
- In the Media Uploads panel, choose Push media uploads by date and include only new and modified files after the date of the last migration.
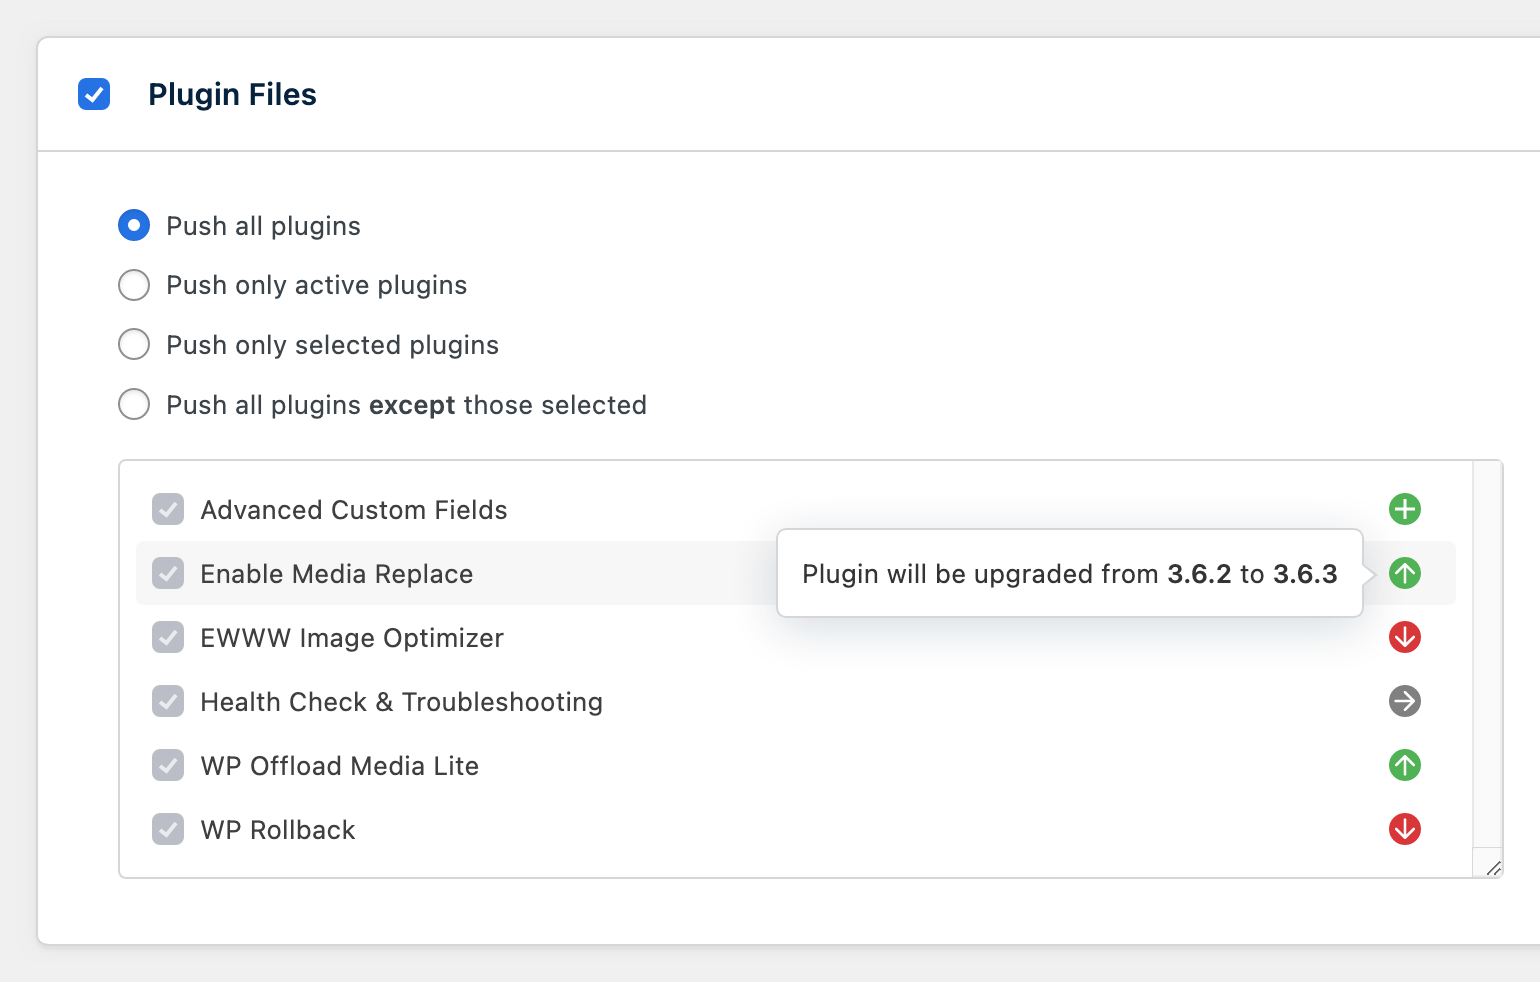
- In the Themes and Plugins panels, helpful icons and tooltips next to each theme and plugin name indicate whether the result of the migration will cause the version to be added, upgraded, downgraded, or remain the same. To speed up your migration, choose Push only selected themes/plugins and select only the items that have been added or upgraded since the last migration.
After Migrating
Once your site is migrated you will receive a migration success email if you provided an address in the plugin. Test your site on Flywheel and confirm everything loads as expected.
When you’re ready to take your site live, follow this nifty guide to point your domain to your newly migrated site on Flywheel!
Limitations
Currently there are some caveats when working with the WP Engine Site Migration plugin. As we continue to modify and improve the plugin, these may change in the future.
Multisite Migrations
Multisite networks can be migrated if the Flywheel site has been converted to a multisite before the migration. At this time, individual subsites cannot be migrated using the plugin.
eCommerce and Other Dynamic Sites
Dynamic sites that change frequently due to eCommerce sales or other user activity require special consideration. For example, it’s a good idea to put the source site into maintenance mode to prevent data loss during a migration.
New documentation for migrating eCommerce sites with the WP Engine Site Migration plugin will be available in the future.
Common Issues
Rewrite Rules & Access Restrictions
Flywheel does not support .htaccess files. As a result, if the source site uses Apache and .htaccess files to handle rewrite rules or restrict access to certain directories, then those behaviors will not carry over to the Flywheel site.
Similarly if the source site uses NGINX to configure rewrite rules or restrict access, then additional steps may be required to maintain those behaviors on the Flywheel site. Configuring redirect rules can be done directly through the Flywheel App.
Security Plugins
Security plugins, such as Wordfence, which include a Web Application Firewall (WAF) are known to cause issues with migrations. When a migration occurs, many consecutive requests take place between the source and destination, which can trigger the rate limiting behavior of these security plugins. Disabling such plugins during a migration can improve the chances of success.
Basic Authentication
Migrating to a private site that is using Basic Authentication requires a username and password to be provided along with the connection information in order to establish a connection. The plugin will prompt you for these credentials if Basic Authentication is detected.
Migrating from a private site that is using Basic Authentication may prevent a connection from being established. The plugin will attempt to detect the Basic Authentication credentials automatically, but this is not always possible depending on the host. Disabling Basic Authentication on the source site may improve the likelihood of establishing a connection.
Failed Loopback Request
If a failed loopback request is detected prior to starting a migration, then an error panel will appear that prevents the migration from starting until a successful loopback request is detected. Possible causes of failed loopback requests include basic authentication and hostname resolution.
In the case of hostname resolution, the server hosting the site needs to be able to resolve the hostname of your site. The plugin uses wp_remote_post() to make requests to your site at http://example.com/wp-admin/admin-ajax.php. If you can’t ping your site’s hostname from the server, the plugin will not be able to dispatch the background processes necessary to perform the migration. Work with the site administrator or hosting provider of the source site to correct any issues with hostname resolution.
Getting Started
New to Flywheel? Start here, we've got all the information you'll need to get started and launch your first site!
View allAccount Management
Learn all about managing your Flywheel user account, Teams and integrations.
View allFeatures
Flywheel hosting plans include a ton of great features. Learn about how to get a free SSL certificate, set up a staging site, and more!
View allPlatform Info
All the server and setting info you'll need to help you get the most out of your Flywheel hosting plan!
View allSite Management
Tips and tricks for managing your sites on Flywheel, including going live, troubleshooting issues and migrating or cloning sites.
View allGrowth Suite
Learn more about Growth Suite, our all-in-one solution for freelancers and agencies to grow more quickly and predictably.
Getting started with Growth Suite
Growth Suite: What are invoice statuses?
Growth Suite: What do client emails look like?
Managed Plugin Updates
Learn more about Managed Plugin Updates, and how you can keep your sites up to date, and extra safe.
-
Restoring Plugin and Theme Management on Flywheel
-
Managed Plugin Updates: Database upgrades
-
Managed Plugin Updates: Pause plugin updates
Local
View the Local help docs
Looking for a logo?
We can help! Check out our Brand Resources page for links to all of our brand assets.
Brand Resources